
What to Pack for Multi-Day Hikes – My Backpacking and Wild Camping Gear List
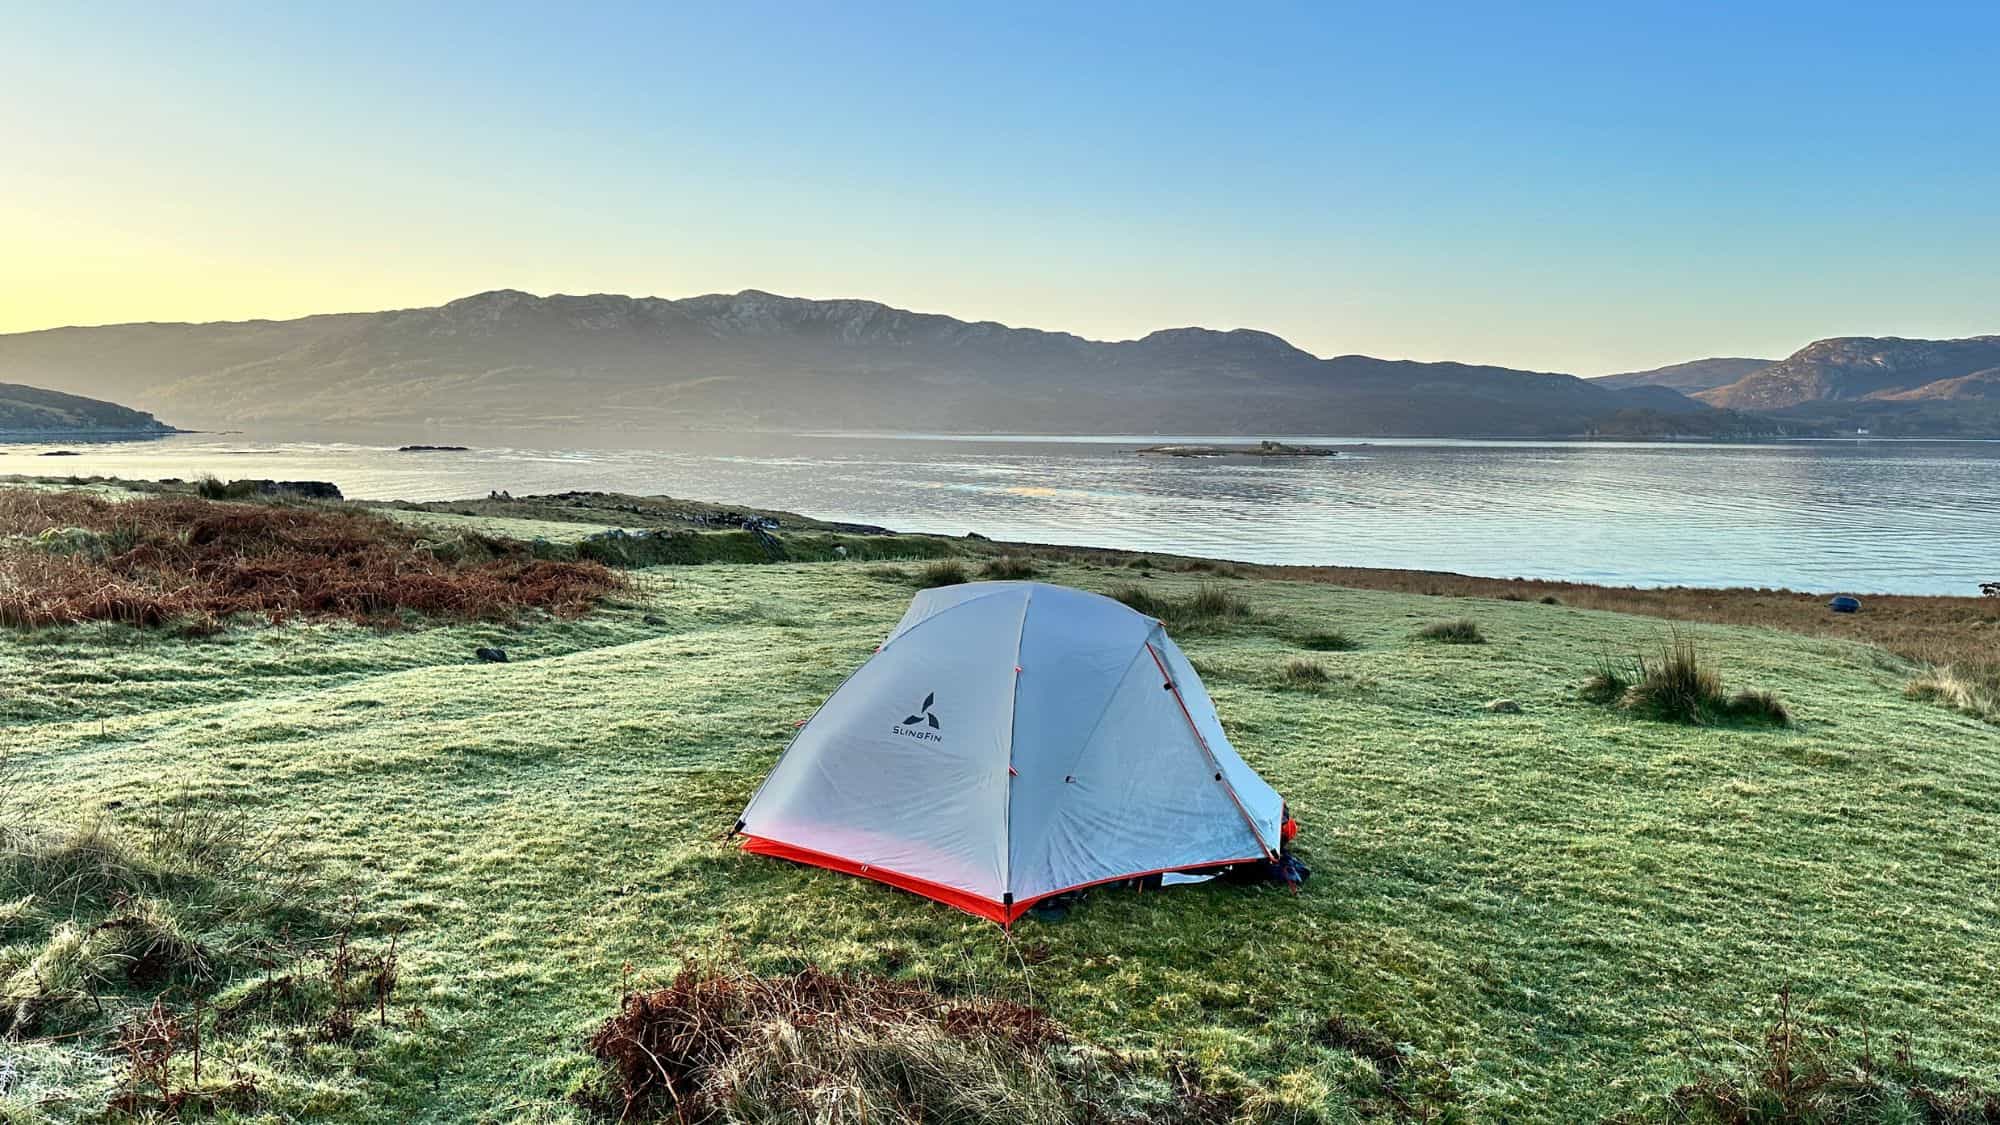
There’s something about backcountry or wild camping that feels both freeing and humbling. You’re carrying everything you need on your back, bedding down where the day’s hike ends, and waking up with the first light of morning. No check-in desk, no campsite booking, no car parked nearby. Just you, your pack, and the landscape.
This comprehensive gear guide accompanies our free Interactive Packing List, which helps you pack methodically and remember everything. This great little app works on any device and you can add notes, change quantities, and then save or print. You can even share it with hiking partners so everyone knows what's covered if your'e hiking in a group.
Every hiker’s setup will look slightly different, and that’s fine. Think of this guide as a foundation you can adapt to your own style, location, and season. Whether you’re heading into the Scottish Highlands, the Alps, the forests of Scandinavia, or the coastlines of Portugal, the essentials are pretty much consistent.
So let’s get into the gear that makes wild or backcountry camping not only possible but something you’ll want to do again and again.
Multi-Day Hiking Packing List Quick Links
This article may contain affiliate links. If you make a purchase using one of these links, we may receive compensation at no extra cost to you. See our Disclosure Policy for more information.

Shelter & Sleep System – The Core of Camping
When you’re wild camping, your shelter and sleep system are like the foundation of your kit. A good setup means you’ll stay warm, dry, and rested, even when the weather turns to crap. A poor choice can leave you shivering through a sleepless night, or worse, putting you in danger of hypothermia. This is where it’s worth investing some thought into what is best for where and when you will be camping.
Tent, Tarp, or Bivvy?
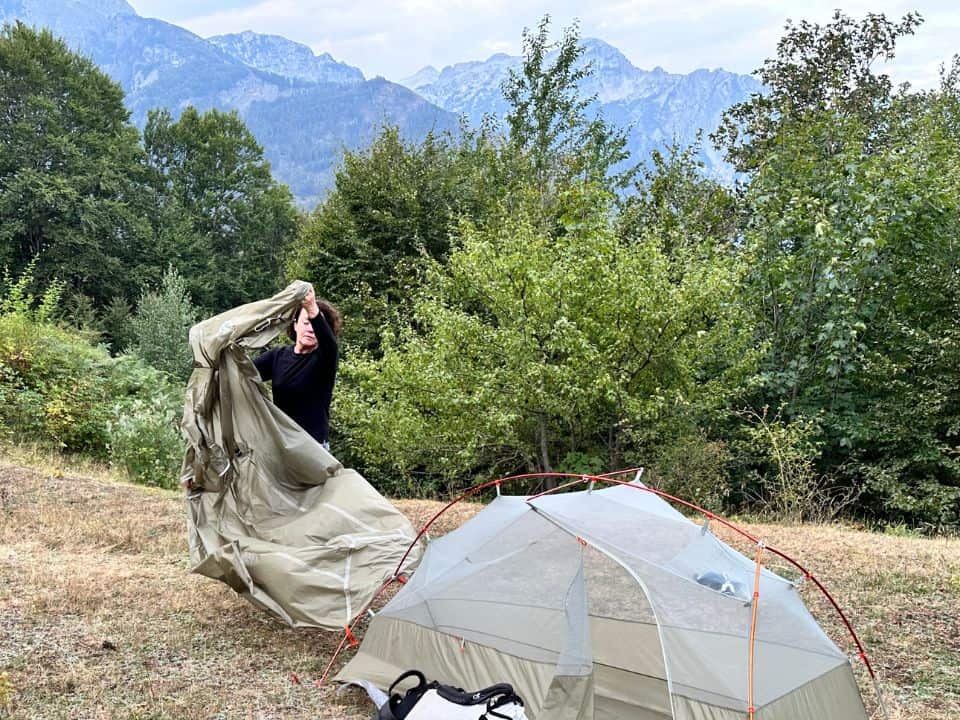
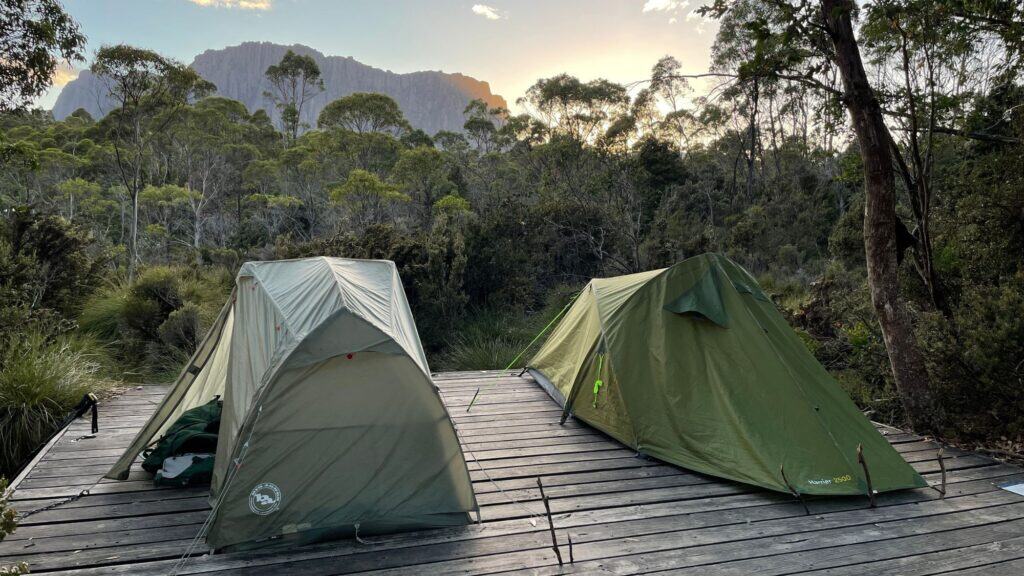
For most hikers, a lightweight tent is the default choice. It gives full protection from wind, rain, and insects, while still being compact enough to carry for days at a time. Freestanding tents have the advantage of pitching on almost any surface, while trekking-pole tents save weight if you’re already carrying poles.
Single-wall vs double-wall (and materials)
As a general rule, many trekking-pole tents are single-wall. And of those, the tents at the higher end of the price spectrum are usually made from Dyneema Composite Fabric (DCF), while those at the lower end are more often than not, made from Sil-Nylon (a blend of Silicone and Nylon). Almost all freestanding tents are double-wall, and include a nylon mesh insect screen and a rain fly. Many freestanding tents can be used with just the screen, which is amazing if the atmosphere is right for star -gazing
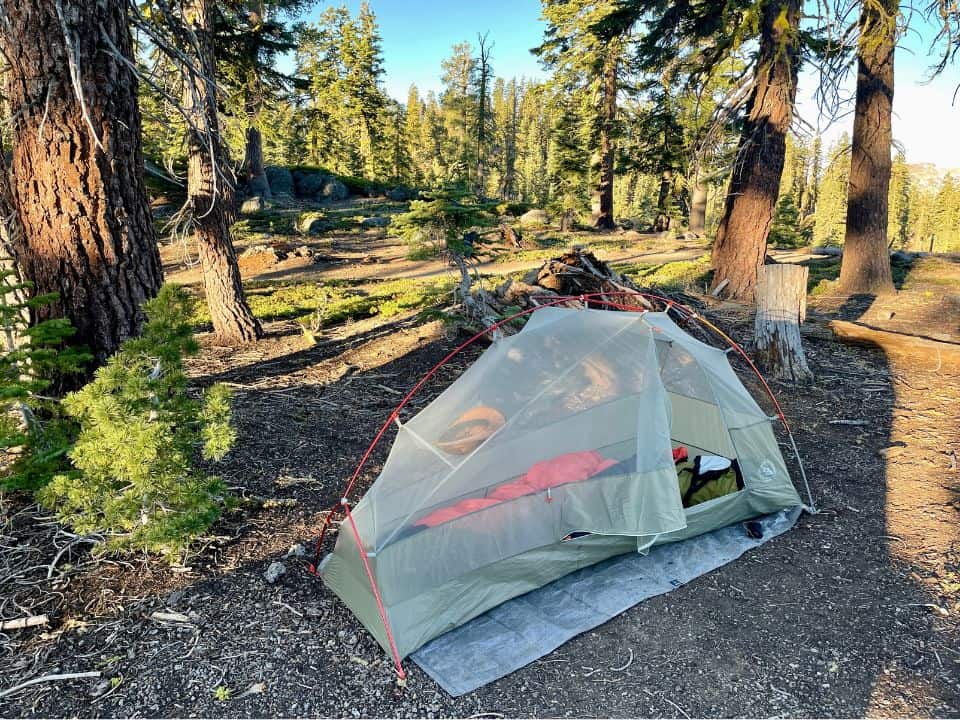
Single-wall designs are lighter and quicker to pitch, but they can struggle with condensation in damp climates. Users tend to carry a cloth to wipe away moisture in the morning, and Swedish Cloths have come up again and again as absorbent, lightweight, and quick drying. Double-wall tents add a bit of weight but generally handle moisture better and can be pitched on a hard flat surface without the need to stake.
Tarps
Tarps are a lighter alternative to tents and can be pitched in many different ways depending on the terrain and weather. Paired with a groundsheet, they provide good coverage with plenty of ventilation, which makes them appealing in warmer climates.
They are less common in Europe, where unpredictable weather can make tents the more practical choice, especially in alpine regions, but they do have a following among ultralight hikers. In North America they’re more widely used on long thru-hikes like the PCT or AT, where weight savings are a high priority.

A Note on Hammocks
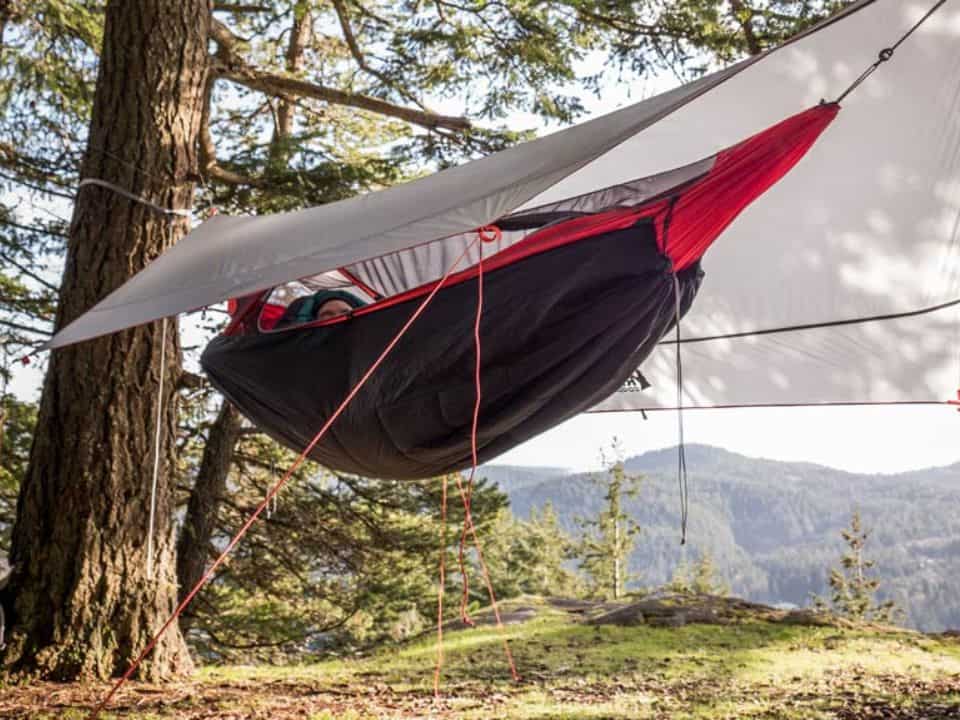
In North America, hammock camping paired with an underquilt has become extremely popular. It keeps you off the damp ground, gives a very comfortable sleep, and works well in heavily forested areas. In Europe and Australia however, hammocks can be harder to use. Many wild camping spots simply don’t have large, well-spaced trees, and in areas with smaller woodlands, the strain of hanging a hammock can damage delicate trees.
For European and Australian conditions, a tarp tends to be the lighter “open” option, and a tent is still the most reliable all-rounder.
If you do go down the hammock route, you will need insulation underneath. The most popular is an underquilt, which is separate from a quilt you may put on top of you. An underquilt goes under the hammock – not you, to stop heat loss through convection. Other options to insulate include a sleeping mat or Reflectix (aka Space Blanket bubble wrap).
Sleeping Bag or Quilt?
A good night’s rest depends on what you’re sleeping in as much as what you’re sleeping under. Whether you choose a sleeping bag or a quilt, it needs to be rated for the conditions you’ll face.
Quilts have gained ground among hikers who want to cut weight without compromising warmth. Unlike traditional sleeping bags, quilts don’t have insulation underneath you. This is because once you lie down, that fill compresses and stops working. The idea is that your sleeping pad provides ground insulation, and the quilt covers you on top, where it actually keeps you warm. Most, if not all quilts come with a strap system that fits around your pad to keep you nicely tucked in.
When you’re choosing a sleeping bag or quilt, don’t just look at the “extreme” rating. That’s a survival benchmark, not a guide to comfort. The comfort rating is a better baseline for colder sleepers or women, while the limit rating is more useful for men or warm sleepers.
As for insulation, down has the best warmth-to-weight ratio, but doesn’t handle moisture well. Generally, synthetic options weigh more, but retain warmth when damp and dry faster. However, newer synthetics like Climashield Apex and Primaloft Gold now rival lower‑grade down for warmth‑to‑weight and dry faster.


Hydrophobic down is something you will hear often. It's regular goose or duck down that’s been treated with a water-repellent coating, usually a DWR (durable water repellent). It’s designed to absorb less moisture and dry out a bit faster if it gets damp.
However, it’s not a miracle fix. If your sleeping bag gets properly wet, hydrophobic down will still lose loft and take a long time to dry. The treatment also wears off with time, compression, and washing. It’s a small upgrade over untreated down, but not a replacement for good shelter, ventilation, and keeping your sleep kit dry in the first place.
Sleeping Pads: The Real Key to Staying Warm
Your sleeping pad does more than just soften rough ground. It plays an essential role in keeping you warm by blocking heat loss to the cold earth beneath you.
When you lie down on the ground, your body starts losing heat through conduction , which is the direct transfer of warmth from your skin to the colder surface beneath you. The earth doesn’t have to be freezing for this to happen; it just has to be cooler than you. Your sleeping pad slows that transfer by creating a layer of still air or insulation underneath. Without it, your body keeps feeding the ground heat all night, no matter how warm your sleeping bag feels on top.
There are three main types of pads:
- Closed-cell foam (CCF): Light, reliable, and indestructible, but bulky and firm. Good backup or stack layer. (example: Therm-a-Rest's Ultra-LW Z Lite Sol Sleeping Pad)
- Insulated air pads: The best warmth-to-weight, compact when packed, but vulnerable to punctures. Choose a quiet model if you’re a light sleeper. (example: Big Agnes Rapide SL Insulated Pad)
- Self-inflating pads: Durable and stable, although they can be bulkier and slower to pack. (example: Sea to Summit Pursuit Plus Sleeping Pad)
What R-Values (or R-Rating) Mean
An R-value is how well a pad resists conductive heat loss, so essentially how warm the pad will be. Summer conditions call for R 2–3, three-season trips sit comfortably in the R 3–4.5 range, and anything below freezing needs R 5.5 or more. If you sleep cold or you're planning to camp on damp, low ground, go warmer than you think you need.
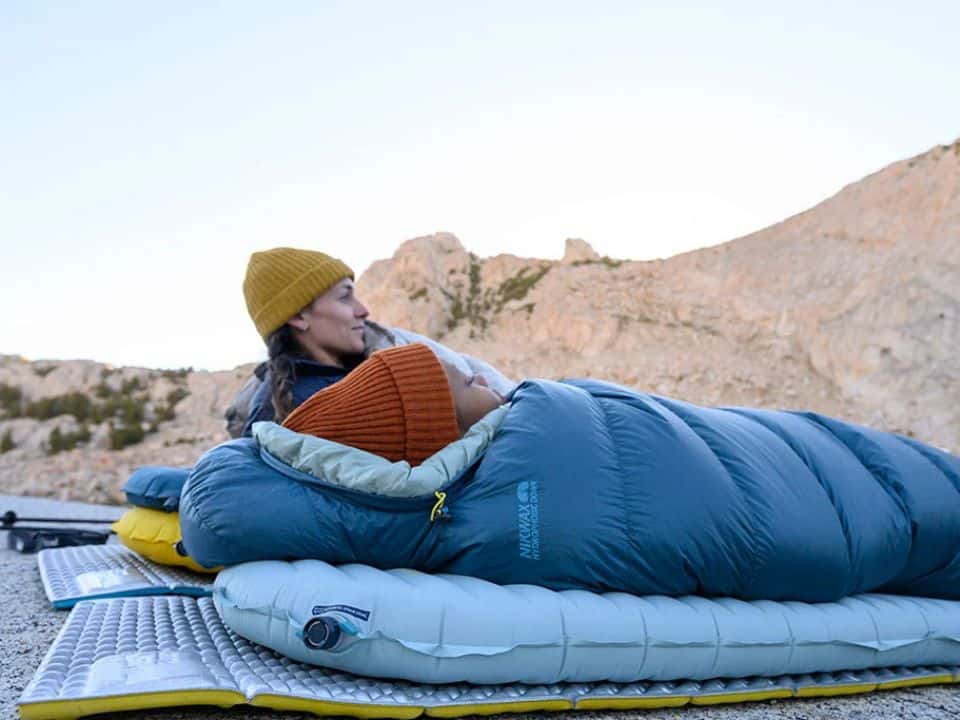
You can also increase warmth by stacking pads and combining their R-values. For example, pairing a foam pad (closed cell pad) with an R-value of 1.5 under an inflatable pad rated R 3.5 gives you roughly R 5 in total. It doesn’t matter which one goes on top for warmth, but it makes sense to put the tougher pad on the ground to protect the inflatable. Therm-a-Rest's Ultra-LW Z Lite Sol Sleeping Pad, will add 2.0 R-value to any sleep system.
Caring for Your Air Pad/Mat
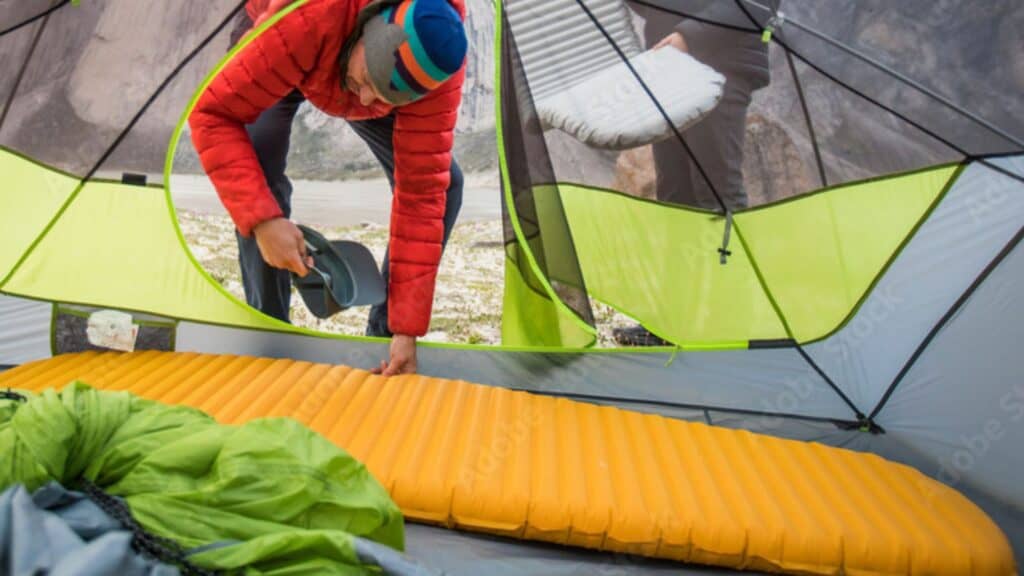
Especially if you are carrying an insulated air pad, it's important to protect it. It goes without saying, but you should always use a groundsheet to shield your pad and tent floor. It doesn't have to be an expensive branded footprint, Tyvek or Polycro is extremely cheap and durable.
Also if you’re hiking in arid terrain, like Australia’s Larapinta Trail, pack your sleeping pad in the middle of your pack to protect it from sharp, spiky plants. Most, if not all, sleeping pads come with small stick-on repair patches. If not, a piece of Tenacious Tape will fix any hole and stay in place until you return home. Tenacious Tape is an awesome item no utility kit should be without.
Blowing up your pad by mouth might seem harmless, but it sends warm, humid air straight into the chambers. Over time, that moisture can cause mould, reduce insulation performance, and even freeze in cold conditions. That’s why many quality air pads now come with an air sack – which is actually way easier to use than your breath! Alternatively, some hikers use a small rechargeable pump which is compatible with all the major brands.
My Sleep System Recommendations

Pack Light, Pack Right. Free Multi-Day Hiking Packing List
Plan methodically and keep track of every essential for your next multi-day hike. Add notes and quantities, save or print your list, and share it with hiking partners so everyone knows what’s covered. Works on any device.
Camp Kitchen – Cooker & Kitchenware
Your Cook Setup: Stove, Pot, and Fuel
When you are hiking and camping out, every gram counts. So you need something that works efficiently, packs light, and suits your needs. The length of your hike and whether you’re just boiling water for dehydrated meals or cooking from scratch will determine the size or contents of your setup.
The camp kitchen truly is one of the sub-kits where personal preference is the differentiator. For example, if you are just heading out for 2-3 days, you may like the idea of pancakes and blueberries for breakfast and some form of fried hash for the evening meal. If so, you might take a lightweight frying pan.
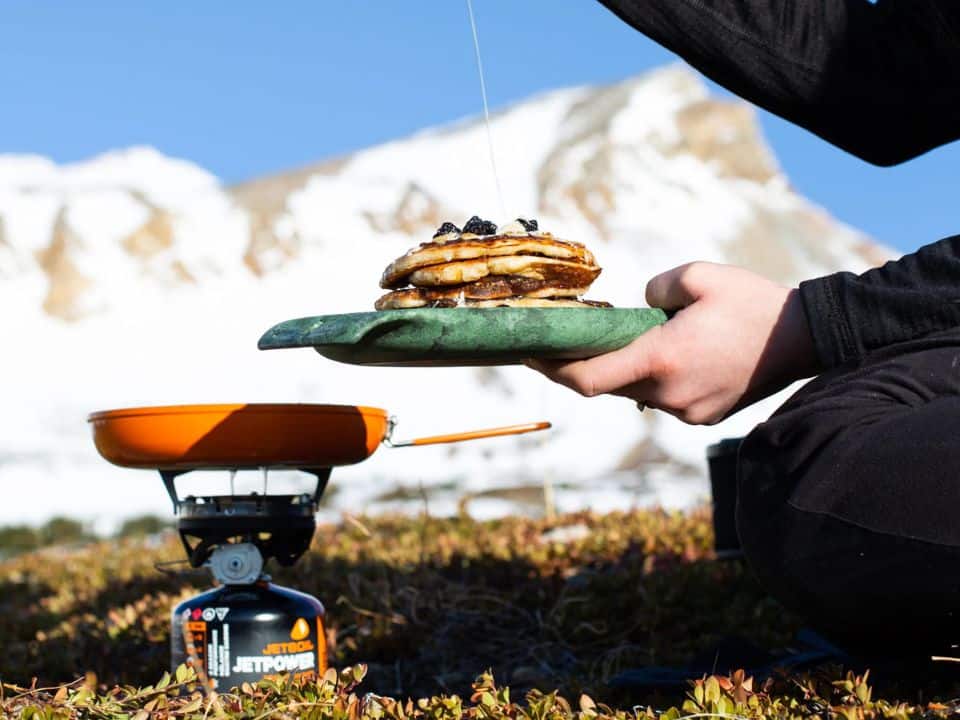
Or maybe you just cold soak for various reasons (actually something I am planning on doing for my upcoming trip of the GR131). If that's the case you would need to take a lightweight screw-top canister to hydrate your food while you walk.
And then there are a huge range of scenarios in between, from only using your stove to boil water to hydrate ready meals and make coffee, to taking along a fishing rod and creating fantastic gourmet meals on the track. Some people live for the weekends where they can actually do this – and kudos to them. The possibilities are endless and in the end it's all about whatever rows your boat.
But lets look at the basic set-up. A stove and a pot. This will hydrate your food and make you a coffee.
Types of Stoves
Gas Canister Stoves
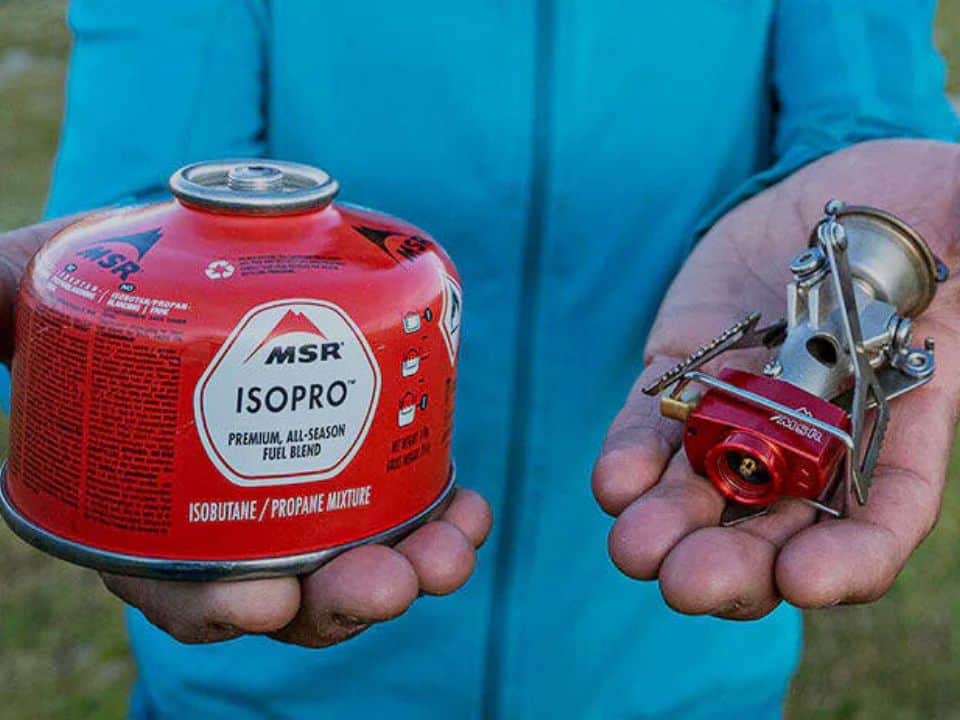
The most common type of stove for wild camping or backpacking is a gas canister stove, which screws onto a threaded gas canister. Threaded gas canisters are widely available throughout Australasia, North America, and Western European countries with a strong outdoors culture. Outside of these regions, threaded gas canisters are available, but only in selected sporting stores and a multi-fuel stove may be the better option.
There are multiple gas canister stove options available, from cheaper brands that do the trick to my personal favourite, the Soto Windmaster. Most pack up small and are extremely lightweight; the only difference being is the boil time, how much gas is consumed during a boil and stability. A few hikes ago, we needed an emergency replacement for our older Jetboil Stash, and a no-name cheaper option was our only option. The “arms” were so short, the pot needed to be held while boiling, so please take this into consideration when purchasing.


Some hikers prefer an integrated system like the Jetboil Zip, which combines the stove and pot into a single unit. The pot uses a built-in heat exchanger, which is a metal ring around the base that captures and transfers more heat into the pot instead of letting it escape. The idea is for more fuel efficiency, especially in windy or cold conditions. Other brands now use similar designs, including MSR and Fire-Maple. On a personal level, I have used these in the past, but my hands down favourite cooker is the Japanese brand Soto.
The threaded gas used with gas canister stoves is a mixture of butane and propane. These canisters are all basically interchangeable with various stoves. Some are reportedly better than others, due to their “mix”. But the bottom line is Jetboil gas is not just for Jetboil stoves and gas marked for “summer” can be used in the off-season. The canister opening has what's known as a Lindal valve, which prevents leakage once the cooker is removed from the canister.
Threaded gas canisters cannot be shipped or taken on an aircraft. So if you're flying in for a hike, it's important to check ahead if gas can be purchased (or if stores are open before you depart for the trailhead). I've spent a full day chasing gas canisters on arrival in some destinations, time which could have been better spent. The lack of thread canisters on the tiny island of La Palma, is one of the reasons why I will be cold soaking for my upcoming GR131 west to east bound.
A very useful product we always carry on hand, is our Flip Fuel, a gas transfer device. In fact, on arrival in Greenland to hike the Arctic Circle Trail, the one and only store in Kangerlussuaq, where you arrive had no gas. So I walked to the local hostel, and made up 2 full containers with several half empty canisters, using my Flip Fuel. This small device has paid for itself time and time again and I swear by it. It's a great item to keep in your kit.

.
Multi-Fuel Stoves
Multi-fuel stoves burn liquid fuels like white gas (also sold under the brand name Coleman fuel or Shellite), kerosene, or even unleaded petrol depending on the model. They’re a necessity in regions where gas canisters aren’t available, including parts of Europe where there is little outdoor culture, Asia, Central and South America. White gas is the cleanest and hottest-burning option, and is ideal for cold weather or high-altitude use. If you’re hiking somewhere off the beaten track, a multi-fuel stove means that you’ll be able to cook, regardless of what fuel is available.
Unlike canister stoves, multi-fuel setups rely on a pressurised metal fuel bottle. Although you can’t use any old bottle, as it needs to be designed to handle pressure, and threaded to match your pump. Fuel bottles for multi-fuel stove use are widely available and lightweight.
The way it works is this: the bottle is manually pressurised using a built-in plunger pump, which pushes fuel through the line and into the stove head. Once primed, you’ll get a consistent flame that’s much less affected by cold than a gas canister would be. MSR’s WhisperLite International, for example, boils a litre of water in about 3.5 minutes using white gas, no matter the temperature or altitude. Sure, these stoves are heavier and require more parts, but the tradeoff is fuel independence and reliability anywhere, in any season.
Your Pot/Saucepan/Kettle/Skillet
Most hikers carry a 600–900 ml pot, usually made from titanium or hard-anodised aluminium. Some hikers prefer an integrated system like the Jetboil, which combines stove, pot, and windscreen into a single unit. The pot uses a built-in heat exchanger, which is a metal ring around the base that captures and transfers more heat into the pot rather than letting it escape.
Otherwise, a simple pot with a lid and handles does the job. In fact, I purchased a cheapie from a €2 store in Portugal while hiking the Fishermen’s Trail, which suited our needs perfectly!
As I mentioned above, just like our regular kitchens, camp kitchens also cater for those who thrive on creating gourmet meals. I've witnessed folk on the trail creating Michelin-quality tucker, and that being the highlight of their hike.
The bottom line is, every item in your pack has to earn its place. If carrying a skillet for frying that trout you catch, or the large pot for making a stew is important to you. – then go you. There are many cookware sets on the market, which are lightweight and items in the set also double up as strainers or even chopping boards. There are many cookware sets on the market, and Sea to Summit is is one brand that offers an extensive range of collapsible and nesting cookware sets.

Sharing Is Caring
Pass this on to someone who’ll be glad you did.
Eat, Drink, Stir.
The most basic setup you will need is something to stir and eat with, and something to drink out of. At the other end of the scale, you can pack a plate and bowl, and a knife, fork, and spoon set.
As we often wild camp, and sometimes it's a dry camp, we like to keep washing up to an absolute minimum, for environmental reasons and also to save water. If I'm hiking alone, I'll either eat straight out of my dehy food packet, or my Vargo Bot (which doubles as my cup) if I'm eating my Overnight Oats for breakfast. If I'm cooking then I'll probably eat right out of the pot, and I tend to use a long handled spork for both stirring and eating
There is a huge array of lightweight hiking and backpacking plates, bowls, and cups available, with some sets included with the pot and skillet. Again, as with a regular kitchen, you can completely go to town. Just remember: every item needs to earn its place, and if you can double up, I recommend doing so.


A small knife, multi-tool, or Swiss Army knife is useful if you’re opening packaging, slicing cheese, or prepping fresh food. It's always kept in my utility kit and has been used time and time again and not just for food.
For cleaning, I cut a simple scourer pad into a circle, which helps to get into the corner of the bottom of the pot and a small microfibre cloth to replace dishcloth and tea towel. For dishwashing liquid, I tend to just use the all-purpose Wilderness Wash.
Food Storage and Bear Canisters
Where and how you store your food matters, especially if you're in bear country or anywhere with scavenging wildlife like foxes, raccoons, possums, or pine martens. In most parts of Europe and Australasia, hanging your food or using a smell-proof bag is enough (although in Eastern Europe, particularly Romania, bears are becoming a problem). In parts of North America, though, proper bear-safe food storage isn’t just a good idea, it’s legally required.
Some areas in North America mandate a bear canister, a hard-sided, lockable container that prevents bears from accessing your food. They typically weigh around 2 lbs (900g to 1kg) and can be a bit bulky, but in places like the Sierra Nevada, the Adirondacks, or the Yellowstone region, carrying one is just part of the deal. Some places a Bear Sack will suffice, but check local regulations as you can be fined or removed from the trail if you’re not carrying proper storage.
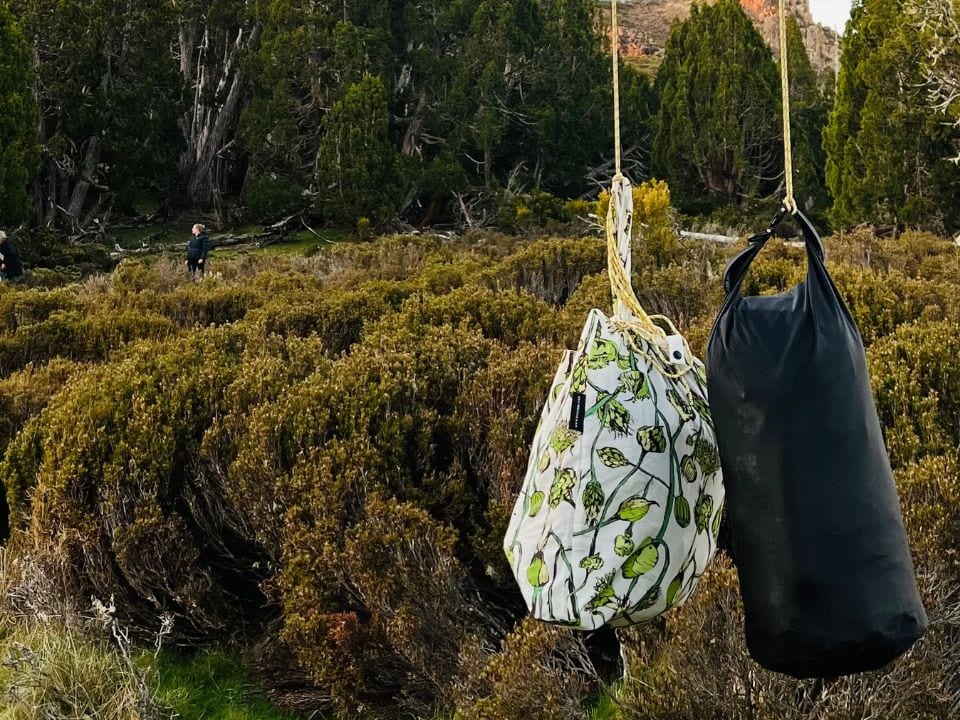
Even outside of bear zones, if you don't keep your food and smellables in a separate bag overnight, you could find your gear torn or eaten through by a fox, possum or other “mini-bear”. Some people, use Odour-proof bags, but I prefer to hang my food bag from a branch, using paracord I keep in my utility kit. My advice – never store food inside your tent or vestibule unless you’re 100% certain animals aren’t an issue. Spoken from experience!
My Camp Kitchen Recommendations
Safety & Navigation
When you're back country or wild camping or hiking remote trails, your safety gear and navigation tools aren’t just “nice to have”, they’re pretty much essential. Conditions change fast, accidents can and do happen, and trails that look straightforward on paper can feel very different when you’re tired, lost, or running out of daylight. This topic is usually shoved in at the end of a packing list, but in reality, it's one of the 3 pillars – Shelter, Food and Safety. Let's kick off with Navigation. Why Not.
Navigation
GPS hiking maps are incredibly useful tools that have changed the way we navigate trails. They use signals from a network of satellites orbiting the Earth to pinpoint your location, even when you’re deep in the backcountry. The great thing is, your device doesn’t need mobile reception. Instead, it receives satellite signals directly, and the GPS chip calculates your position using triangulation.
Most apps let you download detailed topographic maps in advance, so once you’re on the trail, your phone shows where you are in real time, without needing internet. That’s why it’s really important to download your maps offline and test they’ve saved properly before you lose signal.
GPS accuracy can vary depending on the terrain, and deep valleys or thick forest can slow the signal. The other thing to consider is that electronics can and do fail for various reasons, which is why it's prudent to carry a paper map and compass as backup.
I really do recommend taking a navigational course. If you can't get to an in-person training course, then The Columbia River Orienteering Club has excellent tutorials on YouTube.

Take the Navigation and Safety Quiz!
This simple quiz will challenge your knowledge on essential navigational tools like maps and GPS – Ready?
Satellite Communication
There are two widely available types of satellite communication devices, and they’re quite different. First is the Personal Locator Beacon (PLB), such as the RescueMe, which sends a one-way emergency signal via a government satellite system. The second is the Satellite Emergency Notification Device (SEND), like the Garmin inReach Mini, which allows for two-way communication. Let's look at each of these in detail.
Personal Locator Beacons (PLBs)
Personal Locator Beacons operate on the 406 MHz distress frequency, which is monitored by the international COSPAS-SARSAT satellite network to trigger search and rescue responses. PLBs don’t require a subscription, as the service is publicly funded by governments worldwide to support emergency rescue.
To activate the device, you simply raise the antenna and press the activation button. Once triggered, the beacon contacts the nearest Rescue Coordination Centre which can pinpoint your location, often within 120 metres. As of 2024, some PLBs also include a Return Link Service, which confirms your signal has been received.


Satellite Emergency Notification Devices
Satellite Emergency Notification Devices (SEND), like the Garmin inReach Mini, allow for two-way messaging and SOS alerts using a commercial satellite network (not the government-run system used by PLBs). You can type and send custom messages or use preset messages to check in with family, even when completely off-grid.
A subscription is required for both the messaging and emergency features, and you’ll need to reactivate it before your hike if you’ve paused it at home, otherwise, the device won’t work. When an SOS is triggered, it connects to a 24/7 monitoring centre that communicates with you directly and coordinates with local search and rescue. The inReach also lets your contacts follow your real-time location and, in newer models, offers weather forecasts, GPS navigation, and basic mapping.


Search and Rescue Coverage
The number of hikers lost or injured each year is pretty much scary. As I write this, my Facebook feed shows a young man who is lost in Tasmania's Mt Field NP, and another young woman missing on Vancouver Island. Sadly, 2025 seems to be the year of hiking accidents and fatalities.
What many people don’t realise is that hiking is, in many ways, an endurance sport. Weather, dehydration, and physical ability can all impact your ability to navigate safely. And then there’s the risk of injury, which more often than not can happen in the simplest way.
Only this year on the Kungsleden, I stepped off the edge of a small bridge while watching a reindeer up ahead. I wasn’t doing anything extreme, just distracted for a second, and the next thing I knew, I had a badly sprained ankle, so much so, we thought it was broken. The Kungsleden (or Kings Trail) is in remote far north Sweden. Had I not had emergency coverage, I would have been up the proverbial creek with no paddle.

Emergency Rescue and First Aid Quiz
Want to test your knowledge of first aid essentials, emergency rescue options, and how to handle critical situations on the trail?
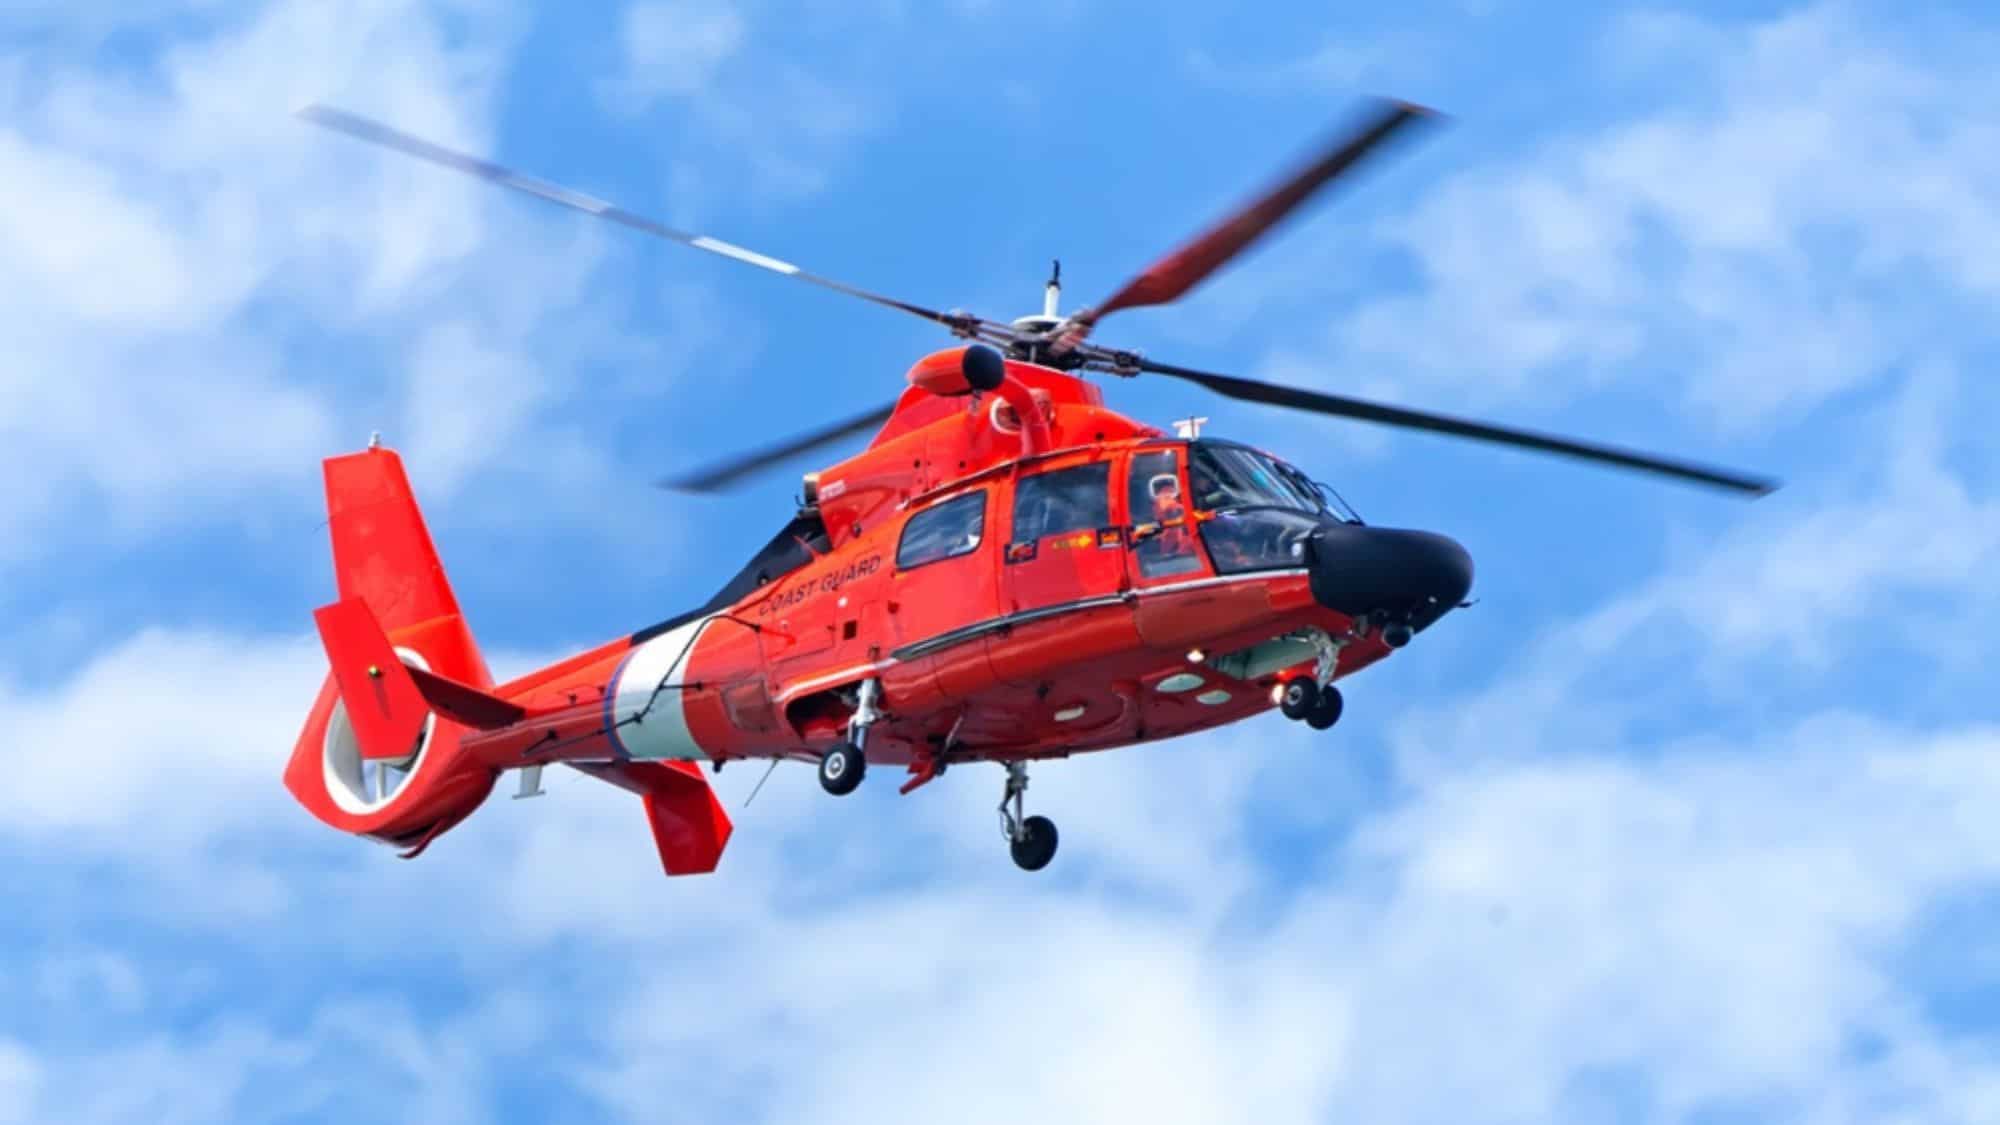
Some countries have free emergency rescue, but unless you’re a resident, more often than not, you’re not covered. Almost all travel insurance policies offer Emergency Assistance; however, this is purely rescue coordination and basically glorified customer service. Only some travel insurance policies cover the actual cost of the helicopter, and the search, rescue, and medical team.
I use and recommend Overwatch x Rescue. It includes helicopter rescue and repatriation to your home hospital, should you need it. For what it offers, it’s extremely well priced—and far more competitive than anything else out there. Please use my code SOUL15 for a 15% discount.


Lighting
Whether you're arriving late at camp, setting out before dawn, or negotiating your way to toilet in the middle of the night, a light source is an important safety tool. It's the one item you cannot afford to leave behind, or bring with no charge or spare batteries. Rechargeable headlamps use little power to charge up. However, using them at high lumens can drain the battery more quickly. So, if using your lamp for extended periods, use on a lower setting to preserve charge.
Many headlamps have the option of running on AAA batteries as well as a rechargeable battery. Its always a good idea to take spares along in your utility kit. Choose a headlamp with green or red light, which preserves night vision better than white light and is less disruptive to both your sleep and that of others around you. Its also good for spotting kiwi at night when hiking in New Zealand!


First Aid
Your first aid kit doesn’t need to be a pharmacy, but it should be trail-specific. At the very least, pack something for blisters, pain relief, cuts, and a bandage for sprains, or to use as a splint, and any personal medications. I've written a comprehensive article of the Hiker's First Aid Kit and it's well worth a read.
The ability to fix yourself up or manage small issues before they become big ones is really important. Know what’s in your kit and how to use it, is also important, so it's worth investing your time in a first aid course – of which there are several freely available online. The Red Cross is one global organisation that has First Aid Courses. Alternatively, nationals of Commonwealth countries could use St John Ambulance, which has been teaching first aid since 1887.

My Safety and Navigation Recommendations
Pack Light, Pack Right. Free Multi-Day Hiking Packing List
Plan methodically and keep track of every essential for your next multi-day hike. Add notes and quantities, save or print your list, and share it with hiking partners so everyone knows what’s covered. Works on any device.
Water & Hydration
Bottles vs. Bladders (aka Water Reservoir)
Many multi-day hikers now favour bottles because they offer clear visibility of water level, straight-forward filling and cleaning, and fewer failure points such as leaks, freezing hoses, or mould build-up in hard-to-dry tubing. In fact, many of the new ultralight packs on the market no longer have hydration sleeves or ports.
In North America Smartwater bottles are popular among hikers who do not use water bladders – not for the water, but for the bottles. Weighing only a couple of grams, their slim shape fits easily into side pockets, and the 2.8 cm mouthpiece is compatible with most squeeze-style water filters.
Very few comparable bottles have come on the market to replace Smartwater bottles, But Cnoc has just come out with the Thrubottle, essentially exactly the same shape, weight and size as the Smartwater Bottle. Another micro brand which is proving to be very popular is the M!GO Water Bottle by Mazama, available on Garage Grown Gear. However, it's often sold out as soon as it hits the shelves.
Personally, I use a Nalgene bottle to keep my clean water in and drink from, and a 3L Hydrapak to use as a filter bladder and to hold water when dry camping.
Pass It Down the Track
Good trail wisdom’s meant to travel. Share this one on!
Water Treatment
Even when water seems abundant and clean, it’s not always safe to drink straight from the source. Generally, streams or rivers near farmland, livestock, or human activity should always be treated
There are several options to treat water; Water filters (e.g. Sawyer Squeeze, BeFree), UV devices (e.g. SteriPEN), and Purification tablets (e.g. Aquatabs).
Water Filters
Squeeze-style filters use a hollow fibre membrane to physically strain water. Inside the filter's cartridge are tiny straw-like fibres with microscopic pores (around 0.1–0.2 microns) that trap contaminants like Giardia, E. coli, and Cryptosporidium while allowing clean water through. It’s a mechanical process, with no chemicals or batteries and is fast, lightweight, and easy to maintain.
Gravity-fed water filters work on the same system and are perfect for couples or groups. A gravity fed water filter can process a large amount of water without any squeezing or pumping. I love this system as we hang it as soon as we arrive at camp, and it filters away in the background while we get everything else sorted.


UV Devices
UV devices like the SteriPEN use ultraviolet light to neutralise bacteria, protozoa, and viruses in water. They don’t remove sediment or improve taste, so the water needs to be clear before treatment. UV purification is fast, lightweight, and chemical-free, however they do rely on batteries or charging, so you’ll need to monitor power and carry a backup option in case of failure.
Purification Tablets
Purification tablets like Aquatabs work by releasing chlorine-based compounds that kill bacteria, protozoa, and viruses in the water. Once added, they need about 30 minutes to disinfect properly, though colder or murky water may take longer. They don’t remove sediment or particles, so the water should be as clear as possible before use. Tablets don’t rely on any moving parts or batteries, which makes them useful in emergency situations or as a backup method.
My Water & Hydration Recommendations
Toileting & Hygiene
When backcountry or wild camping, toileting is part of the experience; just like cooking your food or stashing your food away from bears or possums, or striking camp. However there is no toilet, no handbasin, no shower, and unlikely you will be carrying in a full size heavy cotton bath towel.
So let's take a look at what you really need.
Toilet Paper
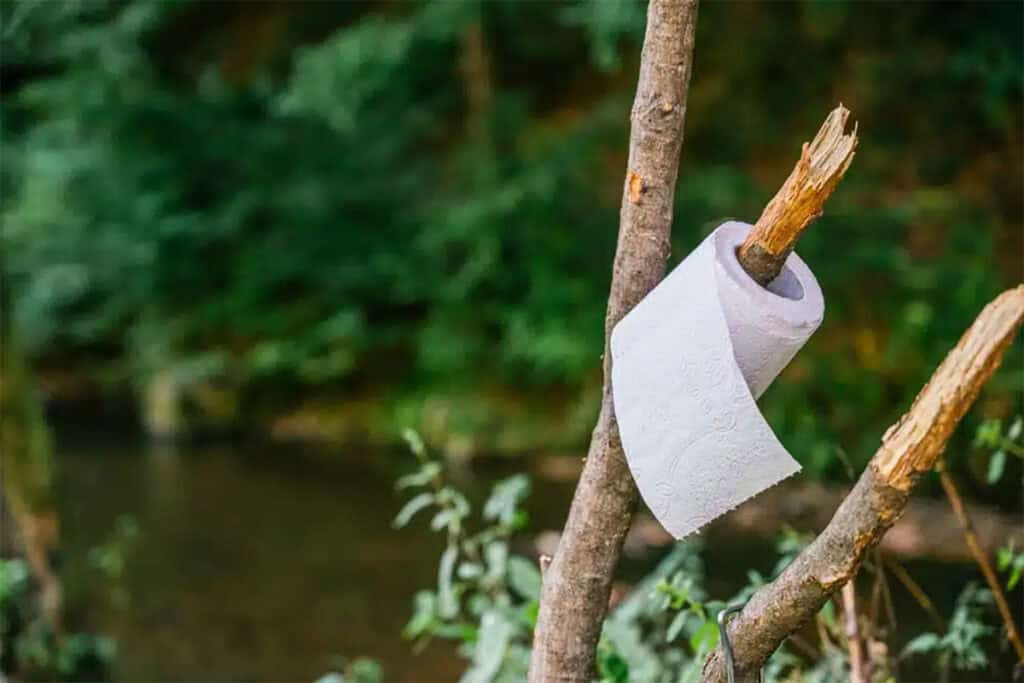
The old practice of burying toilet paper has been replaced with “pack-it out”. Toilet paper takes a very long time to biodegrade and especially in arid climates it may never biodegrade. The best way to handle toilet paper put your soiled toilet paper in disposable doggie bags as you go. You can double bag then in a larger bag and then empty or dispose of the bag, when you get to a bin.
If packing out isn't your style, there are alternatives to toilet paper.
Kula Cloth (or pee-cloth)
A Kula Cloth (pee-cloth) is for wiping after urinating and designed specifically for front-end cleanliness. It is not intended to wipe your backend after pooping due to the absorbent properties of the fabric. Kula Cloths have a waterproof layer and an absorbent side. They are made from a specialised antimicrobial fabric is treated to harness UV rays, which sanitise the cloth by breaking down microbes' DNA, drying the fabric, and preventing pathogen growth. You do need to wash then often to prevent urine buildup and smell.


Portable Bidet (aka Backcountry Bidet)
There are many portable bidets on the market now, and essentially they all work the same way. Portable bidets squirt a steady stream of water over your genitals, cleansing after toileting or to freshen up to prevent chafing. Some backcountry bidets are small caps which screw onto a
small plastic water bottle, while some brands include the water bottle as part of the design.
I prefer the small cap variery and my favourite brand is Culo Clean. Weighing just 11g (0.42oz), It's compatible with most plastic bottles and fits in the two most common diameters. You can easily regulate water intensity by exerting more or less pressure to the bottle.

Female Urination Device
A Female Urination Device (FUD) is an innovative product for individuals who traditionally sit or squat to urinate, enabling them to do so while standing up. The FUD design includes a spout that directs urine away from the feet, so you can stand up when urinating outdoors. To use, simply push your underwear to one side, place the device securely against your body, and urinate. There's no need to
remove your pack or clothing.

And What to do with Your Poop.
OK! Now the hard stuff. And if it's not hard, then you might like to read the next section on hygiene.
Faeces is the brown solid waste you produce. And almost all walkers or hikers have needed to go when on the trail or wild camping. I have an in-depth article on how to do this correctly, but essentially you should bury your waste. The hole you need to dig should be at least 20 cm (8 inches) deep. And to do this, you need to carry a small trowel in your kit.
There are many trowels on the market especially for this use. They are usually made from titanium, and are extremely strong and sharp in order to cut through grass roots easily to dig a hole. Your trowel is used to dig the hole and then cover the hole with dirt. Your trowel should never come in contact with your faeces.
If you are unsure about this topic, I urge you to read my article on toileting when hiking or camping. I explain it all in a lot more detail.
Packing it Out NASA Style
There are times when it is not possible to bury your waste. In dry, arid conditions, the lack of moisture slows down the biodegradation of human waste. Often, these arid conditions also mean hard or rocky ground, which can make digging a hole extremely difficult.
The ideal solution is to use a portable human waste bags such as the Wag Bag or Restop. Many national parks in arid regions actually hand these out free to hikers and campers. Sometimes it might just not be possible to bury your waste – you might be on the Camino or walking through private property on one of the many walks in Europe. If this is the case, a portable human waste bag such as a Restop of Wag Bag may just be the ticket.
How do Portable Human Waste Bags work? Quite clever actually! They use a NASA-developed gelling agent that transforms the waste into a spill-proof, odourless, solid state. Each biodegradable kit includes a multi-use waste bag, zip-close puncture-resistant storage bag, toilet paper, and a hand sanitiser. Once used, the outer bag can be carried for several days until you reach a garbage bin, where it can be disposed of.

And What About Your Period?
You have a few options when hiking with your period. Traditional methods like tampons or pads are commonly used, but these must be carried out with you; not buried or left behind, to preserve the environment.
Menstrual cups and disks are sustainable period care options, generally made from medical-grade silicone. Both Menstrual cups and disks are designed to be inserted into the vagina during menstruation, collecting rather than absorbing blood. They are a long-lasting, eco-friendly alternative to pads and tampons, and safe for up to 12 hours of use. If you would like to find out more about about these products, please read our in-depth article on toileting in the wild.

Personal Hygiene
Even though you are out in the wild, basic hygiene is still important. You can't always wash your hands after toileting or before eating and this can cause contamination, or even gastroenteritis. This condition can be debilitating and completely ruin your adventure. Worse still, it can quickly spread to others in your party.
The absence of soap and running water is one of the fastest ways to spread germs between campers and hikers and the best way around this is to use a hand sanitiser with at least 60% alcohol. Sanitiser works by using alcohol to disrupt the lipid membranes and protein structures of pathogens, effectively
inactivating them. The alcohol also cuts through the natural oils and grime on your hands, which can otherwise protect germs from exposure.
Washing and Cleanliness
I still like to keep clean on a daily basis and I do this by washing myself using a small UL foldable Dog Bowl (yes that's right!), which is perfect as it sits flat on the ground and won't tip. I use a small microfibre cloth as a washcloth and a few drops of Wilderness Wash as soap.
Hiking or backcountry or wild camping does not mean that you have to go without. However you still need to be aware of the environment. You can't wash and condition your hair in a river or stream, no matter how environmentally friendly your hairdresser claims your products are. Even our sweat and sunscreen can affect aquatic life in pristine waterways. This post is all about gear, not a how-to; but it is worthwhile considering the types of toiletries and cosmetics you bring along on the hike.
Take the bare minimum and use small screw top bottles to store your cosmetics. Use pure eco-friendly soap where possible and consider toothpaste tabs which can be swallowed instead of toothpaste.
My Toileting and Hygiene Recommendations
The Hygiene Quiz
Test your knowledge of key hygiene practices that can prevent trail illness in both you and others. Do you really know what to do?
Utility Kit
I've mentioned a Utility Kit before, and this is something I take on every overnight hike. Its basically a small bag that contains everything I need to “fix ” things, plus spares of items like batteries. Here is a basic list of what is on my Utility Kit
Small Pouch for Utility Kit
Power
One or two 10,000 mAh power banks are usually enough to keep your phone, headlamp, and GPS device running. How much capacity you need depends on how often you use your phone for photos, maps, etc, but a second bank gives peace of mind on longer tracks.
Cold weather also drains batteries more quickly. If the hut is cold at night, keep your power banks and phone inside your sleeping bag to help preserve charge.
My Power Bank Recommendations
Backpack and Storage
For any backcountry or wild camp, a 45–60L backpack is usually the sweet spot. That gives you enough space for your sleeping bag, warm layers, food, and rain gear, without being so big you’re tempted to overpack. If you're efficient and your gear is reasonably compact, there’s no need to go bigger.
I prefer the modern ultra light packs as opposed to more traditional woven fabric packs. My Durston Kakwa is my favourite pack when carrying the full gear. It's 55L including the outside pockets, which I use for wet weather gear, poop kit, and snacks. It's lightweight and sturdy. If you are after a more
A Pack liner or dry bags are a must in some places. I use a Nylofume liner bag inside my pack. Nylofume is ultralight, super strong, and totally waterproof. I double-bag anything critical (like my sleeping bag and clothes) in dry bags just in case.
Many people use pack covers to keep their gear dry instead of bagging everything from the inside. Its a matter of personal preference. I prefer the pack liner myself, but I see plenty of pack covers on the track. Many packs come with a pack liner, but if yours doesn't, they are easy to come by.


My Backpack & Storage Recommendations
Creature Comforts
Let's face it, camping out in the wilderness is supposed to be enjoyable right? So don't forget some creature comforts to make it just perfect!
Coffee Maker
Coffee Plunger – compatible with Jetboil Zip
Hip Flask (For your Favourite Tipple)
Kindle
UL Foam Core Mat (for Yoga)


Good to Have
Hiking Poles – Hiking poles help reduce strain on your knees and improve stability, especially on uneven or steep terrain. They distribute weight more evenly and can make long days feel easier. Lightweight poles reduce upper body fatigue, while adjustable ones let you adapt quickly to changing gradients. Neccessary if you have a hiking pole tent.
Sleep Mask – A quality sleep mask will block out light especially if hiking 47 degrees south on New Zealand’s Rakiura Track, or the Arctic Circle Track at a latitude 66.9 degrees above the equator
Ear Plugs – Choose ear plugs that can mould to your ear canals and are soft enough to sleep with. For those who are anxious about sleeping in the wild, they can quieten the “things that go bump in the night” sounds.


Seasonal & Location-Specific
UV Protection
Sun Hoodie – Look for a high UPF rating of 50. Ultra Lightweight Sun Hoodies protect your neck and ears, along with the backs of your hands. When worn with a cap, they provide the ultimate UV Protection.
Sunglasses – Polarised sunglasses reduce glare and protect your eyesight from UV damage, cataracts, and snow blindness or photokeratitis.
Sun Gloves – Especially important if using Hiking Poles, as your hands can be highly exposed to UV rays. Sun gloves have been life savers for me, shielding my skin during long hikes.
Sun Umbrella – You may look and feel like Mary Poppins, but don’t knock sun umbrellas, which can also double as rain protection. Sun Umbrellas will also reduce the temperature under the umbrella by several degrees.


Sunscreen Stick – Opt for an SPF 50 sunscreen stick to protect all areas of your skin that are not covered by clothing or hats. Sticks reduce the chance of spills or leakage throughout your pack – spoken from experience!
SPF 50 Lip Balm – A good quality lip balm will also protect your lips against windburn.
Face Buff – A face or neck buff has many uses – to protect against sun or wind, an eyemask at night, and a sweat band or ear muff, when worn as a head band.
Cap – A cap pairs perfectly with a Sun Hoodie, offering excellent face protection. Remember, if worn alone, it leaves your neck and ears vulnerable to sun exposure.
Cap with Neck Shield – A cap with a neck shield gives you comprehensive sun protection similar to that of a Sun Hoodie. Many models feature a removable neck shield, which is versatile for days when full coverage is not needed.
Wide Brimmed Hat – Make sure your lightweight hat has a brim wide enough to provide ample shade for your face, including your neck and ears.
Bug Protection
Headnet – When the midges are out, a headnet is worth its weight in gold. Choose fine mesh that sits away from your face and slips easily over a cap. It’s light, simple, and makes evenings bearable when the air is thick with insects.
Thermacell Zone Mosquito Repellent – Handy at camp when you’re cooking or trying to relax. It runs on a cartridge and pad system that creates a small protective zone without smoke or spray. Works best in calm conditions; wind quickly limits its reach.


Cold Weather Protection
Beanie – Helps prevent heat loss through the scalp, which has little fat and many blood vessels. It’s especially important during rest stops or at camp, when your body isn’t generating as much warmth. Make sure it fits comfortably under your hood to support core temperature regulation.
Cold Weather Buff – Helps insulate the neck and face, where blood vessels also sit close to the surface. In icy winds, it shields vulnerable areas and can be pulled over the nose for added warmth. Merino is a good choice as it will keep you warm, even when wet.
Down Puffer Jacket – Down offers exceptional warmth for weight, making it ideal for cold, dry conditions. Down traps body heat efficiently, however it can loses insulating power when wet.
Primaloft Jacket – Synthetic insulation like Primaloft® stays warm even when damp, making it ideal for humid conditions or hikers who sweat heavily. It’s a smart alternative to down in wet environments, and offers dependable warmth when conditions are unpredictable or layering options are limited.
Waterproof Jacket – A rain jacket’s main job is to keep your core dry, which is an important factor in preventing hypothermia. When your torso gets wet and cold, your body loses heat fast. Look for a jacket rated at least 10,000mm waterproof with taped seams and a full storm flap or waterproof zip.


Waterproof Pants – Look for lightweight, full-zip designs for easy layering over boots. While not always needed, they’re worth carrying when rain, snow, or strong winds are in the forecast.
Waterproof Gloves – Wet hands lose heat rapidly and make basic tasks, like cooking or setting up camp, harder. Choose gloves that can layer over thin liners if hiking in extreme conditions.
Rain Kilt – gaining popularity, rain kilts offer waterproof protection which is quick to put on, doesn’t trap heat, and allows airflow while hiking.
Microspikes – Lightweight traction devices that fit over your trail shoes or boots. They provide grip on icy, compacted, or snow-covered trails, helping to prevent slips and falls. Ideal for alpine hikes or shoulder season conditions where ice is likely.
Ready to Go? Just One More Thing.
Thanks for reading! I hope this guide has helped you feel more confident about what to pack for your next multi-day hike. With the right gear, you’ll be better prepared for whatever the trail throws at you — from bad weather to blistered feet to unexpected wildlife sightings (the good kind!).
Don’t forget to check out our Free Interactive Packing List that goes along with this post. Tick things off as you pack, add your own gear notes, and make sure nothing gets left behind. You can even share your list.
And if this guide helped you out? Share it with someone else who's planning a trip. Whether it's their first wild camp or their fiftieth, there's always something useful to pick up.
Stay safe out there, leave no trace, and enjoy every moment on the trail
Happy Hiking !
Pack Light, Pack Right. Free Multi-Day Hiking Packing List
Plan methodically and keep track of every essential for your next multi-day hike. Add notes and quantities, save or print your list, and share it with hiking partners so everyone knows what’s covered. Works on any device.
FAQ
What's the difference between wild camping and backcountry camping?
They're essentially the same thing. Wild camping is the term used in the UK and Europe, while backcountry camping is more common in North America and Australia. Both mean camping in remote areas without facilities, carrying everything you need on your back, and being completely self-sufficient throughout your trip.
Do I need a tent for wild camping or can I use a tarp?
Both work, but tents are more practical in most conditions. Tents offer full protection from wind, rain, and insects. Tarps are lighter and cheaper but require more skill to pitch properly and offer less protection. In Europe's unpredictable weather, most hikers prefer the reliability of a tent over a tarp.
How do I choose the right sleeping bag temperature rating?
Look at the comfort rating, not the extreme rating. The comfort rating indicates the temperature at which a cold sleeper will stay warm. Men and warm sleepers can use the limit rating. If camping in changing seasons, go warmer than you think you need. Remember, you can always vent a warm bag.
What's an R-value on a sleeping pad and why does it matter?
R-value measures how well a sleeping pad insulates you from the cold ground. Higher numbers mean better insulation. Summer camping needs R 2-3, three-season trips need R 3-4.5, and winter requires R 5.5 or higher. Without proper insulation underneath, even the warmest sleeping bag won't keep you comfortable at night.
Can I drink water straight from streams when wild camping?
Not recommended, even if the water looks clean. Streams near farmland, livestock, or human activity should always be treated. Use a water filter, UV device, or purification tablets to remove bacteria, protozoa, and viruses. Clear mountain water can still contain Giardia or other pathogens that cause serious illness days into your hike.
How do I go to the toilet when wild camping?
Dig a hole 20cm deep, at least 50 metres from water sources. Bury your waste and cover it completely. Pack out all toilet paper in sealed bags; don't bury it as it takes years to decompose. In arid conditions or where digging isn't possible, use portable waste bags. Never toilet near water sources or trails.
Do I need bear protection for wild camping in Europe?
In most of Europe, no. However, Eastern European countries like Romania have growing bear populations where precautions are needed. Elsewhere, foxes, possums, and pine martens will raid food if given the chance. Always store food away from your tent using odour-proof bags or by hanging it from a tree branch overnight.
What size backpack do I need for multi-day wild camping?
A 45-60L backpack suits most multi-day trips. This capacity holds your tent, sleeping system, food, water treatment, clothing, and safety gear without being oversized. If your gear is lightweight and compact, 45-50L is plenty. Only go larger if carrying group gear, bulky winter equipment, or food for extended trips beyond a week.
How much water should I carry when wild camping?
Carry 1-2 litres between reliable water sources. More in hot weather or arid terrain where water is scarce. Research your route beforehand to know where streams or springs exist. Always carry water treatment whether it's a filter, UV device, or tablets. In dry regions, you may need to carry enough for dry camping overnight.
What's the most important safety gear for wild camping?
Navigation tools are essential: GPS app with offline maps, backup battery, paper map, and compass. A headlamp with spare batteries, first aid kit for blisters and injuries, and emergency shelter like a space blanket. Consider a PLB or satellite messenger for remote areas. Your phone isn't reliable in the backcountry without proper preparation and backup power.