
Hiking the Larapinta Trail Solo – A Comprehensive Guide
Considering the Larapinta Trail? My experience hiking it solo as a female, remains one of the most remarkable and fulfilling feats I've ever accomplished.
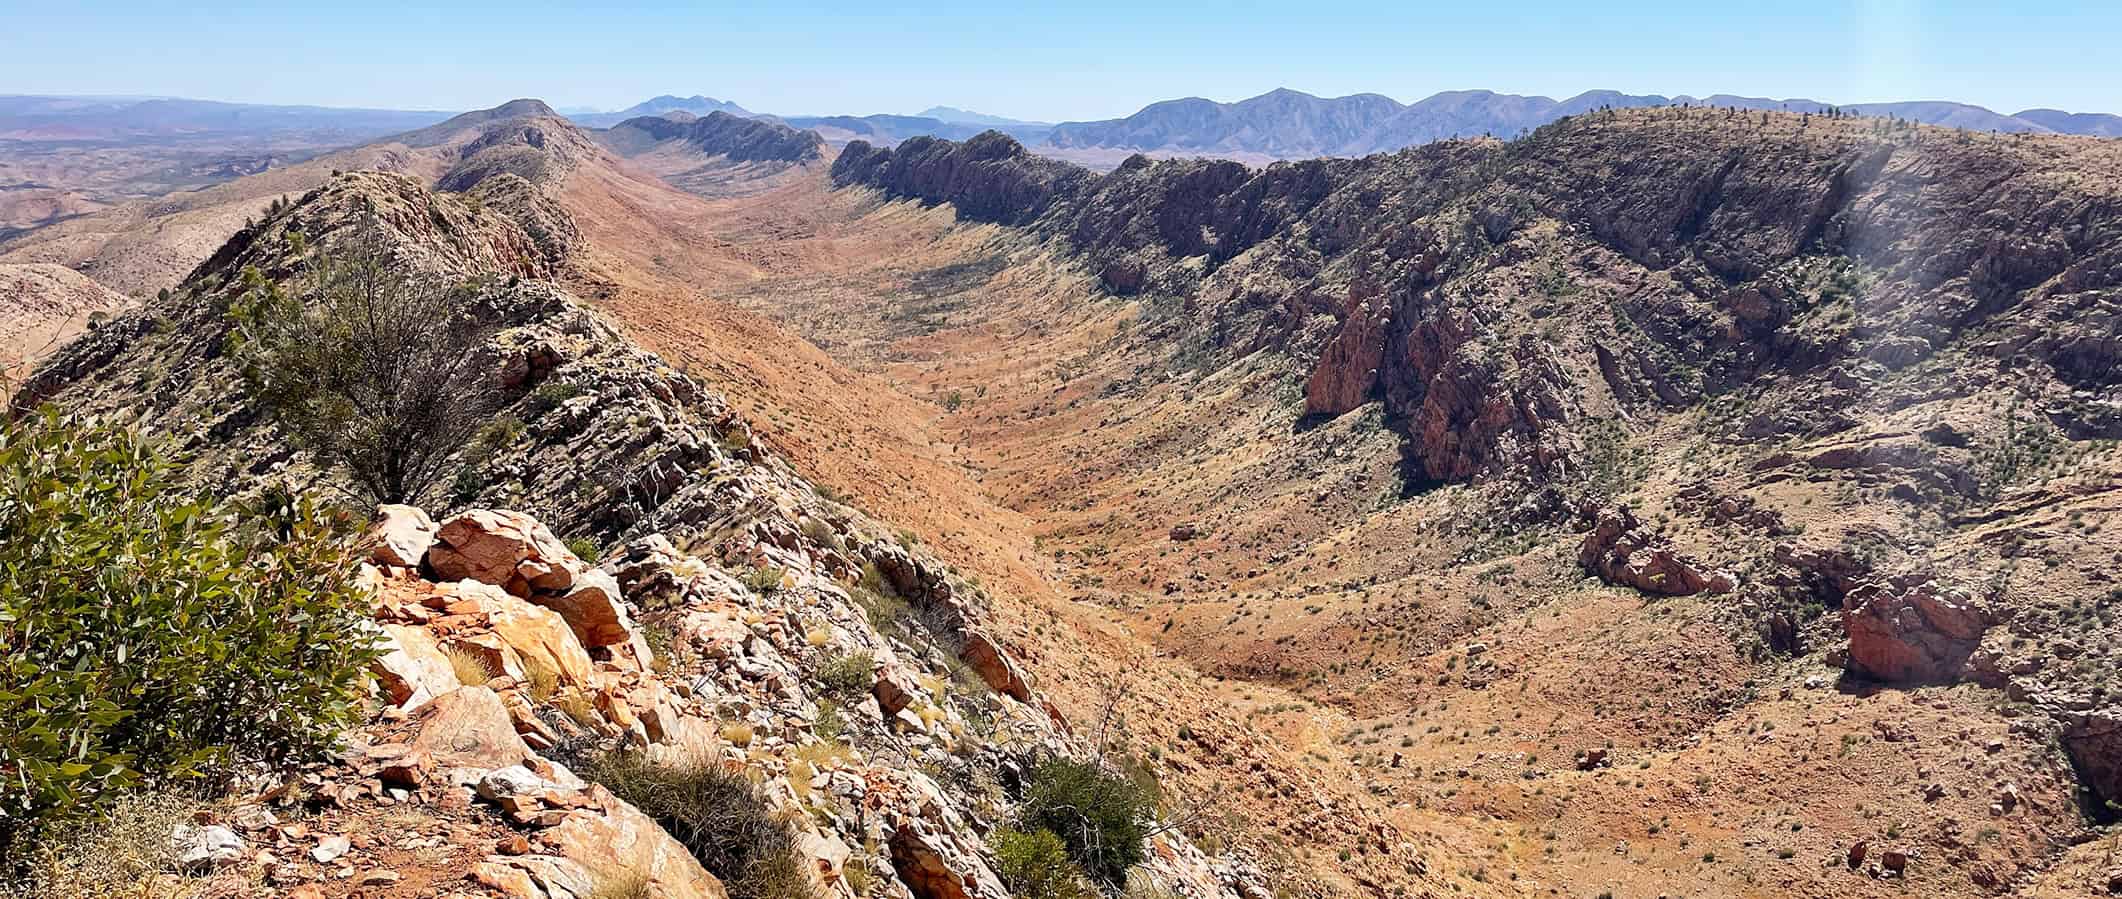
The Larapinta Trail covers 223 km (139 mi) along the West MacDonnell Ranges in the Northern Territory, right smack in the middle of the “Red Centre” the most central part of Australia.
The surreal landscape surrounding the Larapinta Trail includes desert plains, weathered mountain ranges, rocky gorges, and some of Aboriginal Australia's most sacred sites, including Uluru and Kata Tjuṯa.
My friend Gail once described the Red Centre as the heartbeat of Australia, while all the towns and cities, located on the perimeter of the large continent we call Australia, were just the “pretty bits.” Much like an adorned necklace. I couldn't agree more.
Walking through a rocky gorge on the Larapinta Trail, where the traditional custodians of the land – the Arrernte people, would have walked over 30,000 years ago is indescribable. And I can't wait to share it with you.
In this comprehensive guide, I’ve gathered all the Larapinta Trail prep info you’ll need to fully plan for this epic hike. Let's go!
Larapinta Trail Hiking Guide Quick Links:
- Larapinta Trail Quick Facts
- Fees and Registrations
- How to Organise Your Food Drops (Resupply)
- When is the Best Time to Hike the Larapinta Trail?
- Is There Water on the Trail?
- Is There Cell phone/Mobile Reception on the Trail?
- Is it Safe to Hike the Larapinta?
- What are the Campsites Like?
- How Long is Each Section?
- How do I Get to The Larapinta Trail?
- What Should I Pack for the Larapinta Trail?
A full list of inclusions can be found in the Table of Contents


Traditional Custodian Acknowledgement – The Arrernte People
I wish to acknowledge the Arrernte people, who are the Traditional Owners and Custodians of the Central and Western Arrernte Country. I would also like to pay my respects to their Elders, past and present. Thank you for the opportunity to share this magnificent place – the Larapinta Trail and Western MacDonnell region.
The Larapinta Trail has a wealth of details, more than a single post can contain. You'll find a general summary here, but for deeper insights, be sure to explore my series of companion posts.
This article may contain affiliate links. If you make a purchase using one of these links, we may receive compensation at no extra cost to you. See our Disclosure Policy for more information.
Larapinta Trail Quick Facts
| Location | Tjoritja / West MacDonnell NP, Northern Territory, Australia |
| Distance | 223 km / 138 mi |
| Elevation Gain | 7266 m / 23838 ft |
| Highest Point | 1390 m / 4560 ft |
| Duration | 12 – 17 days |
| Trail Type | Mixture of formed and unformed track, rocky steep ascents and descents |
| Grade | 4-5 |
Map and Elevation Profile
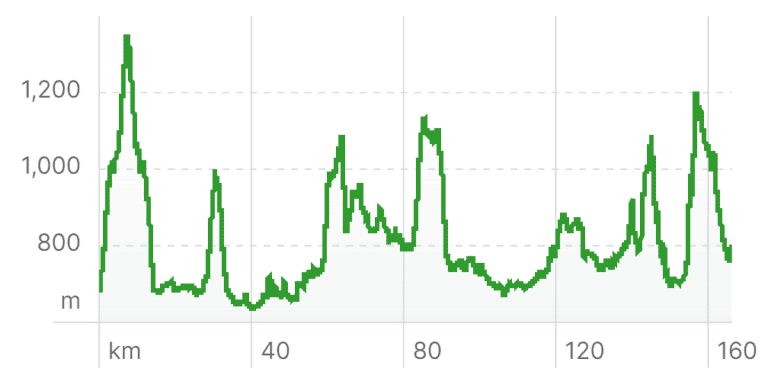
I totally recommend taking a compass and paper map. An excellent bundle of weatherproof paper maps, plus detailed information on each section is available here.
Each pack contains six sheets with 12 Larapinta Trail maps at 1:50,000 scale produced by NT Government. Regardless if you end up using them or not, they make a great trip momento.
You will also need a compass and the knowledge to use it. I recommend taking a navigational course. Just like first aid, navigation is a good skill to have.
I attended a navigation course at Mt Barney Lodge in Qld. There are in-person training sessions in most locations, but if you can't get to any or need to brush up on your skills (like me), then The Columbia River Orienteering Club has excellent tutorials on YouTube. They also have tutorials on using GPS systems such as GAIA and similar.
For an online Larapinta Trail map, I recommend FarOut Guides. Their guides are excellent, and I've also used them for the Heysen Trail, Greenstone and Caples Track, and the Tahoe Rim Trail.

Pack Light, Pack Right – Free Interactive Checklists
No More Overpacking. No More Forgetting Essentials.
Our free interactive packing lists help you pack methodically and remember everything. Add notes, quantities, save or print, and share with hiking partners so everyone knows what’s covered and what they need. Works on any device.
Available for multi-day wilderness camping, hut-to-hut hikes, and inn-to-inn walks, with new lists added frequently.
Know Before You Go
Fees and Registrations for the Larapinta Trail
As of 2023, NT Parks and Wildlife have implemented registrations, walking fees for the Larapinta Trail and a booking and fee system for the Larapinta Trail campsites.
You will need a valid Parks Pass to enter the West MacDonnell National Park. A two-week pass is $30 AUD, while a 12-month pass is $60 AUD.
Get your Parks Pass Here
Trail fees for the Larapinta Trail are $25 AUD per person per night to a maximum of $125 for a walk over consecutive days.
Pay your Trail Fees Here
These Guides for Multi-Day Hiking are Recommended:
Complete Multi Day Hiking Packing List
What to Wear When Hiking (Winter and Summer)
Complete Nutrition Guide for Multi Day Hikes
Hiking in the Heat
The Essential First Aid Kit
Fees and Registrations for the Larapinta Trail Campsites
Most Larapinta Trail campsites fall into category B, with fees of $10 per adult per night, which covers official wild camping sites like Brinkley Bluff and Counts Point. For detailed guidance on each section to assist with your planning, refer to my guide, Larapinta Trail Sections – Planning Your Hike
When booking campsites for the Larapinta Trail, it's necessary to reserve a spot for each night of your trek. However, the trail does seem to offer flexibility if you need to extend your stay in any particular section.
Standley Chasm is privately owned by a family from the Arrernte people. It is so well worth while spending a night here, as the Chasm is a beautiful (and spiritual) place.
Standley Chasm is booked and paid separately and the cost is $25.50. The price includes the $12 entry into the Chasm along with camping, and use of the shower, washing machine and power via the charging stations now throughout the property. For hikers not wanting to stay the night, the fee for the shower is $5.
Book your Larapinta Trail Campsites Here


Which Direction to Hike the Larapinta Trail?
The Larapinta Trail can be hiked in either direction, or you can cherry-pick the sections you would like to do. There is access to all section trailheads, though some may be accessible by 4WD only.
The Larapinta Trail is traditionally hiked East to West (E2W), from Telegraph Station (Alice Springs), finishing the hike at Mt Sonder for sunrise. Or you can hike from Red Bank Gorge to Alice Springs (W2E), which some consider easier logistically as there is no pressure to meet your transport at Redbank Gorge, and you can take your time. This is the direction I hiked.

Interested in
Hiking Safety?
We have a dedicated Hiking Health, Safety and Hygiene Facebook group!
Larapinta Trail Food Drops
Resupply options on the Larapinta Trail are known as food drops.
You'll find secure food drop locations at four key points along the trail, with several methods to handle delivery and retrieval, all of which are covered in my in-depth Larapinta Food Drops Guide
Alice Springs, the only place purchase food and is a large town with several supermarkets and an Asian and Indian mart.
The one camping store in Alice is the Lone Dingo, where you can pick-up gas, dehydrated food and any other hiking bits and pieces you need. Most hikers add gas canisters to their Larapinta Trail food drops as well – Check out this handy calculator for determining the number of gas canisters you'll need!
I always make a point of calling ahead when trying to pick up gas in smaller towns in case their stores are depleted. If that's the case, I take my Multi-Fuel Stove– a multi-fuel cooker.
READ NEXT: A Complete Food and Nutrition Guide for the Larapinta
Food drop locations include the trailheads at Standley Chasm, Ellery Creek South, Serpentine Gorge, and Ormiston Gorge. If you have transport and decide to do the Larapinta Trail food drops yourself, you must pick up a key from the Alice Springs Visitor Centre and pay $10 plus a $50 deposit.
The key will allow you entry to each of the food drops, except Standley Chasm. Since Standley Chasm is privately operated, they manage their own food drops, and you'll need to pay $5 directly at their kiosk for this service.
Pack your food drops in strong plastic containers and ensure they are well sealed. Get a big black marker (I used the one from the hotel reception) to add your name along with your expected date of pick-up. Refer to my Larapinta Trail Food Drop Guide for the full process.
You can also pay for a service such as Larapinta Trail Trek Support (LTTS), which has various options, including full food drops, container hire and/or retrieval, and food drops in non-secure locations at all the other trailheads. LTTS also have a gear rental and transport service.
Larapinta Trail food drops are not only for food. Many hikers add gas canisters, charged power banks, clean clothes, toiletries, maps for the next section, etc. Be aware you must retrieve your containers if you are organising your own food drops.
Best Time to Hike the Larapinta Trail


The best time to hike the Larapinta Trail is April through to September. Outside these months, the temperature will soar into the mid-forties (celsius), with hot winds and high UV. The temperatures can become even more intense due to the heat captured and generated by the rocky mountain ranges. For more details on dealing with this climate, see my blog post, Hiking in Extreme Heat.
April – May and September (Autumn and Spring) are considered shoulder seasons.
I started hiking the Larapinta Trail in the last week of August and was warned by a local (non-hiker) that it was incredibly dangerous to be “hiking out at that time of the year”. The last week in August was hot – as in mid-thirties (celsius), but the first week in September saw temperatures plummet to single digits at night and the late teens during the day.

Share the Knowledge!
If you know someone who’d benefit from this guide, spread the word!
If given the chance to hike the Larapinta Trail solo once more, I would opt for the shoulder season. The trail is quieter, the evenings a touch warmer, and the wildflowers and birds in spring would be an amazing sight to behold.
Winter (June, July, August) is the most popular time to hike the Larapinta Trail, as it offers prime trekking conditions, with more stable daytime temperatures hovering at low-mid 20C with refreshingly cool breezes.
In the evenings, however, temperatures can drop close to 0°C, and the frost that covers the ground can create a snow-like appearance.
Route Description
Trail Signage
The Larapinta Trail is marked by white square signs with a blue rectangular arrow in the direction of travel. The markers are generally spaced every 1 km, and every so often, they will have the total distance remaining of the section.
Section Signage
Each trailhead has signs with information and advice on the upcoming section. As well as the large boards with information on distance, maps, and health and safety, there are also boards updated with information, such as closures, dangers, floods, etc, by the Larapinta Trail Park Rangers.


Trail Conditions
The Larapinta Trail is rocky, rugged, extremely dry and hard going. The trail can be harsh on your footwear, and sometimes hikers have mentioned that their boots were trashed afterwards – however, if you have a decent pair of boots, such as my La Sportiva Ultra Raptor, I can't see this happening.
Mine were fine afterwards, and someone else I met on the trail wore a pair of Salomon X Ultras that had seen better days, and they made it through. I recommend wearing sturdy shoes or boots.
Trail conditions vary, and the trail definition is generally good. However, rocky high-ground areas and closed gorges sometimes have no apparent trail, so a GPS such as Gaia GPS or FarOut Guides is necessary.
READ NEXT: The Essential Guide to Hiking in the Heat Safely
Vegetation
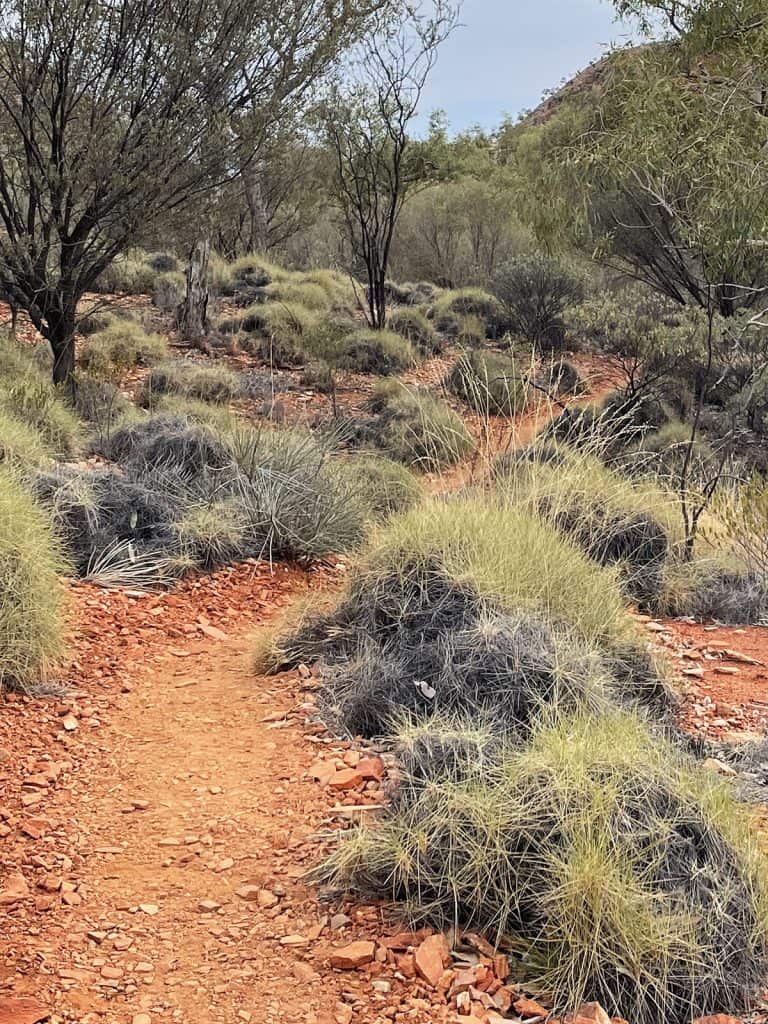
A lot of the vegetation alongside the Larapinta Trail is covered with Spinifex, a native grass that has stiff, needle-sharp leaves. Care must be taken when dropping your pack on the trail for a rest or loo stop, as the leaves can puncture packs and air pads.
It's a good idea to store your sleeping pad and Hydrapak bottle deep inside your pack with your clothing and tent surrounding and protecting your pad.
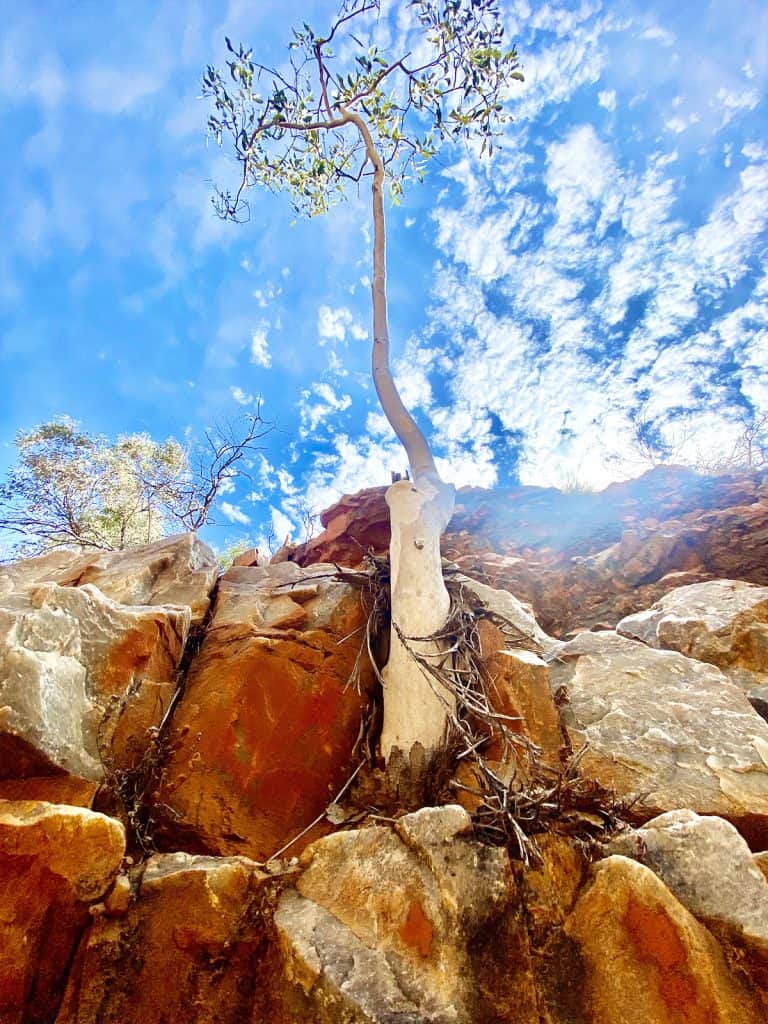
Red River Gums are common in the lower valleys. However, these aren't necessarily on the trail, and there is scant shade from any other flora. Ghost Gums were my favourite – the stark white trunks and branches contrasting against the red rock are truly beautiful. Ghost Gums have minimal leaves and, therefore not a shade source. They just look amazing!
READ NEXT: Our Complete Guide to Toileting Responsibly when Hiking
Water Sources
Water is a major consideration on the Larapinta Trail, especially for the dry camps on ridges such as Counts Point, Brinkley Bluff and Hermits Hideaway. Sometimes, I felt like a packhorse taking off from the trailheads with 7 litres of water!
Water tanks are located at each trailhead and intermediate points on some of the longer sections. The information board at each trailhead will advise where the water tanks are mid-section, if any.
The water tanks are filled up regularly and are sealed with a special water tap to ensure rodents can't get in. The water is clean and drinkable, but it is bore water, which I didn't find palatable. I needed to add electrolytes to my water for flavour – But I've always been known to be fussy about water taste (I find Evian water disgusting), so everyone else will probably be fine.
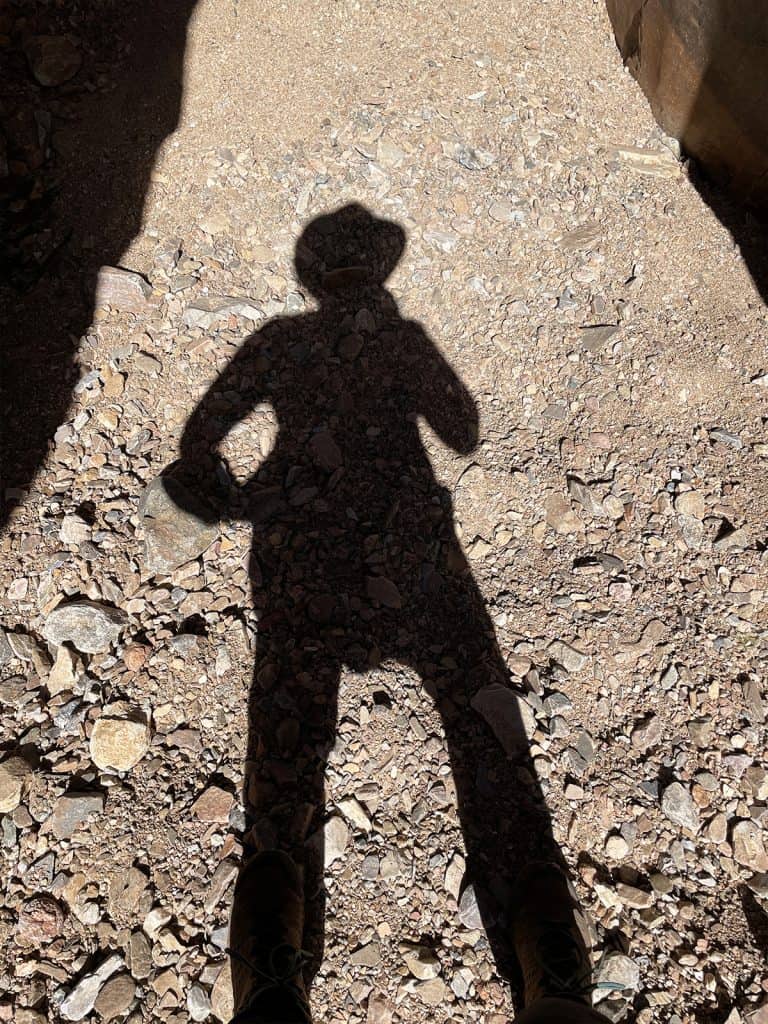

The natural water sources are few and far between and cannot be relied upon. I found the waterholes to be stagnant and pretty bad – however, if push came to shove, I'd treat and drink.
Check out my post on the Larapinta Trail Packing List Essentials to find out about my complete water system I used on this trek
Symptoms of dehydration and heat exhaustion include fatigue, dizziness, rapid heartbeat, and dark urine (which may be hard to recognise when toileting in the wild). Staying hydrated aids in regulating body temperature, sustaining energy levels, and cognitive function during hikes. Staying attuned to your body's signals is crucial when hiking in arid regions with extreme climatic conditions such as the Larapinta Trail. My post on Hiking in Extreme Heat goes into this in more detail
Mobile Reception
The Larapinta Trail offers a remote trekking experience where mobile phone access is extremely spotty. While occasional reception might be found atop some of the higher ridges, it's important to plan as though you won't have signal and not rely on it for safety communications. I used a Telstra SIM, which reportedly worked better than Optus.


Safety
Heat Exhaustion and Dehydration
The primary safety concerns on the Larapinta Trail are heat exhaustion and dehydration, which can happen. Also, ladies, with dehydration comes the risk of cystitis or the beginning of a UTI, to which I'm particularly susceptible. I always carry Urals on any hike in my medical kit for this exact reason.
To combat heat exhaustion, the best idea is to start very early. There were a couple of sections where I sat in a shady gorge, sheltered from the mid-afternoon sun for a couple of hours.


Snakes
The Larapinta Trail is home to some of Australia’s most venomous snakes such as the Mulga Snake (King Brown), but it is highly unlikely you will come across them, particularly during winter. Nevertheless, ensure you carry a snake bandage and that you know how to use it.
If you are an overseas visitor, you may have a different understanding of snake bite management. Due to the difference in venoms, Australia uses a compression technique called a Pressure Immobilisation Technique.
We have an in-depth article of the difference between Australian and USA snake bites and their the snake bit management, which is essential reading for any hiker crossing the Pacific.
Read the article about the Difference in Snakes and their Bite Management here.
Emergency Assistance
When undertaking solo hikes in remote areas like the Larapinta Trail, carrying a Personal Locator Beacon (PLB) is essential for safety. In the event you're injured and cannot make a call, activating your PLB will alert the Australian Search and Rescue service to your need for assistance.
My choice is the RescueMe PLB1; its activation informs the Australian Maritime Safety Authority, which then contacts the closest Search and Rescue service at no cost.
At the time of writing, the Australian Search and Rescue services are also available free of charge to everyone in the country, which includes not just Australian nationals but also international visitors and tourists.
Nevertheless, taking out travel insurance is strongly advised when tackling the Larapinta Trail, especially for those visiting from overseas.
Dogs and Drones
Dogs are not allowed on the trail. Drones may be restricted in certain parts due to cultural, safety or environmental reasons. Regardless, you will need a permit to operate a drone. Contact NT Parks and Reserves for further information.
Larapinta Trail Campsites
There are 41 Larapinta Trail campsites along the trail in total. Most fall into Category B, which costs $10 per night. You'll need to book with NT Parks and Wildlife and specify which camps you plan to stay at and on which nights.
A couple of the Larapinta Trail campsites, like Standley Chasm and Ormiston Gorge, are privately owned and offer grassy areas, a cafe, and hot showers. These campsites are also used by non-hikers.
Payments for the private campsites are made directly to the campgrounds, however at the time of writing you are also able to book online with NT Parks and Wildlife.
All trailhead campsites have a shelter, water tanks, information boards, toilets and access – although some access points might be 4WD only.
Share the Knowledge!
If you know someone who’d benefit from this guide, spread the word!
At some of the Larapinta Trail campsites, the newly constructed shelters have cabinets for food storage, solar powered USB charging ports, and metal platforms that can accommodate either 1-2 single-person tents or 3-4 sleeping pads.
Note these metal platforms can get very cold at night. When I slept on one to make an early start, it was my one sleepless night on the Larapinta Trail!
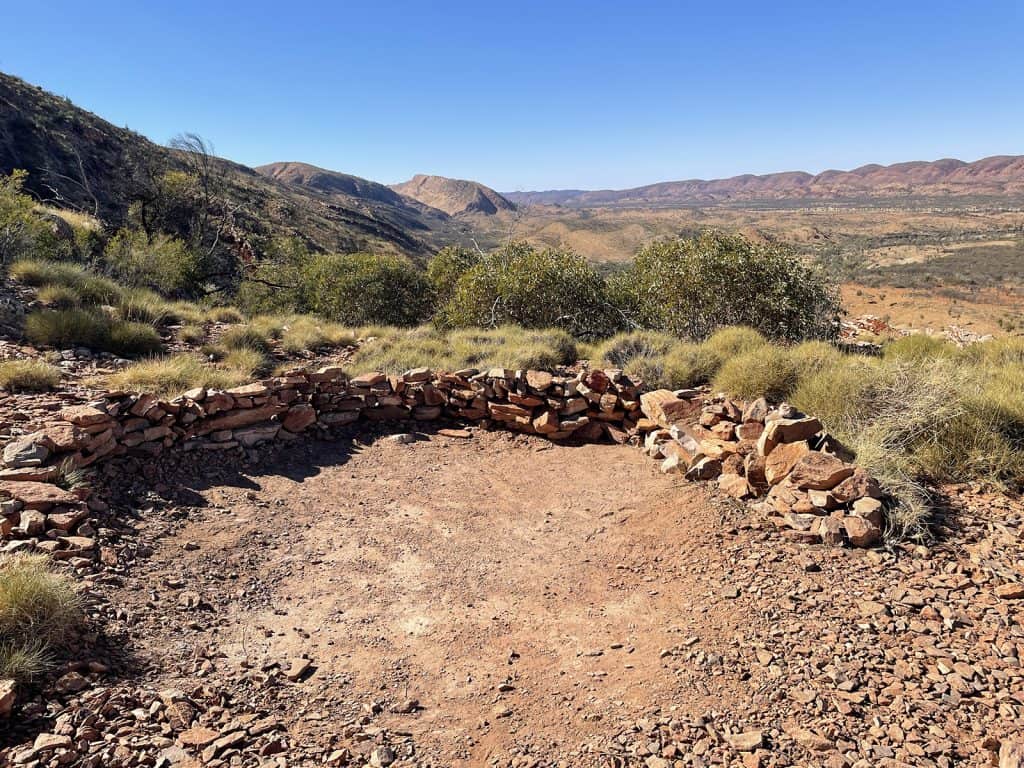
Campsites away from the main trailheads will have nothing more than a tent pad, and often previous campers have built little walls against the prevailing wind.
If you're camping away from the trailheads, it's critical to carry enough water to support you at the dry camp. You'll need water for the evening, the following morning, and enough to last until you reach the next water tank – that's no less than 6 litres in total. But with the right preparation, it's totally doable!
Check out my Larapinta Trail Gear List for details on the additional hydration packs I carried.
Also, beware of dingos who like shoes and have been known to take off with “one shoe.” It is best to keep these in your vestibule or tie shoelaces together and attach them to the tree or shrub.
Mice can often be prolific at Larapinta Trail campsites, particularly around trailhead areas. The mice numbers each year vary according to the grass seed availability, which in turn relies on rainfall. So, a good rainfall season will be followed by a copious mouse population season.
The native mice are actually a species of marsupial and will eat through anything to get water or liquid – that includes silicone. Hang everything – Including your rubbish. I always take a few metres of rope (paracord) in my utility kit to hang my food, and the Larapinta Trail was no exception.
Bottom line – use the food cupboards or meshed drawers at the Larapinta Trail campsites. Not only does this prevent wildlife like mice and dingoes from becoming habituated to human food, but restocking your provisions out there isn't exactly a walk in the park.
Camping on the riverbeds along the Larapinta Trail is normal, and parts of the trail follow a normally dry watercourse. If, however, there's been rain in the area, the creek and riverbeds may be subject to flash flooding. At each trailhead, rangers will post if there is any significant danger, but it is up to hikers to remain vigilant.
If flash floods occur, walkers are advised to move to high ground and wait for creeks to subside. Do not camp in creek beds if there has been constant rain in the region. In the case of sustained flows, walkers should wait to be rescued. Never attempt to cross floodwaters.
A Few Other Things to Note
On the Larapinta Trail, the only places you’ll find rubbish bins are at Standley Chasm and Ormiston Gorge. You will need to pack everything out with you. You can also leave rubbish in your food drop box to be collected afterwards.
Power banks are an absolute must for the Larapinta Trail. While there are solar-powered USB ports in some of the newer shelters, there are only two, which means they are in high demand.
The Larapinta Trail scenery is simply stunning, and while you may not have reception, keeping your phone camera charged is something you will not regret.
I use 2 x Nitecore NB10000 Lightweight Power Bank as they're incredibly lightweight and have a great charge per gm ratio.
The Larapinta Trail is hot and demanding. I noticed some people were carrying large packs – over 60L and possibly mid-high 20 kg in weight. Clothing dries fast, and although it is a 15-plus day trek, you do not need more than one change of clothes.
Try to keep your base weight at most 15 kg. Mine is 10-12 kgs for the record, and you can check out my Complete Larapinta Packing List, to see what I packed.
Pack Light, Pack Right – Free Interactive Checklists
No More Overpacking. No More Forgetting Essentials.
Our free interactive packing lists help you pack methodically and remember everything. Add notes, quantities, save or print, and share with hiking partners so everyone knows what’s covered and what they need. Works on any device.
Available for multi-day wilderness camping, hut-to-hut hikes, and inn-to-inn walks, with new lists added frequently.
Sections and Distances between the Larapinta Trailheads
|
1 Telegraph Station – Simpson Gap: |
23.8 km 9 hrs – Medium |
|---|---|
|
2 Simpson Gap – Jay Creek: |
25.1 km 8 hrs – Medium |
|
3 Jay Creek – Standley Chasm: |
13.6 km 5.5 hrs – Hard |
|
4 Standley Chasm – Birthday Waterhole: |
17.9 km 9 hrs – Difficult |
|
5 Birthday Waterhole – Hugh Gorge |
16 km 10 hrs – Difficult |
|
6 Hugh Gorge – Ellery Creek: |
31.2 km 11 hrs – Medium |
|
7 Ellery Creek – Serpentine Gorge: |
13.8 km 5.5 hrs – Hard |
|
8 Serpentine Gorge – Serpentine Chalet Dam: |
13.4 km 5.5 hrs – Hard |
|
9 Serpentine Chalet Dam – Ormiston Gorge: |
28.6 km 12 hrs – Hard |
|
10 Ormiston Gorge – Finke River: |
9.1 km 4 hrs – Medium |
|
11 Finke River – Redbank Gorge: |
26 km 9.5 hrs – Hard |
|
12 Redbank Gorge – Mt Sonder (rtn): |
15.8 km 6 hrs – Hard |
Larapinta Trail Track Notes
Hiking the Larapinta Trail solo was one of the best experiences in my hiking history, and there were some definite highlights. Rather than go into detail for every section, I'll outline my favourite and memorable parts of the hike.
The beauty of hiking the Larapinta Trail solo is that you can “cherry-pick” sections depending on fitness or time availability.
Many paid hiking tours choose particular sections to walk, and all trailheads are accessible, albeit some are 4WD access only. If I were to hike sections, these would be my picks.
Redbank Gorge
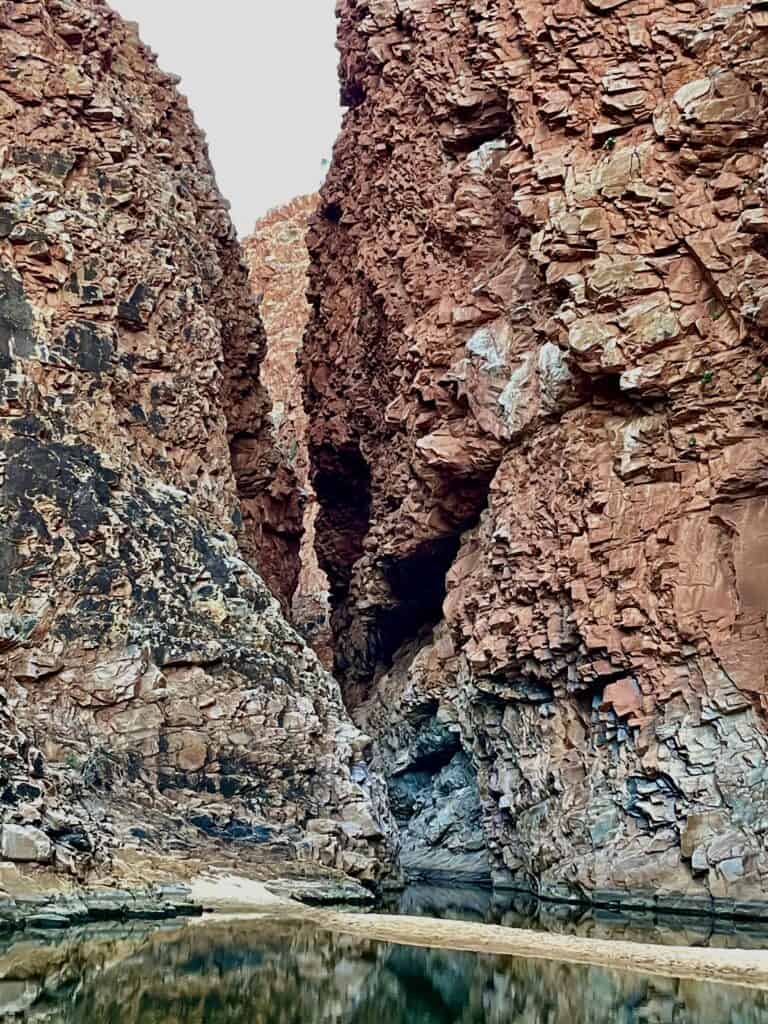
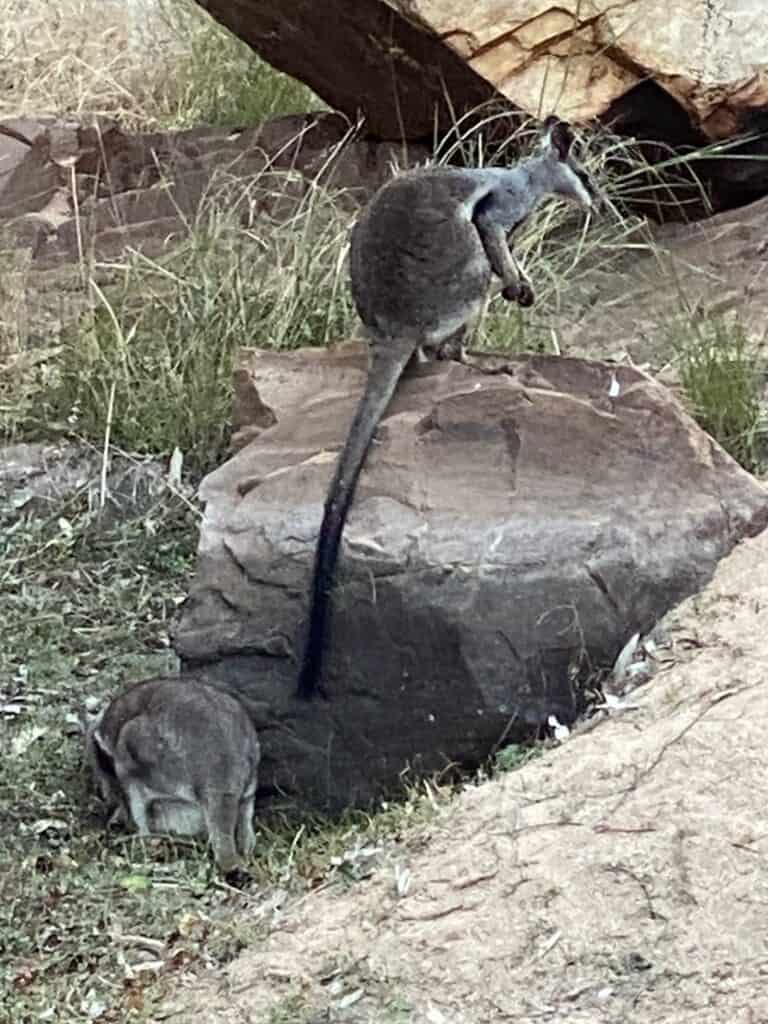
Redbank Gorge, at the western end of the Larapinta Trail, is insanely beautiful, and I felt dwarfed by the magnificent towering walls. I had a hiking buddy for the climb up to Mt Sonder, and we arrived at Redbank Gorge at around 5ish to set up our tents on the dry riverbed. The Redbank Gorge riverbed is large and our nearest neighbours were quite far away.
Once we set up our tents, we made our way down to the gorge. We still had another hour of daylight left, and the diminishing light was gorgeous. Little rock wallabies bounced around, totally ignoring us.
After a hectic morning buying last-minute supplies in Alice Springs and the long drive out to Redbank Gorge trailhead, the stillness and peace of the gorge was a great way to decompress. It was at this moment I realised just how magical the Larapinta Trail was going to be.
Mt Sonder (Rwetyepme)

If you are walking E2W, you will have Mt Sonder in your sights at many points during your walk, and the climb will culminate your trip. If you are hiking W2E, as we did, the sunrise hike is what kicks off one fantastic hike.
We set the alarm for 3 am and packed breakfast, coffee equipment and water in our daypacks. The plan was to have breakfast on the summit during sunrise.
The full moon was shining brightly when we set off, and several people weren't using head torches. It's not a hard slog, the official grade being 4 – a hard-to-moderate hike. The good thing is, it's a daypack-only hike!
I guess I was still on a high from arriving the night before, but the effort was so worth it. The views from the top are insane, and the sunrise is beyond gorgeous. At this early stage of the Larapinta Trail, I was still getting used to the amazing light. I took my time up the top, had a leisurely breakfast and coffee, and just enjoyed the moment.
Interested in
Hiking Safety?
We have a dedicated Hiking Health, Safety and Hygiene Facebook group!
Hermits Hideaway
About 5 hours east of Ormiston Gorge is a ridgeway campsite called Hermits Hideaway. I'd read on the Facebook page that this was a prime camp spot for sunrise and sunset. Not wrong.
Many high-point Larapinta Trail campsites can be exposed, but the Hermits Hideaway camp pads are nicely tucked behind a stout natural wall. It is a dry camp, which means you will have to carry water for the evening and the next day (5-6 litres). I arrived just at sunset and woke early for a truly magical sunrise.
Inarlanga Pass


Inarlanga Pass was used by the custodians of the ochre pits to pass through the Heavitree Range on their way to ceremonies up at Giles Spring, under Mt Giles. Only the men of the tribe were allowed to access the pass, and only with permission.
I sat here by myself, in this pretty shaded gorge for quite some time. The stillness was amazing and wished I didn't have to face the wide-open landscape on the other side and the steep climb up to the saddle. Already, it was promising to be a hot one!
Counts Point

Probably the most photographed outlook on the whole Larapinta Trail, Counts Point provides a stunning panorama of the western horizon, including Mt Zeil and Mt Sonder and as far as the 142 million years old comet crater of Gosse Bluff.
At 1140 m, this is one of the highest points on the Heavitree Range. There are a couple of campsites at Counts Point, and it would have made a fantastic spot to stop, but at that stage of the day, I was eager to press on.
Pack Light, Pack Right – Free Interactive Checklists
No More Overpacking. No More Forgetting Essentials.
Our free interactive packing lists help you pack methodically and remember everything. Add notes, quantities, save or print, and share with hiking partners so everyone knows what’s covered and what they need. Works on any device.
Available for multi-day wilderness camping, hut-to-hut hikes, and inn-to-inn walks, with new lists added frequently.
Fringe Lily Campsite


It's one of the prettiest primitive campsites I came across. There is no structure and no water, only a shaded riverbed.
Arriving early in the afternoon, there was time to explore the deep gorge, which went back a surprising distance. Towards the end of the gorge, you can see a deep water source if you climb up on the rocks – you just can't reach it!
Razorback Ridge


Hiking W2E, after a night at Fringe Lily, you're rewarded with a climb along the spine of Razorback Ridge before hitting Spencer Gorge. On the way, you can test Windy Ridge and see if it lives up to its namesake. Trust me, it does!
Brinkley Bluff


The iconic selfie shot site of the Larapinta Trail, at 1209 m Brinkley Bluff, commands spectacular views at this trail's end. There are several campsites on the ridge, some more sheltered than others.
I'd left Birthday Waterhole first thing in the morning, intent on snagging a site on the ridge, but it was super windy and not a leaf of shade – so Standley Chasm bound. The sunset and sunrise views are incredible if you can time it right to sleep up there.
Standley Chasm (Angkerle)


At 3 am, I walked to the centre of the Chasm by the moon's light and stood there, by myself, soaking up the waves of energy from this magical place. Under the full moon, which shone down into the chasm and onto me, I felt the touch of a thousand women giving me courage and peace. This re-encounter may be lost in this blog post, but it's a memory that will stay forever.
Standley Chasm is a Rock Wallaby Dreaming Place, sacred to Arrente women. Only women could come here to collect bush medicines and perform sacred rites, and the stories and songs could only be passed onto a woman who had been through the appropriate ceremonies.
Standley Chasm is in a private flora and fauna reserve owned by the Iwupataka Land Trust. It is operated by Aboriginal family members who are direct descendants of the people who have lived in this area for thousands of years.
Share the Knowledge!
If you know someone who’d benefit from this guide, spread the word!
Final Thoughts on the Larapinta
Raw, spiritual, beautiful, wild, remote, magical. These are some of the adjectives that come to mind. In reality, the Larapinta Trail profoundly impacts everyone who steps foot on these ancient hills. If you're up for a challenge, this hike is for you.
I hiked the Larapinta Trail as my 5th multi-day hike; my first multi-day hike had been just 6 months previous. Was I ready? Yes. Do I want to do it again? Yes.
The Larapinta Trail is a challenging hike, but with proper training, planning, and a good dose of common sense, it could be one of the most memorable hikes ever.
Transport and Logistics for The Larapinta Trail
Most people use Alice Springs as a starting point. Alice Springs has excellent infrastructure for supply and transport.
Private Vehicle and Parking
If you are leaving your car in Alice Springs, ask your hotel if you can leave your car securely parked while you do the trail. Diplomat Hotel has been known to allow cars to park securely, and the Winter Sun Caravan Park will also look after vehicles for $3 per day, regardless of whether you stay or not.
Shuttle Services
Larapinta Trail Trek Support (LTTS) is the number-one go-to for transport, logistics and food drops. They also hire PLBs and radios. Their support is excellent.
If LTTS is booked up as it was when I walked the Larapinta Trail, I used a private driver through Airtasker, an app that connects people who need to outsource tasks.
I found two people who could drop us off and pick me up. I also met someone who had just asked the locals in the pub if they could run them out for $100, and apparently, several people put their hands up.
If you use private drivers, you will need to find a way to organise your food drops, and LTTS may be able to assist. Our driver helped me with food drops as well.
Public Transport
AAT Kings is the bus service between Alice Springs and Uluru (Ayers Rock). Uluru is totally worth going to, and you can read about my experience here.
Most people fly into Alice Springs unless they are doing a tour of Australia in a camper van. Qantas and Virgin both service the airport. Book your flight here for the best rates.
Pack Light, Pack Right – Free Interactive Checklists
No More Overpacking. No More Forgetting Essentials.
Our free interactive packing lists help you pack methodically and remember everything. Add notes, quantities, save or print, and share with hiking partners so everyone knows what’s covered and what they need. Works on any device.
Available for multi-day wilderness camping, hut-to-hut hikes, and inn-to-inn walks, with new lists added frequently.
Where to stay in Alice Springs
Save Your Pennies
Alice's Secret Travellers Inn
Very Good and Won’t Break the Bank
Elkira Court Motel
Splash Out
DoubleTree by Hilton
Larapinta Trail Gear List
Here are 10 items I would not leave behind if I were to hike the Larapinta Trail again. Please check out my FULL Essential Larapinta Trail Gear List to make sure you don't forget anything!
Sun Hoodie
Cotopaxi Sombra Sun Hoodie
The sun in the Red Centre is fierce, with a very high UV index reading. Even on cloudy days, you can still burn very easily. Therefore, sun protection on the Larapinta Trail is crucial.
Sunscreen is usually everyone's go-to; however, it can feel greasy on the skin and leave you vulnerable to burning if you sweat it off. Made with moisture-wicking fabric, sun hoodies feature a hood that helps keep the sun off your ears, neck, and the top of your head. They are loose-fitting, which can help keep you cool on hot days.
Common in the USA but not so in Australia, the Cotopaxi Sun Hoodie is the best I've found on the market. Plus, the brand ethically and sustainably sources its production and gives back in a big way. Cotopaxi's mission
Sunglasses
Classic Armless Sunglasses by Ombraz Sunglasses
The sunlight is very intense on the Larapinta Trail – sunglasses are crucial!
I love my armless sunglasses, which strap on to your head using a sturdy, soft, flexible cord instead of traditional eye-frame arms. The armless design removes the most breakable part of sunglasses, keeps them from slipping down when you sweat, and is easier to store.
Plus, the Ombraz Shade project plants 20 trees for each pair of sunglasses sold, helping to re-green (and re-carbon) the environment.
Personal Locator Beacon
Ocean Signal RescueMe PLB1, Personal Satellite GPS
You often see me with one of these attached to my shoulder strap. A personal Locator Beacon or a PLB, is vitally important if travelling off grid.
As the RescueMe PLB1 is funded by governments, there are NO CHARGES to use this service. By setting it off, a signal is sent to the rescue authority of the country where you registered your device. If you set it off outside the country where the device is registered, your home rescue authority will immediately notify the rescue services nearest you.
If you want to find out the difference between a PLB and a satellite device such as a Garmin InReach – Read our Satellite Communications and First Aid Article
Water Management
Nalgene Water Bottle (1L) – Nalgene Water Bottle
Soft Water Bottle (3L) x 2 – Hydrapack Seeker Soft Water Bottle
Water Treatment – Katadyn Befree Replacement Cartridge
Electrolyte Powder – LMNT
Dry camping means camping where there is no water source, and you will need to carry water to your camp for use at night and have enough for the next day until you reach water.
Sometimes, you will need up to 6-7 litres. I use lightweight but very durable Hydrapack soft water bottles that field up to a small size when not in use.
You need to be careful when putting your pack on the ground as Spinifex can puncture holes through your pack, so ensure you place soft water storage at the top of your pack or cushion within. The Hydrapack system also works with Katadyn's range of water treatment devices.
Nalgene water bottles are super strong and lightweight (the best combo!). You can fill a Nalgene bottle with hot water and use as a hot water bottle if the temperatures drop to below zero during the night,
My go-to for electrolyte replacement is LMNT. I have a monthly subscription for LMNT and usually take one per day. On a hike, I'll take 2-3. Use my link to get a free sample pack. Totally recommend this brand. They have just the right amount of sodium, potassium and magnesium and no added sugar.
Interested in
Hiking Safety?
We have a dedicated Hiking Health, Safety and Hygiene Facebook group!
A First Aid kit is essential when heading out to the backcountry and should also be taken on day hikes. It comes everywhere with me when venturing out, as you never know when you'll need it.
And the day you don't take it, Murphy's Law – it might be the crucial piece of equipment that makes all the difference. Think snake bandage in Australia, triangle bandage for a dislocated shoulder, or even plain blister plasters. I make up my own first aid kit – click here to see what's in it.
Tent
Big Agnes Copper Spur HV UL1 1-person tent
The beauty of a freestanding tent is that it functions just as its name implies: The tent bodies can hold their shape on their own without needing to be staked out if the ground is impossible to put pegs into (for example, sand or rock).
Another benefit of a freestanding tent is the ability to take the fly off your tent at night and gaze into the universe, marvelling at the zillions of stars glittering like diamonds. Just Wow!
Sleeping Quilt
Katabatic Sleeping Quilt – Flex 22F
Thermal Sleeping Bag Liner
Sea to Summit Thermolite Reactor Extreme
I used to be a sleeping bag person, only because I didn't understand quilts.
Unlike sleeping bags, quilts do not have a zipper. Instead, they are designed to be draped over the body and tucked under the sleeper to keep the cold air out. They are lighter and more compact than sleeping bags, making them easier to carry on long hikes.
The concept behind idea quilt style sleeping bags is to eliminate what’s not truly necessary. In order for down insulation to work, it needs loft (air trapped in and around the down). Therefore, when your body compresses the down, it’s rendered ineffective.
If you already have a sleeping bag and want to add up to 15C, or you sleep cold, a thermal sleeping bag liner can work well, too. The advertised temperature increase is a guide only, and it's different for everybody. Your internal body temperature regulator will dictate the temperature increase.
Puffer (Insulated Jacket)
Cotopaxi Fuego Down Womens Jacket
The desert can get very cold at night, and a puffer is a perfect layer for instant warmth. My Cotopaxi Down Jacket is my winter weight puffer; it is super cosy, lightweight, and packs up small. I use a Stuff Sack to compress my down jacket.
Please check out my FULL Essential Larapinta Trail Gear List to make sure you don't forget anything!
Know anyone who might like this article? Please share!
Thank you for Reading!
Share the Knowledge!
If you know someone who’d benefit from this guide, spread the word!
If You Enjoyed this Guide. – You May Also Like:
- Navigating the Overland Track Solo
- Hiking Frenchmans Cap -Tasmania’s Iconic White Peak
- Hiking the Rees Dart Track – Mt Aspiring National Park
- The Rakiura Track – A Great Walk on Stewart Island
- Traverse Walls of Jerusalem to the Overland Track via Lees Paddock
- Hiking The Tahoe Rim Trail – A Guide for Overseas Visitors
- Conquering the Gold Coast Kokoda Challenge
- Plan Your Larapinta Trail Sections, Best Time of Year, Resupply, and Transfers
- Larapinta Trail Food Essentials and Nutrition Plan
Frequently Asked Questions
How long does it take to walk the Larapinta Trail?
On average the Larapinta Trail takes 14-16 days. There are 12 sections and at least 2 of these can be split, with a dry camp overnight. Many people also take an extra day at Ormiston Gorge or Standley Chasm and take advantage of a hot shower and the washing machine for fresh clothes.
Is the Larapinta Trail difficult?
Short answer yes. The Larapinta Trail is rated a Grade 4/5. The trail is consistently rocky and rugged, and weather extremes can be experienced at any time of the year. Its loose shale and boulders create treacherous ‘ankle-busting' conditions. With steep climbs and drops, it's a trail designed for the experienced hiker.
How much does it cost to do the Larapinta Trail?
- $125 per person Walking Trail Fee (14 days)
- $10 per night NT Parks campsite fees
- $15 per night Ormiston Gorge and Standley Chasm campsite fees
- $75- $120 per Food Drop
- $200 – $410 Transport to/from Redbank Gorge
For a cheaper alternative for your food drops, consult my Essential Guide to Larapinta Food Drops.
Can you do the Larapinta Trail on your own?
Absolutely! I solo-hiked the Larapinta Trail at 56 years old. Solo hiking the Larapinta Trail is incredibly special—it might be tough and long, but it's a life-changing experience. Although often alone on my journey, the camaraderie at the campsites was excellent. As with all remote hikes undertaken solo, ensure you carry a personal locator beacon for emergencies.
What time of year is best for Larapinta?
The best time to hike the Larapinta Trail is April to September. Beyond these months, temperatures can soar into the mid-40's C, with intense UV and hot winds. The rocky mountain ranges may further amplify the heat. For more details on hiking this climate, see my blog post, Hiking in Extreme Heat.
Do you need gaiters for Larapinta Trail?
Gaiters are a good idea for the Larapinta Trail. Where standard gaiters might be too hot and cumbersome some people opt for light, breathable ankle gaiters. They keep out the irritating spinifex needles, saving you from numerous stops to remove the invasive grass seed from your footwear.
What is the hardest part of the Larapinta?
Section 9 is renowned as one of the most difficult Larapinta Trail sections and requires considerable stamina if you plan to complete it in one go. It has particularly challenging ascents and descents between Waterfall Gorge and the Mt Giles Lookout. However, it is widely regarded as one of the most stunning, rewarding hikers with profound scenic views.
How much water do you need to carry Larapinta?
Carrying at least 6L of water each day is imperative on the Larapinta Trail, where water is a critical concern. Aside from water tanks maintained by the Parks, natural water sources are scarce throughout the trail. You'll often rely solely on these tanks for water resupply. Make sure to replenish your body's hydration every evening and morning at the trailheads.
What size pack for Larapinta Trail?
A 50-55L backpack is ideal for hiking the Larapinta Trail. Despite the 15-plus day trek, clothing dries quickly, so more than one change isn't necessary. Strive for a base weight no heavier than 15 kg—mine was between 10-12 kg. For a detailed rundown of my gear, take a look at my Complete Larapinta Packing List.
What shoes to wear on the Larapinta?
For the Larapinta Trail, sturdy hiking boots are a must. Footwear often fails here due to the trail's rocky, mountainous terrain, which is rough in many places. Expect the rugged landscape to wear on your boots, potentially causing scuffs, tears, or punctures, and prepare for it to challenge your feet through twisting, gnawing, rubbing, and jabbing.
How do I get to the start of Larapinta Trail?
The trail starts at the Old Telegraph Station, roughly 4 km from Alice Springs' town center via the Stuart Highway. Independent hikers heading east to west (E2W) can arrange transfers at this trailhead. For those embarking from Redbank Gorge on a west to east (W2E) trek, arranging transport is necessary for the 220 km trip.