

Navigating the Overland Track Solo
The Overland Track in Tasmania was my second-ever multi-day hike, hot on the heels of the Great Ocean Walk – I'd definitely caught the hiking bug!
Hyped as one of Australia's premier hikes, only 60 people per day (34 independent hikers) can start the Overland Track, making bookings for this sought-after hike competitive.
The Tasmanian Overland Track gets a lot of hype. It's a track that is well maintained, and each day, as 34 independent hikers depart Cradle Mountain Visitors Centre, a camaraderie develops within the cohort that I have not experienced since.
Possibly because each evening, hikers congregate inside or around one of the six huts along the track or that, for a lot of people, this is their first multi-day hike. I'm still friends with the group I “did the Overland with,” which is special. This makes hiking the Overland Track solo a great experience as you will connect with people from day one.
The Overland Track itself is not difficult and is clearly signposted. It's touted as a Grade 4 hike, but for most fit people and experienced hikers, the Overland Track is a moderate hike.
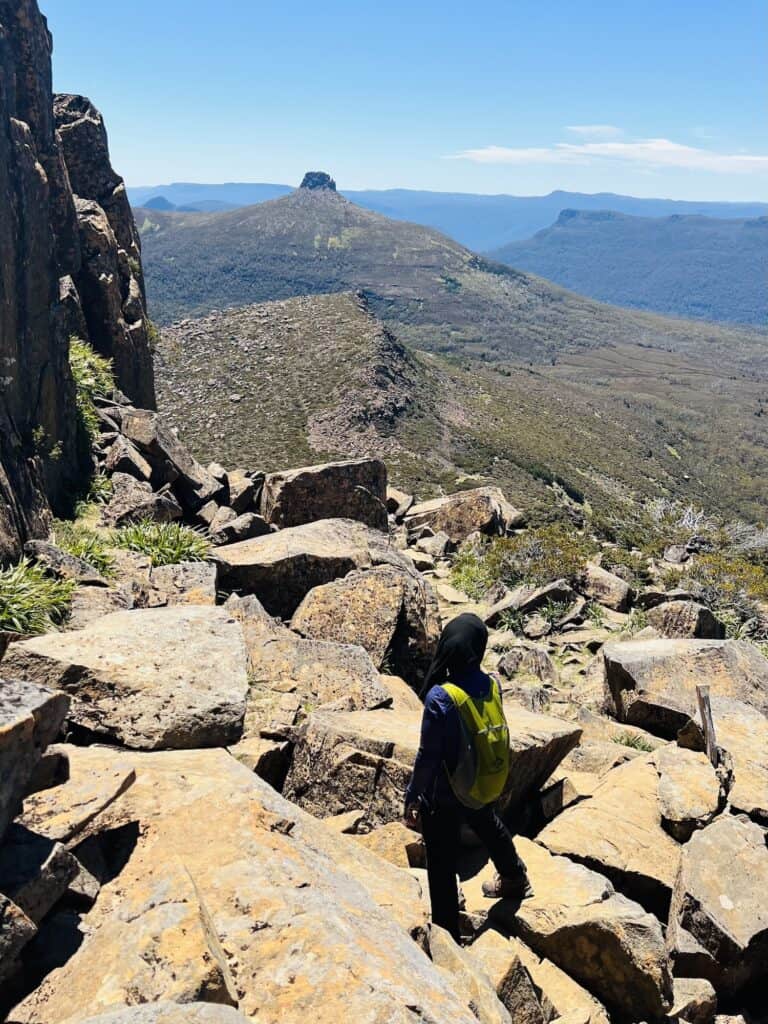
However, adverse weather conditions can quickly turn this hike into a difficult one. As well, there are several side trips that are more advanced than the Overland Track itself and require a degree of rock scrambling.
Lets dive in and check out the Overland Track!
Quick Links – Main Points Covered in this Guide:
- Overland Track Maps and Elevation
- Overland Track Bookings
- The Overland Track Orientation Session
- The Overland Track Accommodation
- Sections and Distances Between Huts
- Track Notes
- Transport and Logistics
- Overland Track Packing List
A full list of inclusions can be found in the Table of Contents
This article may contain affiliate links. If you make a purchase using one of these links, we may receive compensation at no extra cost to you. See our Disclosure Policy for more information.
The Overland Track Tasmania – Overview
| Location | Cradle Mountain-Lake St Clair National Park, Tasmania, Australia |
| Distance | 78.5 km / 47.7 mi (excluding side trips) |
| Elevation Gain | 1461 m / 4793 ft |
| Highest Point | 720 m / 2360 ft |
| Duration | 6 – 8 Days |
| Trail Type | Point to Point |
| Grade | 3-4 |
Map of The Overland Track
Elevation Profile (incl. side trips)

To purchase topographic maps, head to TasMap or in person at Cradle Mountain or Lake St Clair visitor's centres. You will also need a compass and the knowledge to use it. I recommend taking a navigational course. Just like first aid, navigation is a good skill to have.
I attended a navigation course at Mt Barney Lodge in Qld. There are in-person training sessions in most locations, but if you can't get to any or need to brush up on your skills (like me), then The Columbia River Orienteering Club has excellent tutorials on YouTube. They also have tutorials on using GPS systems such as GAIA and similar.
For an online Larapinta Trail map, I recommend FarOut Guides. Their guides are excellent, and I've also used them for the Larapinta Trail, Greenstone and Caples Track, and the Tahoe Rim Trail.

Know Before You Go
Overland Track Bookings
A permit is required between 1 October and 31 May, and there is a maximum limit to the number of departures each day – 60 persons, 34 of these being independent hikers. The permit now includes the Parks Pass for entry into Tasmanian National Parks.
During the off-season (1 June – 30 September), permits are not required, but hikers must carry a Parks Pass. Permits are for the start dates only, allowing hikers to walk the track at their own pace.
Bookings open for the Overland Track on 1 July annually, and bookings fill up very quickly. As soon as you know your dates, it's advisable to jump on and secure your spot.
Concession prices are available for Australian residents. For fee structures and to book the Overland Track, click here
The Cradle Mountain Shuttle Bus – For Day Hikers
Bus passes are included with Overland permits., But if you are visiting Cradle Mountain and don't intend to hike the Overland Track, you will still need to purchase a Tasmanian Parks Pass.
A daily shuttle bus departs from the Cradle Mountain Visitors Centre for Ronny Creek 15 minutes during the summer months. The shuttle cost is $15 return (under 18 travel free) and is valid for 72 hours, so it is perfect for day-trippers or those hiking off the Overland Track.
You can purchase your bus pass and Tasmanian Parks Pass at the Cradle Mountain Visitors Centre, or Online


The Overland Track Orientation Session
A group orientation session is held before departure at the Cradle Mountain Visitor's Centre for all hikers embarking on the Overland Track. Due to the number of newbie multi-day hikers and overseas guests, the compulsory orientation session is informative and totally worthwhile.
You must sign a form stating you have the essentials to protect yourself against the elements, such as a tent, sleeping bag, waterproof pants, jacket, etc. This is alpine Tasmania, and rapidly changing weather conditions can occur anytime.
They will check your bag if they suspect you are not adequately prepared. See my Overland Track Packing List for my recommendations.

The Overland Track Options and Direction
From 1 October to 31 May, the track must be hiked southbound, starting at Ronny Creek and finishing at Lake St Clair.
Outside the permit season, hikers can walk the track in any direction. There are several side trip options available (see Sections)


Supply and Resupply on The Overland
There are no resupply options on the trail. Most people stock up in either Launceston or Hobart, where there are several camping/outdoor stores. The Overland Track Transport, one of the preferred transport providers, also sells a variety of hiking essentials (including food and gas) should you have forgotten anything.
Best time to Hike The Overland Track
From 1 October until 31 May, are considered the “summer months,” and permits are required. However, January through March are the optimum months for weather and the number of daylight hours.
During the off-season, hikers can still walk the Overland Track, but it's suitable for experienced hikers only due to weather extremes.


The Overland Route Description
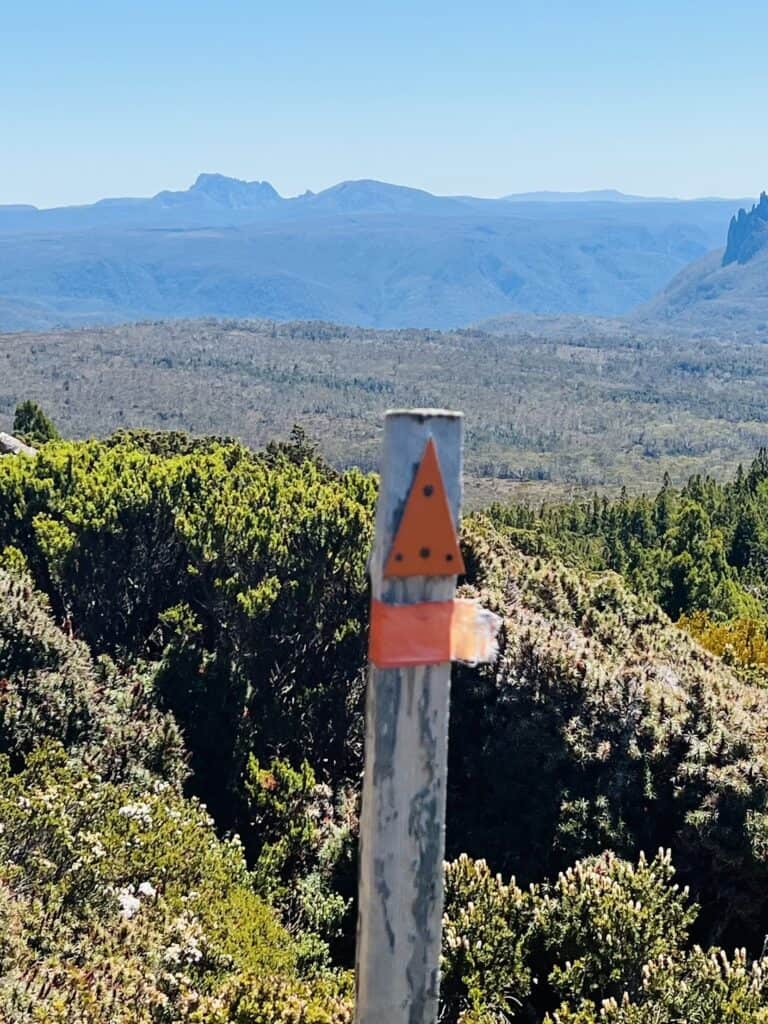
The Overland Track is well-marked. The track consists of boardwalk across areas which are considered fragile as well as unformed track. Side trips to the mountain summits include boulder climbing, also known as rock scrambling.
Water Sources on The Overland Track
Water is plentiful along the way, and you can safely fill up at the many streams you cross.
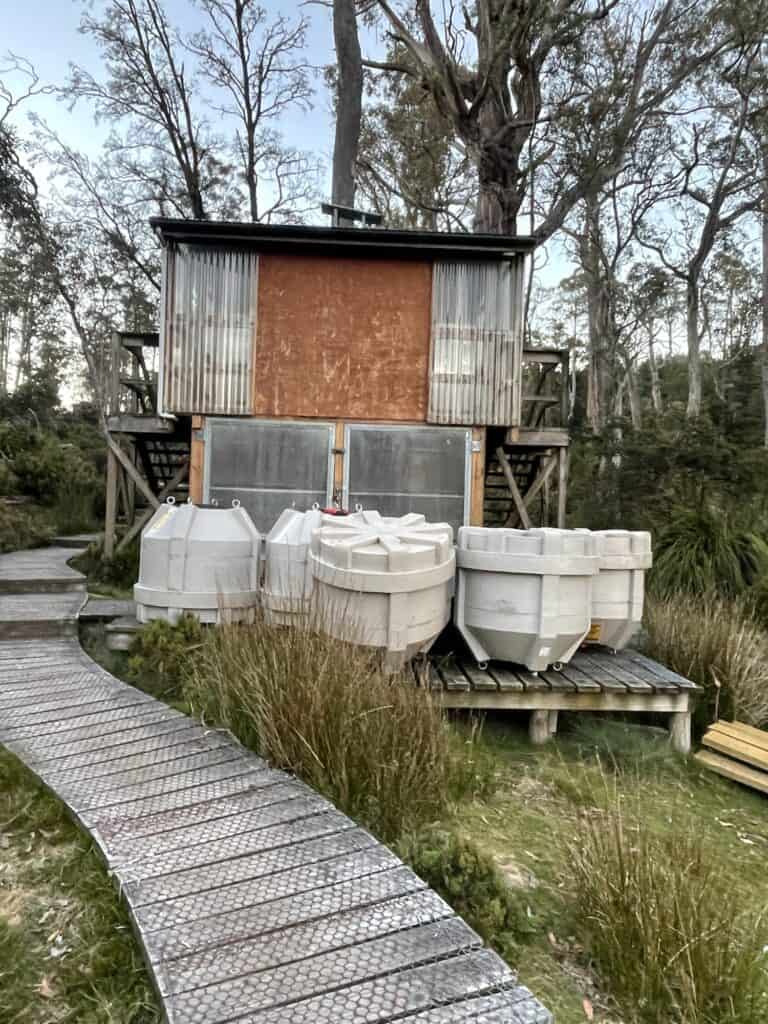
Each hut has a large water tank. As it's rainfall from the roof, and there are A LOT of possums climbing all over the huts, it is advisable to treat it.
Safety on The Overland Track
The primary safety concern with the Overland Track is the possible rapid change of weather as snow has been known to occur on any given month.
There are four emergency huts along the track; however, in the case of a sudden snowstorm, setting up a shelter and getting warm should be a number one priority.

Pack Light, Pack Right. Free Multi-Day Hiking Packing List
Plan methodically and keep track of every essential for your next multi-day hike. Add notes and quantities, save or print your list, and share it with hiking partners so everyone knows what’s covered. Works on any device.
Dogs and Drones
Dogs are not allowed. Drones are not permitted in any Tasmanian National Park.
Overland Track Accommodation
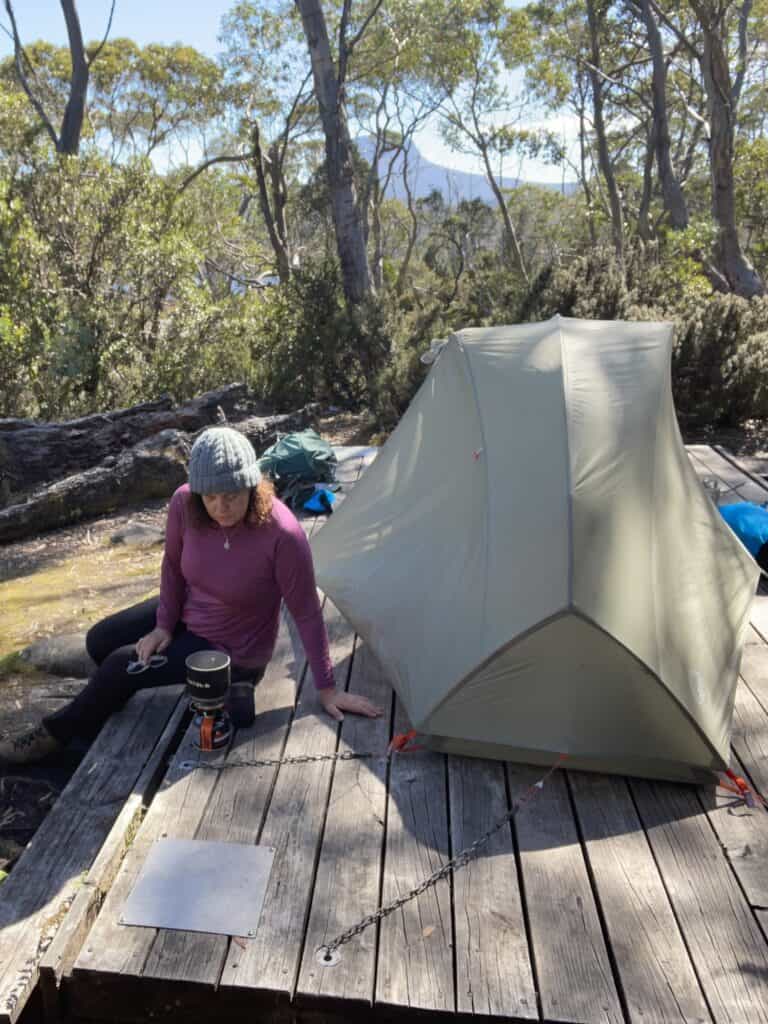
The trail has seven huts. From south to north: Waterfall Valley, Windermere, Pelion, Kia Ora, Bert Nichols, Narcissus, and Echo Point. Accommodation inside the huts is on a first-come, first-served basis, and there are also wooden tent platforms outside each hut (except Echo Point) with chain and nail anchor points.


All huts have composting toilets, water tanks, a fire for when the temperature delves below 10 C, and stainless steel tables and benches. The sleeping spaces are bunk-style wooden platforms with no mattresses; you use your sleeping pad.
Waterfall Valley, Windermere and Kia Ora have recently been replaced, and the modern buildings are thermally efficient and operate using solar power.
The new huts have some lighting in the common rooms, but none in the bunk rooms. The older huts have no lighting.
Remember head torch etiquette and turn on your red light when using your head torch around other people or getting up to go to the loo at night.
Pelion Hut can also be used by hikers coming across from the Walls of Jerusalem with the intention of hiking the Mt Ossa summit.
The Overland Track Sections and Distances
Hikers can start the Overland Track at the Cradle Mountain Visitors Centre, but most people opt for the free shuttle bus to the trailhead at Ronny Creek. If you wish to walk, it's a 7km easy boardwalk track, which will take approx 2 hrs.
|
SECTION 1 |
|
|
Ronny Creek to Waterfall Valley Hut: |
10.7 km 4 – 6 hours |
|
Side Trips |
|
|
Cradle Mountain Summit: |
2 km 2 – 3 hours (rtn) |
|
Barn Bluff: |
7 km 3 – 4 hours (rtn) |
|
SECTION 2 |
|
|
Waterfall Valley hut to Lake Windermere: |
7.8 km 2.5 – 3.5 hours |
|
Side Trip |
|
|
Lake Will: |
3 km 1 hour (rtn) |
|
SECTION 3 |
|
|
Lake Windermere to Pelion: |
16.8 km 5 – 7 hours |
|
Side Trips |
|
|
Old Pelion Hut: |
1 km 0.5 hour (rtn) |
|
Mt Oakleigh: |
8 km 4 – 6 hours (rtn) |
|
SECTION 4 |
|
|
Pelion to Kia Ora: |
8.6 km 3 – 4 hours |
|
Side Trips |
|
|
Mt Ossa: |
5.2 km 4 – 5 hours (rtn) |
|
Mt Pelion East: |
2.4 km 2 hours (rtn) |
|
SECTION 5 |
|
|
Kia Ora to Bert Nichols Hut: |
9.6 km 3.5 – 4.5 hours |
|
Side Trips |
|
|
D’Alton and Fergusson Falls: |
1 km 1 hour (rtn) |
|
Hartnett Falls: |
1.5 km 1 hour (rtn) |
|
SECTION 6 |
|
|
Bert Nichols Hut to Narcissus: |
9 km 3 – 4 hours |
|
Side Trips |
|
|
Pine Valley Hut: |
4.7 km 1.5 – 2 hours (one way) |
|
Narcissus to Cynthia Bay: |
17.5 km 5 – 6 hours |
As you can see, the main Overland Track sections are relatively short, giving you plenty of opportunity to take the side trips.
Most people miss Pine Valley Hut, mainly due to time restraints, or they feel they've “done the Overland” – but in my opinion, Pine Valley Hut, The Acropolis and the Labyrinth were pretty spectacular.
Pine Valley Hut had a distinctively different vibe, probably as it was filled with non-Overlanders, many of them local Tasmanians.
I've travelled from Narcissus to Cynthia Bay by walking the track and taking the ferry. I enjoyed the hike around Lake St Clair; however, I get it that the ferry ride across the lake is a fantastic end to the whole trip, especially if you are catching the ferry with the rest of your cohort.


The Overland Track – Track Notes
I won't go into absolute depth on each section as the reality is, you'll experience that yourself. There are a few tricky bits which I'll go into, but I'll give a brief overview of “my hike”.
For a detailed description of each section, visit the Tasmanian Parks and Wildlife Overland Track Walk Notes.
Starting Out on The Overland Track
The Overland Track was my second multi-day hike, so I was still a bit of a grommet (Aussie slang for rookie or inexperienced person). The whole experience was super exciting, and I'd already connected with a few others on the Facebook page – which is very active and informative.
You need to be at the Cradle Mountain visitors centre for a 9 am start for registration and a compulsory orientation. The orientation is really informative and covers situations such as hypothermia, alpine safety, standard LNT principles, and what to expect on the trail.
You are required to sign a safety checklist, which is emailed to you once you make your booking. The checklist confirms you are carrying the absolute minimum for what is needed when hiking in the alpine region. It's all pretty standard, and I have also included an Overland Track Packing List covering these essentials. As well, you can access my full gear list of what I take on my multi-day hikes.


The bus to Ronny Creek is complimentary with an Overland Track pass. Accompanying the excited hikers destined for the Overland Track are day trippers and day hikers on the bus who want to view or climb Marion Pass or Cradle Mountain.
Tasmanian Parks supplies log books at each trailhead of all national parks, and Ronny Creek is no exception. People do get a little blasé with signing in and out, but the log books are there for a purpose – so the Tasmanian Parks service can locate you in the case of an emergency.
Marions Lookout
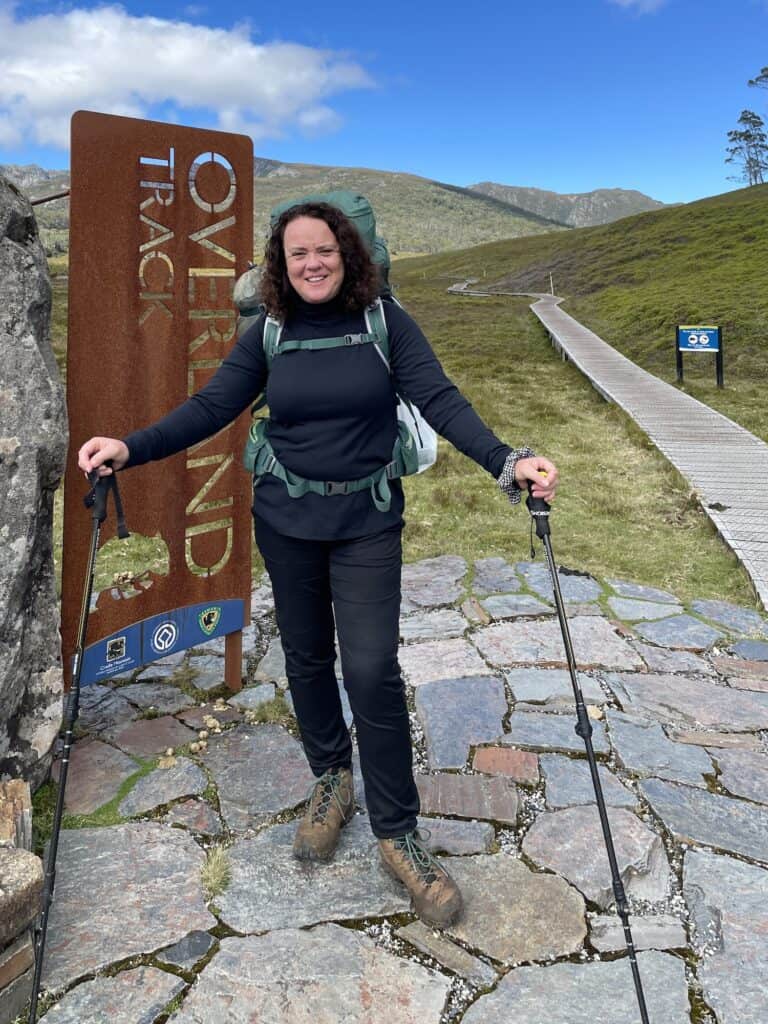
After signing in, it's time for the obligatory photo with the iconic “The Overland Track sign” before setting off. The first day of the main Overland Track is the most challenging, which is unfortunate as you're carrying 7 days of food. But it's not really that difficult and the difficult part is only a short distance.
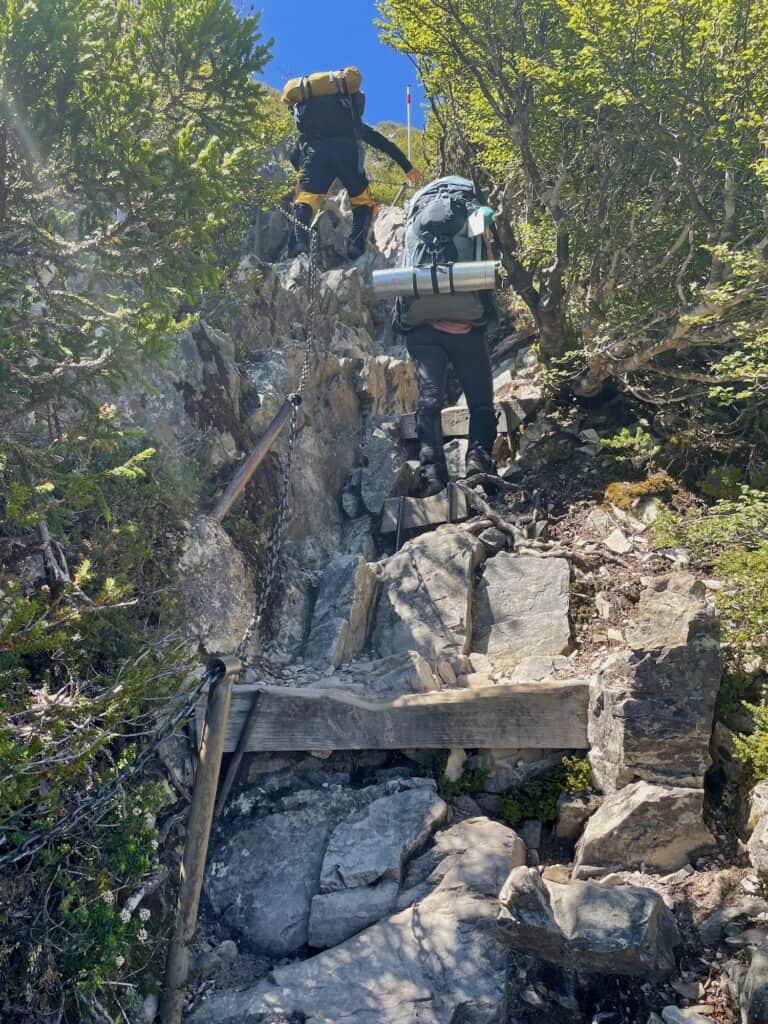
The climb up to Marions Lookout is the steep part of the section, and towards the top of the lookout, there are chains to hang on to and help haul yourself up. Just make sure you have a hat and windbreaker/fleece handy at the top to put on straight away, as the top is very exposed, and you'll be cooling down quite rapidly.
The lookout is a great place to grab a bite to eat and enjoy the view.
Pack Light, Pack Right. Free Multi-Day Hiking Packing List
Plan methodically and keep track of every essential for your next multi-day hike. Add notes and quantities, save or print your list, and share it with hiking partners so everyone knows what’s covered. Works on any device.
Waterfall Valley Hut and Windermere Hut
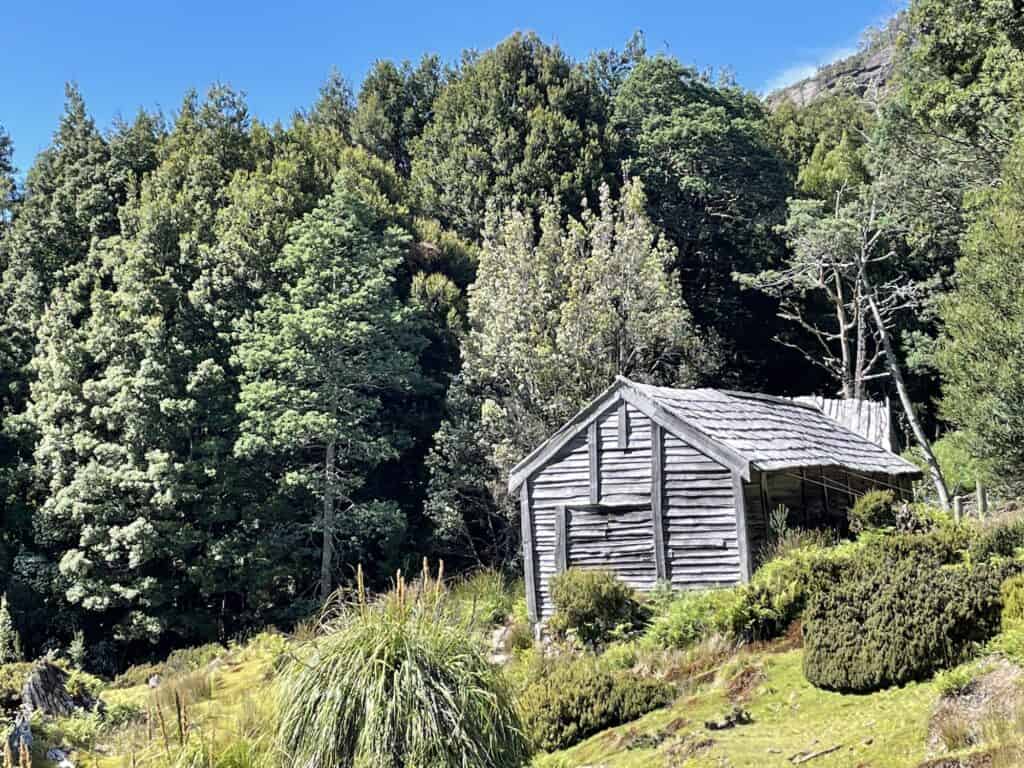
I didn't attempt the climb to Cradle Mountain summit during this trip; I was still finding my feet with this multi-day hiking gig. So I carried on to Waterfall Valley Hut, which was newly built and very nice.
All the huts along the Overland Track are gradually being replaced with smart, new, thermally efficient buildings that operate using solar power. Although unlike the fabulous Tahune Hut on nearby Frenchmans Cap trail, the Overland Track huts do not have outlets to charge your devices.
For a trail this long, I take 2 x Nitecore NB10000 lightweight power banks which charge my iPhone, head torch, kindle (if I take it), and my Garmin inReach. I do keep my power banks warm and my phone on airplane mode to conserve power.
The second day on the Overland Track took me to Windermere hut, which, during my time, was still one of the older huts.
It's a short section that could easily be combined with the previous or the next, Windermere to Pelion. Note – If you are planning to hike the summit of Mt Oakleigh (8km – 4-6 hours), combining this section with the next might not be doable.
The great thing about Windermere is the lake where you can go for a refreshing swim if it's a hot day (or not).

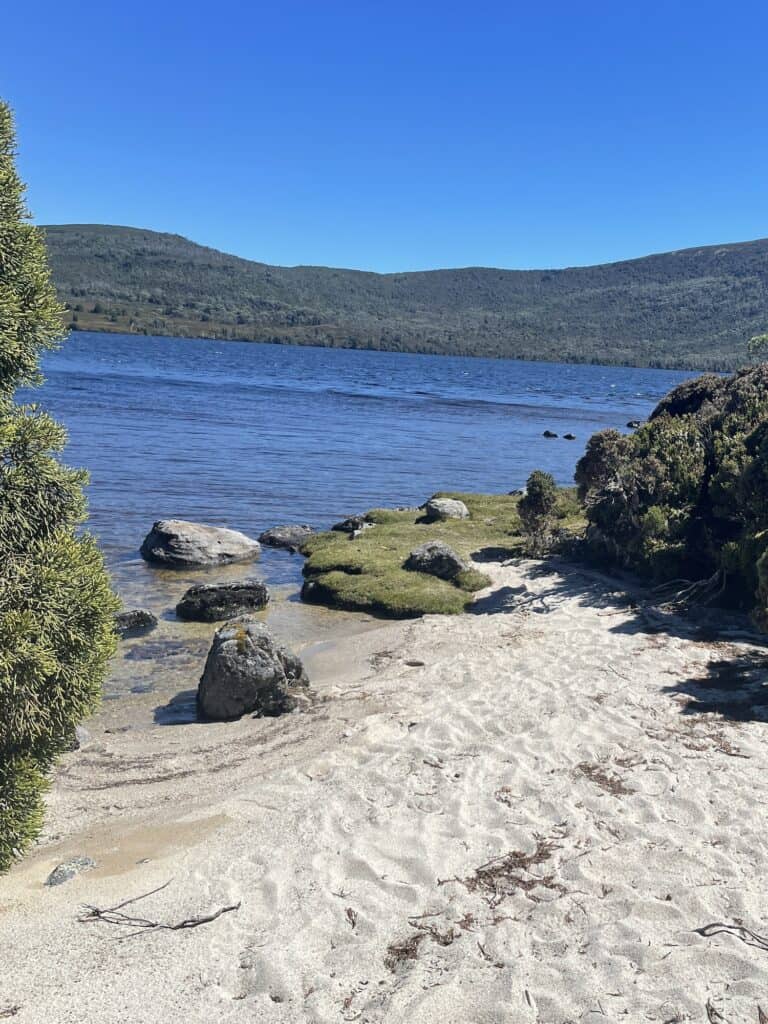
Pelion Hut
Windermere to Pelion is the longest section on this trail, and at 16.8 km, 5-7 hours, it's not that bad, and you can really take your time.
This section has a longish incline that involves stepping over numerous slippery rocks and tree roots. I noticed the New South Welshmen and Victorians seemed to find this section challenging, while Queenslanders used to wet rainforest tracks, such as those in the east coast Lamington National Park, found it a doddle.
Just before you come to Pelion Hut, a junction to the east takes you to Old Pelion Hut. It's only a short walk off the main track to this historic little hut with a replica of the visitor's book from the turn of the century.
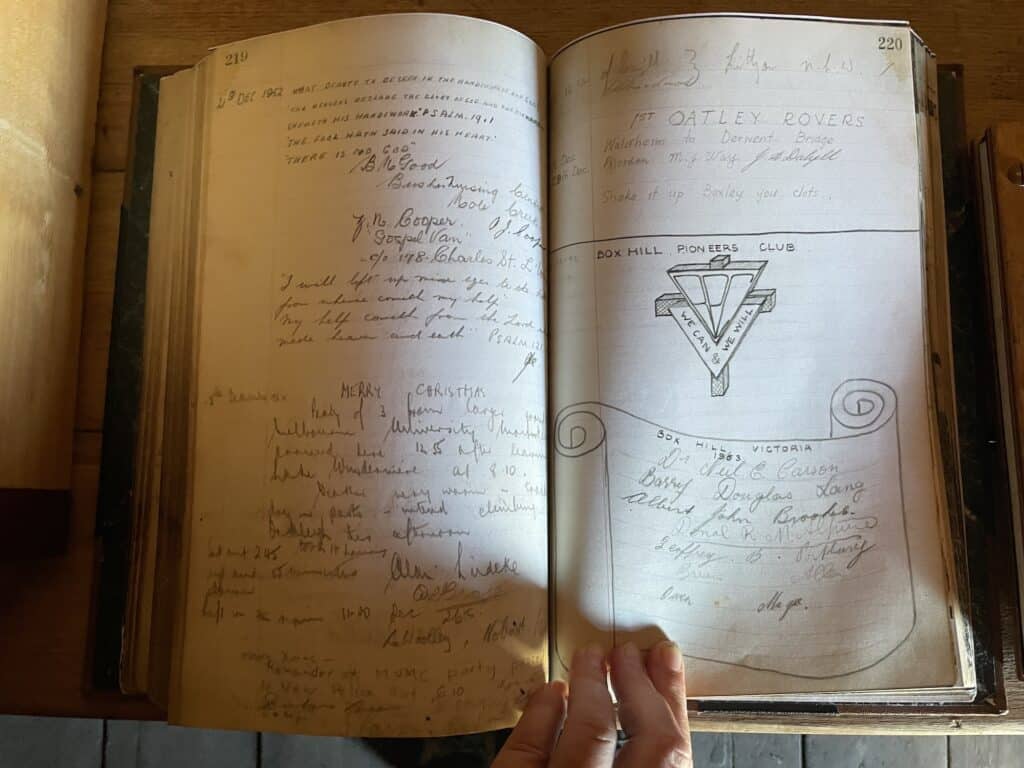
There is also a swimming hole for a dip in the creek further down from the hut. I continued to Pelion Hut and sorted my gear before returning, as the journey to Old Pelion is only 1 km, 0.5 hour.
Pelion Hut differs in a couple of ways. Firstly, there are only a couple of wooden tent platforms. The main camping area is behind the hut on a grassy open area.
Secondly, if you're there and wondering why there are so many more people than the previous huts, it's additional hikers coming over from nearby Walls of Jerusalem National Park who can officially stay for up to 2 nights.


I did the Walls of Jerusalem hike into Cradle Mountain via the Lees Paddock Trail the following year, and to date, that has been one of my favourite Tasmanian hikes.
Regardless, Pelion Hut is lovely despite being one of the old huts on the Overland Track. The view out to Mt Oakleigh is spectacular, and by the time you get there, you will have started to forge friendships with the other hikers in your cohort.

Mount Ossa and Mount Pelion East
The next day is when you want to leave bright and early to try and summit Mount Ossa. There is a junction 4.5 km along the track heading south with a platform to leave your packs.
The cross junction gives you the option to head east to summit Mount Pelion East (1433m) – 2.4 km, 2 hours or west to summit Mount Ossa (1617m) – 5.2 km, 4-5 hours.
Currawongs
Beware the Currawong! The extremely smart Black Currawong (Strepera fuliginosa) is native to Tasmania. They wait at junctions on the Overland Track for hikers to leave their packs, before swooping down and opening the packs with their powerful beaks.
I've seen empty food wrappers splayed across the wooden platforms as Currawongs have delved into unsecured abandoned packs. I emptied my hip pockets for starters and used reusable zip ties to secure my zips. If you stash your pack with the straps facing up, the Currawong will find it harder to access, as they're not strong enough to roll your pack over.
On this particular trip, I climbed Mount Pelion East. It's really important to Hike Your Own Hike (HYOH). If you don't feel capable of climbing to a summit such as Mt Ossa, then don't.
There are a lot of newbies hiking the Overland Track, and the climb up to the top of Mount Ossa can be treated as a right of passage. I didn't feel I was capable at the time, but when I returned a year later, I found it easy and enjoyable.
Mount Pelion East is a nice alternative. The views across Mount Ossa and beyond are sensational. Although steep, it's shorter, so you can really take your time.
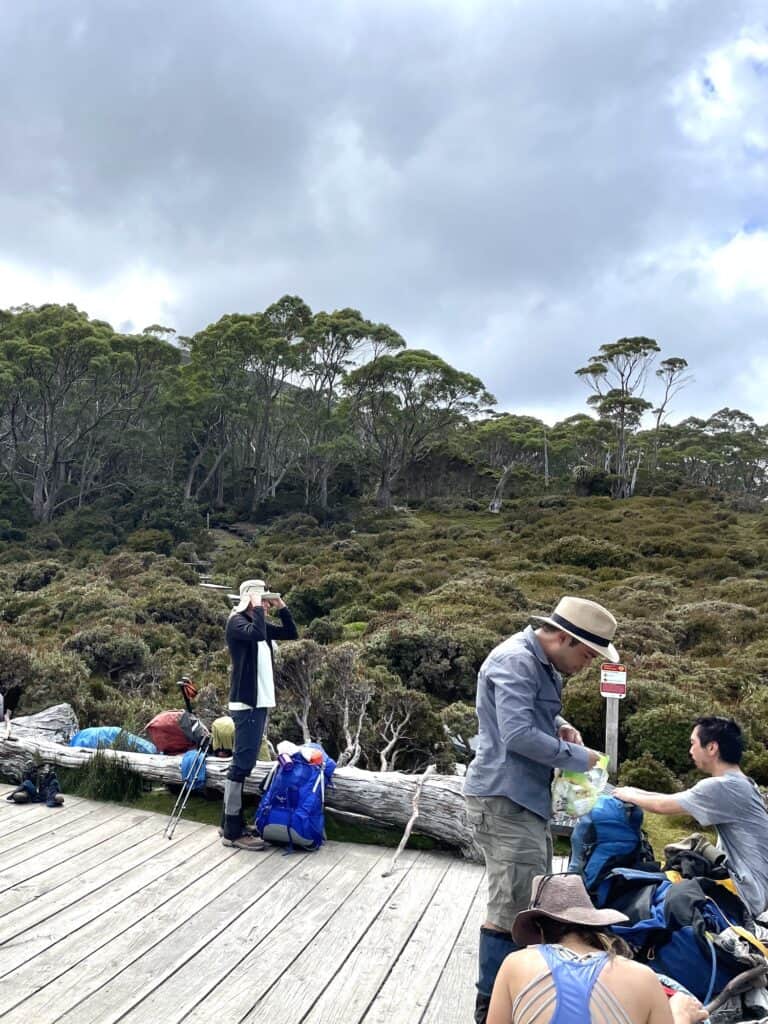
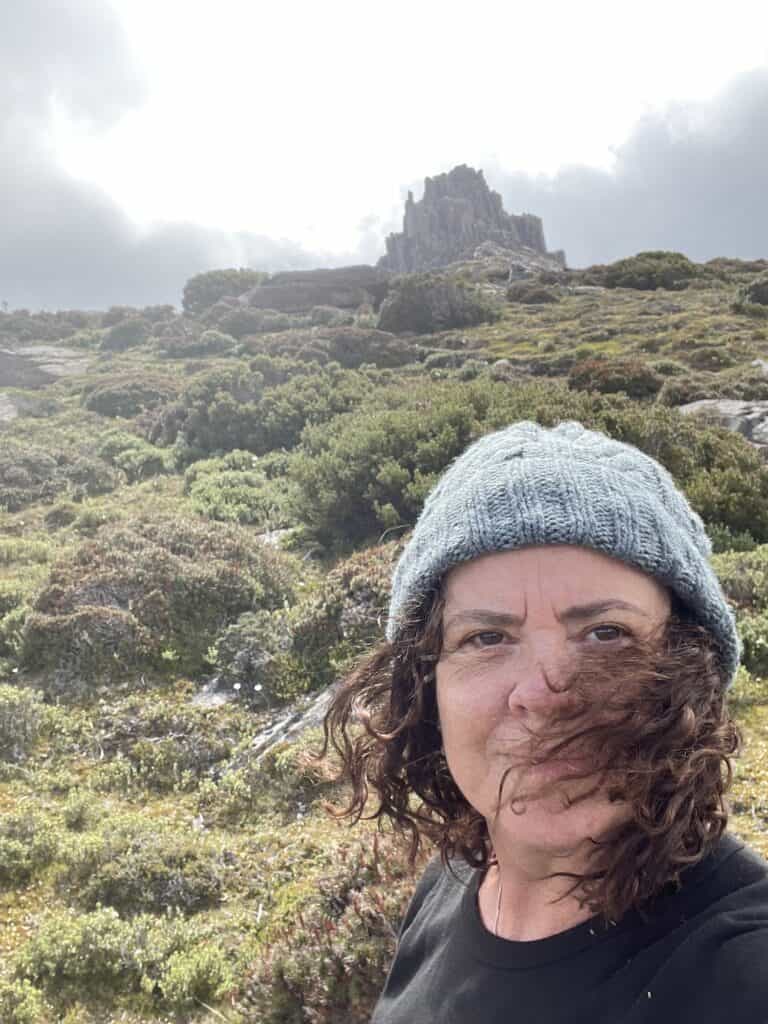
Kia Ora Hut and Bert Nichols Hut
Kia Ora Hut to Bert Nichols (Windy Ridge) is another short section that can be combined with the following on to Narcissus. I took side trips to D'Alton and Fergusson Falls, which extended the day a bit.
A note here: if you see hikers emerge from Hartnett Falls, they've come through on the legendary Never Never Trail from the Walls of Jerusalem National Park.
Bert Nichols is one hut I would miss if doing this again – which I did a year later and carried on to Pine Valley Hut. In my opinion, it's cavernous and lacks personality.
The valley also houses huts used by the tours and slack packers, so the night I stayed at Bert Nichols, I was awake until around 2 am listening to late-night revellers. Not to put you off – these are my daily walk notes and my opinion only. You might think otherwise or have an entirely different experience.
The following day, after a sleepless night, I hit the trail early for the walk out to Narcissus, where I caught the ferry to Lake St Clair. If I weren't to detour to Pine Valley Hut, I would bypass Bert Nichols and continue to Narcissus for the night and either chill by the lake shores and catch the ferry or hike out alongside Lake St Clair to Cynthia Bay.

Like This?
We'd love you to share this great guide!
The Lake St Clair Ferry Service
The operators of the ferry service get a lot of flack for not answering the phone or not being contactable. The ferry service is owned and operated by the Lake St Clair Lodge. The lodge is involved with a Tasmanian tourism training scheme that helps young people from developing countries obtain hospitality training.
When you ring through to change a booking, the trainee staff at the hotel will often answer the phone, and sometimes they might need help answering a question. Be patient with them; they are trainees, and English is not their first language.
Hikers from the Overland Track are not the only passengers on the ferry. Many people take the ferry as a day trip or to start/return from Narcissus for the many other overnight hikes in this section of the national park.


The ferry operator is quite flexible with when you take your passage, even if you arrive with no ticket. I arrived on a day in the first week of January and managed to get on. If you can't, Narcissus is a nice hut to wait out and have a cuppa.
When you arrive in Narcissus, there is a 2-way radio inside the hut. Pick up and speak to the lodge staff to confirm your passage on the next ferry. If you are earlier or later than your original booking, they will confirm your passage, and if the boat is “full”, you can go on standby.
To book the Lake St Clair Ferry Service – click here

Lake St Clair Lodge
And that's a wrap! Arriving at the jetty in Cynthia Bay lands you at the Lake St Clair visitors centre and the Lake St Clair Lodge. Don't forget to sign the log book and grab a burger and beer at the lodge while you wait for your transport.


Transport, Accommodation and Logistics
Shuttle Services
Transport Launceston – Cradle Mountain and Lake St Clair – Launceston
Overland Track Transport provides a daily shuttle service from Launceston to Cradle Mountain Visitors Centre, which coincides with the check-in and orientation.
They do a luggage storage service and sell food and other supplies should you need to top up if you were going on to hike the nearby Frenchmans Cap. The 2 pm shuttles departing Lake St Clair to both Hobart and Launceston offer a free ticket transfer if you finish early or late (subject to availability).
E Guide is another operator with loads of options for getting to Cradle Mountain for the start of the Overland and transport to Hobart and Launceston from Lake St Clair.
Transport to and from Hobart
Another option for returning to Hobart is to make your way to the Derwent Bridge Hotel, which is an hour's walk along Lake St Clair Road, and catch the Area Connect bus to Hobart, which runs each Tuesday and Friday at 11.35 am. It's also $28 compared to $80 for the shuttle, so a significant savings.
The Derwent Bridge Hotel offers free camping to completers of the Overland Track as long as you buy a meal. The chef is Sri Lankan, and his curries are to die for.
Transport from Hobart to Cradle Mountain is tricky and expensive. Your options are limited so it’s just way easier flying into Launceston, or catching the bus Hobart to Launceston or Deloraine, to meet the Launceston shuttle.
Wild Island Adventure has shuttle services between Hobart and Cradle Mountain, and Lake St Clair to Hobart, but they are costly.


Getting to The Overland Track by Car
As with all Point to Point hikes, the car shuffle is always an issue. It's a 180 km drive between the two terminus, but there are a few shuttle operators that do “self-drive” options – notably E Guide, who seems to have half a dozen options available should you be driving.
Parking for The Overland Track
Parking at both terminuses is free as long as a valid Parks Pass is displayed.
Getting There and Away
Logistically, Launceston is the more accessible city for transport to Cradle Mountain, so it makes sense to land there. All major domestic airlines fly into Launceston and Hobart.
Where to stay in Launceston
Save Your Pennies
Pod Inn
Very Good and Won't Break the Bank
Hotel Grand Chancellor Launceston
Splash Out
Peppers Silo
Luggage Storage
Most hotels will provide luggage storage if you are returning to the hotel for a night after you complete the hike. If not, Overland Track Transport has a luggage storage service.
Like This?
We'd love you to share this great guide!
Overland Track Packing List
As with my Ultimate Gear List for Overnight Hikes, what I took on my Overland hike as a newbie, compared to what I took along a year later with quite a bit of experience when hiking the Walls of Jerusalem, differs from what I take along now as a seasoned hiker.
My Ultimate Gear List for Overnight Hikes is what I took on my Frenchmans Cap hike two years after completing the Overland. Lightweight hiking is extremely important to me. My pack now weighs half what it used to, and consequently, I find my hikes so much easier than I did when I first started.
Pack Light, Pack Right. Free Multi-Day Hiking Packing List
Plan methodically and keep track of every essential for your next multi-day hike. Add notes and quantities, save or print your list, and share it with hiking partners so everyone knows what’s covered. Works on any device.
Pack and Sleep System
Pack – Bonfus Framus 48L Ultra 200X Pack
I chose the Bonfus because of the internal frame. Weighing just 450 grams, the Bonfus 48L Framus is exceptionally well made and super strong, using the new Ultra 200X. Ultra fabrics are likely the strongest, most durable materials on the market, and many ultralight backpack makers are now moving towards Ultra. Plus, Ultra 200X is waterproof.
If you're new to exploring ultra-light packs and notice many are white, which seems odd for a pack about to get incredibly dirty, there's a reason. Most of the new fabrics used by ultra-light brands (not to be confused with the Ultra fabric) cannot be dyed easily, and if dyed, the chemical footprint is significant. The fabric is so durable; dirt just cleans right off, so the white colour is not an issue.
Bonfus packs are minimalist, meaning there are no additional zippers, pockets, bells and whistles. Trust me, you don't need them.
Tent – Big Agnes Copper Spur HV UL1 1-person tent
I have two tents: a one-person and a two-person. My one-person is the Big Agnes Copper Spur, and I purchased it before my first-ever multi-day hike. When I bought the tent, I remember thinking how expensive it was. Two years later, I did the maths and realised how much this tent cost me per night, which was incomparable to a night in a hotel.
Sleeping in my Big Agnes is like my little home, and when I'm inside, I feel safe (regardless of whether there are bears outside). The Big Agnes is also free-standing, which is very useful if camping on a rock or wood platform.
Tent Pegs – Fishbone Anchor Tent Pegs
For the love of God, please don't drill cup hooks or nails into the tent platforms. I just can't believe people do this. These Fishbone Anchor Pegs – pack of 10 (also available on Amazon) slip into the grooves of the planks and help secure your guylines. Super lightweight, they are also perfect for non-freestanding tents such as my 2-person UL LanShan 2 Ultralight Tent.


Sleeping Bag – Ultra Light Sleeping Bag
They don't make the bag I carry anymore; this is the closest thing I would replace my old one with. Temperatures on the Overland Track could potentially reach sub-zero, and you want a sleeping bag that will do the trick. If you already have a sleeping bag and want to increase the heat, you can invest in a Thermal Sleeping Bag liner, which will add up to 14C. Note this is dependent on individual body temperatures.
EDIT: Since writing this article, I have changed from a sleeping bag to a Sleeping Quilt
Sleeping Pad – Exped Ultra Sleeping Pad
Look for a sleeping pad which is insulated and has an R rating of at least +4. If you are unsure about what an R rating is, I've written a comprehensive article on sleeping pads which you may find useful.
The Essentials On “The Overland List”
Waterproof Jacket – Pataonia Waterproof Jacket
The Overland Track checklist lists a Waterproof Jacket with a “Storm Front”. What does a storm front refer to? It means when the front zip is covered by a flap of fabric so the zip is not exposed. It's not special; many jackets have this; you just probably haven't taken much notice until now. Now, whenever you look at a jacket, you'll notice if it's got a “storm front” or not. Your waterproof jacket will also double as a windbreaker.


Waterproof Pants – The North Face Antora Women's Waterproof Pants
A requirement for the sign-in process. Most people hike in quick-dry pants, so a bit of water isn't usually an issue. In alpine territory, the aim is not to get wet; getting wet combined with freezing temperatures is a recipe for disaster. If you meet very foul weather that turns to snow, your waterproof pants will also act as a windbreaker.
Gloves – XTM Real Deal Goretex Gloves
You might need them, or you might not. Your hands are one of the first to get cold when the temperature drops, and you'll be thankful you packed them – or that they were a requirement. These gloves are also lightweight and will dry overnight.
Beanie – Patagonia Brodeo Unisex Beanie
The old myth that we lose 10-45% of our body heat through an uncovered head has been debunked. However, our core temperature can drop substantially and rapidly with an uncovered head. This is mainly due to the large number of blood vessels in our scalp.
As the blood travels around the body, the environment quickly cools the blood crossing the scalp area. I keep my beanie in the outside pocket of my pack and put it on the moment I stop, even if it's just for a snack. I also sleep with it on. Bring a good one. This item is important.
Clothes I Wear Each Hiking Day
Top – Sun Hoodie
The alpine sun can get VERY strong, and it's deceptive because it can be cold at the same time. Introducing the Sun Hoodie. Sun Hoodies are an American thing. Almost every hiker in the USA wears or at least owns one, and the USA sun isn't as intense as ours down under.
I have no idea why they aren't worn or even sold in Australia. These tops are MAGIC. Super lightweight, the good ones are up to SPF 50 coverage, quick drying, absorbent..the list goes on. I started wearing one when I hiked the Tahoe Rim Trail, and I've never looked back.


Footwear – Topo Ultraventure
I often see posts on Facebook in almost every hiking group where people ask a huge group of faceless random strangers for advice on the best boot to buy. Hiking footwear is a highly personal choice and depends on your foot shape and how you walk – not how good they look or if someone else thinks they're great.
I swear by Topo trail runners. They're lightweight, quick drying and have a wide toe box so your feet can work naturally.


Bra – Patagonia Switchback Sports Bra
Undies – Under Armour Pure Stretch Hipster 3 Pack Briefs
My sports bra and underpants are black and serve as a bikini should I need to strip off for swimming. No need to pack a swimsuit!
I take 3 pairs of socks and 3 pairs of underpants. As soon as I wash and get into my camp clothes, I put on fresh underwear and socks and wash those worn throughout the day. The undies will likely dry overnight; however, I've hung my socks from my pack the next day to finish drying. This is a personal choice, as I prefer fresh socks and underwear daily.
Camp Clothes
Merino Base Layer – XTM Merino Wool Women's Thermal Top
Merino Pants – Icebreaker Merino Crush Womens Pants
I use my Merino thermal top and pants as camp clothes and pyjamas. I actually bought my Merino pants in Aldi, and they are the best pants ever. Unfortunately, I haven't been to Aldi again during “Merino base layer week”, and I would dearly love another pair. If you ever see them, nab them. They're affordable and good quality.
The Icebreaker brand is the closest I can find on the market.
To sleep, I would wear my Merino base layers, a beanie, my puffer jacket and my windbreaker draped over the sleeping bag if it's really cold.
Camp Gloves – XTM Merino Wool Gloves
Keep these dry for when you come in from the cold and wet.
Check out my Ultimate Gear List for Overnight Hikes, including what I carry in my first aid kit, my utility pouch and my poop bag.
Carrying a PLB on The Overland Track
While a Satellite Communication Device, such as a PLB is not mandatory, there have been many instances where Australian Search and Rescue Operators (SES) have found people quickly and efficiently when the hikers have had a Satellite Communication Device.
Unfortunately, there have also been many instances where the SES have been unable to locate missing or distressed hikers, as their whereabouts have just been guesswork. I always carry a PLB with me on all hikes outside urban areas, whether a multi-day or an afternoon hike.
You do not need a PLB for each group member, just one per group will suffice. PLB's are available for hire at the Cradle Mountain Visitors Centre; however, they have a limited supply so call ahead if planning on hiring.
Two forms of satellite communication systems which are widely available are the Personal Locator Beacon, which submits a one-way signal to a government system and Two-Way Satellite Emergency Notification Devices (SEND) which allow you to transmit and receive messages as well as request emergency rescue. Let's look at each of these in detail.
Personal Locator Beacons (PLBs)
Personal Locator Beacons (PLBs) are one-way emergency communication devices that operate on the 406 megahertz frequency. I use the RescueMe PLB unit.
The 406 megahertz distress frequency emitted from PLBs is detected by the international COSPAS-SARSAT satellite system for initiating search and rescue efforts.
PLBs require no subscription fees because the service is funded and provided by governments around the world as a public safety feature to assist in search and rescue operations.
The device is small, compact, and lightweight, making it suitable for various environments. To activate it, simply erect or deploy the antenna to a vertical position and press the designated ‘on' or activation button.
Once activated, your registered PLB contacts the nearest Rescue Control Centre relative to your location, and utilising Global Navigation Satellite System (GNSS) technology, it can pinpoint your position with an accuracy of up to 120 metres.
As of 2024, some models of PLBs now include a Return Link Service, which notifies you when your distress signal has been successfully received.
While the PLB, such as the RescueMe PLB, offers precise location tracking in emergencies, it can be complemented by Satellite Communication Devices, which allow for two-way messaging and additional communication capabilities.
Satellite Emergency Notification Devices
Two-Way Satellite Emergency Notification Devices (SEND), such as the Garmin InReach Mini, provide communication capabilities for both sending and receiving messages in remote locations.
SEND devices, like the inReach Mini, facilitate two-way messaging and emergency notifications using a commercial satellite constellation, different from the government-operated system used by PLBs
Subscription fees are required for access to the commercial satellite network that powers the device's communication services. This applies to both two-way messaging and SOS functionality. If you pause your subscription when at home, reactivating it is imperative; otherwise, the device won't work.
Upon triggering an SOS, the device connects you to a 24/7 monitoring centre that communicates with you directly and coordinates with local search and rescue teams.


The Garmin InReach Mini, with its advanced technology, also provides real-time location tracking and sharing, offering peace of mind to users and their loved ones. So basically Mom can follow along.
Recent models of devices like the Garmin inReach Mini also include features such as weather updates, GPS navigation, and mapping, adding further value beyond the emergency communication capabilities.
While these devices are more feature-rich with additional functionalities, including two-way messaging, they complement the simple yet reliable one-way distress signalling of PLBs.
My PLB of choice is an Ocean Signal Rescueme PLB1 Personal Locator Beacon
The Overland Track Guided Tours
While tackling the Overland solo offers incredible freedom, there are definite advantages to joining a guided group — especially if it’s your first time hiking in Tasmania’s wilderness.
Guided tours take the heavy lifting out of logistics: permits, hut bookings, gear, transport, food drops, weather planning — it’s all handled for you.
Plus, expert guides bring local knowledge, safety backup, and can enhance your experience with side trips and secret spots you might otherwise miss.
If you want to focus fully on the trail without sweating the behind-the-scenes work, a guided Overland Track hike might be the perfect choice.
Here are 3 excellent guided tours we recommend
🥾 57Hours – Overland Track Guided Adventure
For hikers who want the true Overland experience, without the heavy pack pain.
This fully supported 7-day adventure lets you walk Tasmania’s iconic track without carrying a tent or cooking gear. Stay in simple but comfortable huts, enjoy hearty camp meals, and tackle bucket-list side trips like Mount Ossa (Tasmania’s highest peak).
Expect a balance of challenge and comfort: you'll still walk the full track, but with lighter loads and expert guides to help you get the most out of every side trail, summit, and swimming hole.
👉 Check out the 57Hours Overland Track Tour
🎒 Intrepid Travel – Trek the Cradle Mountain Overland Track
For those wanting a small-group, full-carry experience with a social, supported vibe.
Intrepid’s 6-day Overland Track trek keeps it raw and real: you’ll carry your full pack (tent, food, gear), camp in stunning wilderness, and be guided by passionate locals who love showing off Tasmania’s wild side.
This is the Overland as it’s meant to be — rugged, remote, and rewarding — but with the backup of an experienced team making sure you hit the best highlights, from epic summit side trips to lesser-known lookouts.
👉 View Intrepid’s Overland Track Adventure
🌿 Intrepid Travel – Tasmania Adventure (Including Dove Lake)
For those looking for a comprehensive Tasmanian experience with a taste of the Overland Track.
This 6-day journey offers a curated exploration of Tasmania's diverse landscapes and cultural highlights. From the pristine beaches of Freycinet National Park and the striking Bay of Fires to the ancient Tarkine rainforest and the iconic Dove Lake near Cradle Mountain, this tour balances scenic walks with cultural experiences. Guided by knowledgeable locals, you'll delve into Aboriginal heritage at the ningina tunapri gallery, sample regional delicacies in St Marys, and traverse varied terrains without the need for heavy packs. It's an ideal option for those wanting to experience Tasmania's natural beauty and cultural richness in a well-supported, immersive format.
👉 Explore the Tasmania Adventure Tour
Final Thoughts on The Overland Track
The Overland Track is a great entry-level hike for those attempting their first multi-day hike, as the main track is relatively easy, safe, and has a great infrastructure, similar to the Three Capes Track.
It also has side trips well suited to experienced hikers. Those wanting to push the limits can also combine sections to finish the track, including side trips in 4 days.
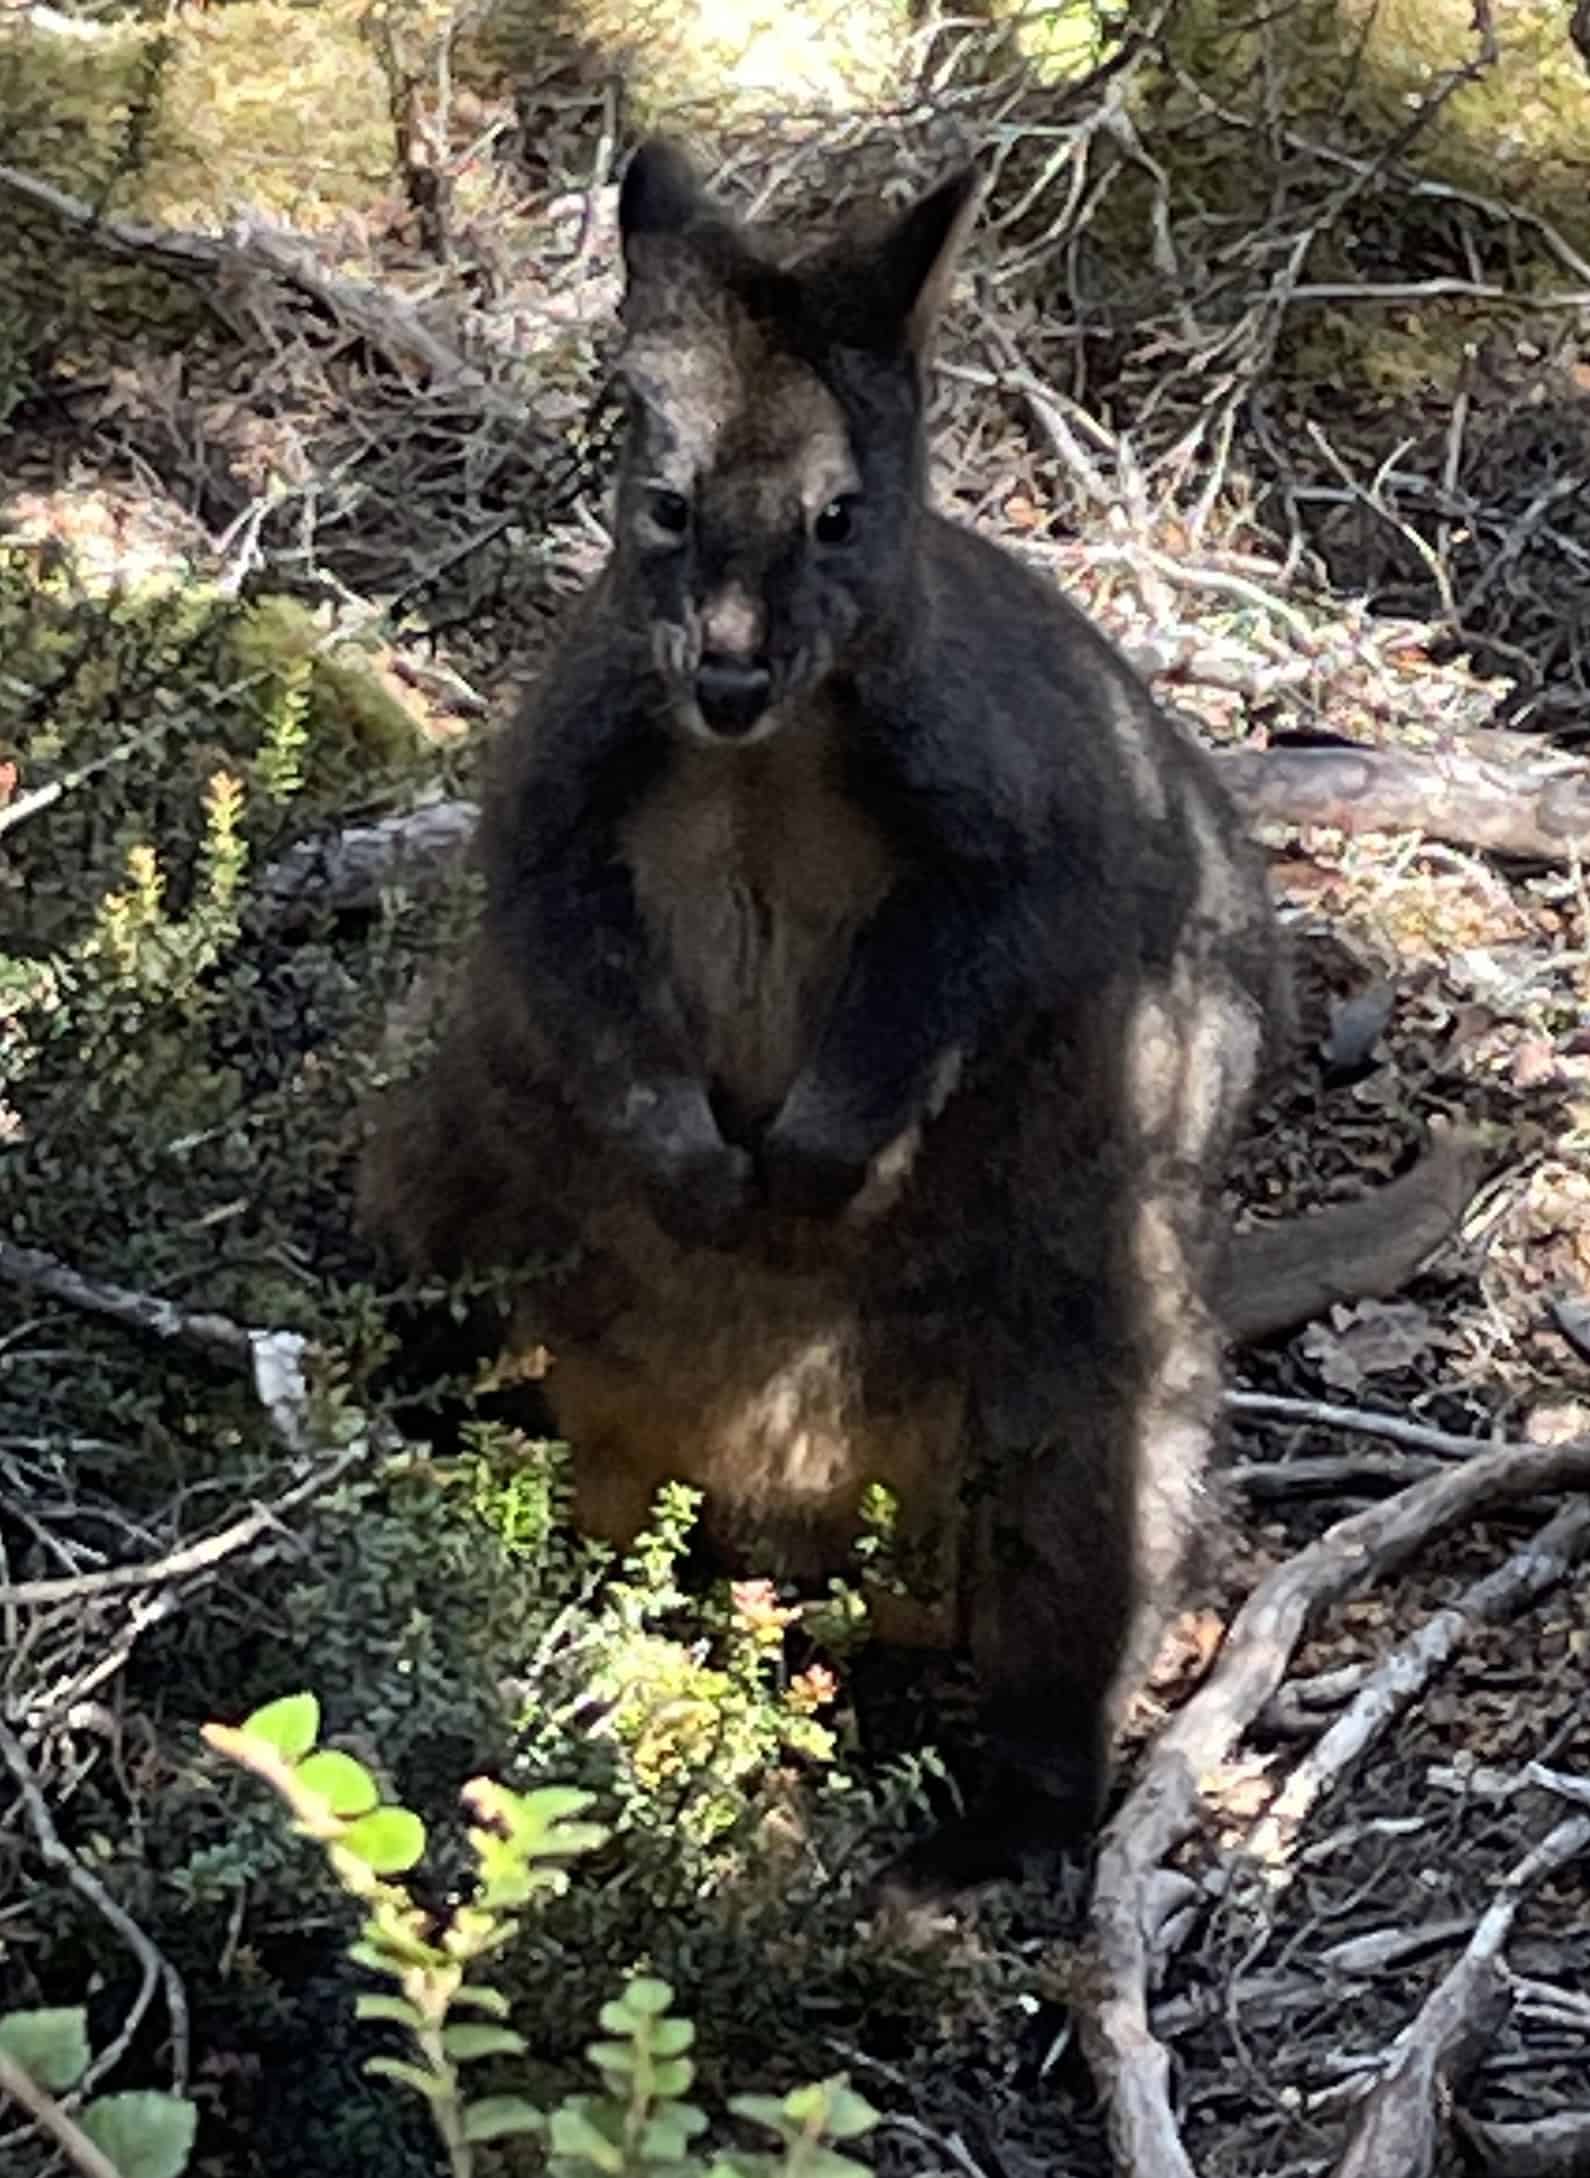
The world heritage area and scenery is beautiful, and you get to see a number of iconic Australian mammals.
If You Enjoyed this Guide, you Might also Like:
- Navigating the Overland Track Solo
- Hiking Frenchmans Cap -Tasmania’s Iconic White Peak
- Hiking the Rees Dart Track – Mt Aspiring National Park
- The Rakiura Track – A Great Walk on Stewart Island
- Traverse Walls of Jerusalem to the Overland Track via Lees Paddock
- Hiking The Tahoe Rim Trail – A Guide for Overseas Visitors
- Conquering the Gold Coast Kokoda Challenge
- Plan Your Larapinta Trail Sections, Best Time of Year, Resupply, and Transfers
- Larapinta Trail Food Essentials and Nutrition Plan
Like This?
We'd love you to share this great guide!
Frequently Asked Questions
What is the hardest part of the Overland Track?
The start of the Overland Track, from Ronny Creek to Waterfall Valley, is considered the hardest section, with the ascent to Marion's Lookout. This steep climb requires a good level of fitness. While summiting Mt. Ossa or Cradle Mountain are difficult, this first section is the only climb where you need to carry a full pack.
How hard is the Overland Track in Tasmania?
The Overland Track in Tasmania is considered a challenging hike, with rough terrain, steep climbs, like the ascent to Marion's Lookout, and Tasmania's unpredictable weather. Although it is well-defined and board walked in parts, hikers should be reasonably fit, experienced in multi-day trekking, and well-prepared with appropriate gear for the 6-day, 65-kilometre journey.
How long is the Overland Track?
The Overland Track is a 65-kilometre trek through Tasmania’s wilderness, typically taking six days to complete. This multi-day hike in Cradle Mountain Lake St Clair, traverses diverse environments, from dense rainforest and glacial valleys to alpine plateaus, and is a renowned adventure for experienced walkers seeking the beauty of Tasmania's natural heritage.
What is the average weight pack for Overland Track?
The average weight of a backpack for the Overland Track is typically between 15 to 20 kilograms. It should include essentials like food, water, camping gear, and appropriate clothing to accommodate Tasmania’s variable weather. Carrying a lighter pack is advantageous for comfort and endurance but ensure it contains all necessary items for safety and self-sufficiency on this multi-day hike.
How fit do you need to be for the Overland Track?
To tackle the Overland Track, you should maintain a moderate to high level of fitness. The track demands endurance for long walking days, carrying a full pack, and handling rough terrains, including steep ascents and potentially inclement weather. Regular cardiovascular training and strength exercises, especially for carrying loads, are advisable before embarking on this 65-kilometre, six-day trek.
Where do you go to the toilet on the Overland Track?
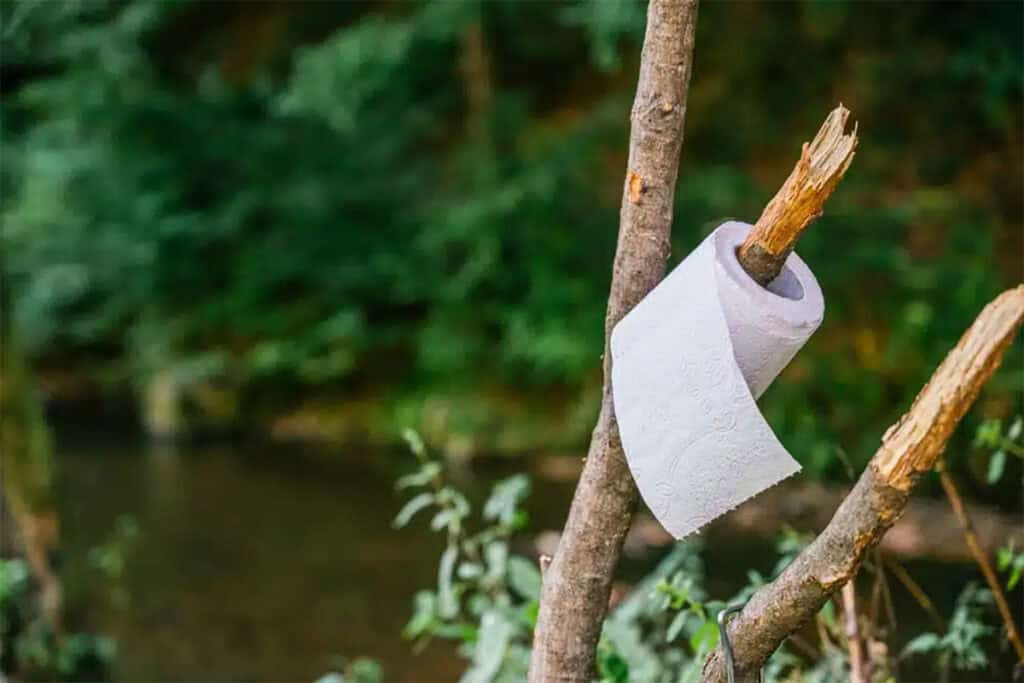
Along the Overland Track, all the huts have basic toilet facilities. It's important to utilise these to minimise environmental impact. In between these points, if you're caught short, ensure you are at least 100 meters from water bodies and trails, bury human waste 15-20cm deep, and pack out all toilet paper and hygiene products in a sealable bag.
What is the best time to do the Overland Track?
The best time to hike the Overland Track is during the Tasmanian summer, from October to May. During this period, the weather is generally milder and days are longer, providing better conditions for the trek. However, December to March is the peak season, offering the warmest temperatures and lower rainfall, which many hikers consider the ideal for the Overland Track.
Do you need a 4 season tent for the Overland Track?
For the Overland Track, a sturdy 3-season tent is generally sufficient outside of winter months. It should be capable of withstanding strong winds and heavy rain. In winter, or if you expect particularly severe weather, a 4-season tent is advisable for added durability against snow and extreme conditions. Always prepare for the unpredictable Tasmanian weather to ensure safety and comfort.
What sleeping bag do I need for the Overland Track?
For the Overland Track, you'll need a sleeping bag rated for the expected temperatures, which can drop below freezing at night, even in summer. A bag rated to at least -10 degrees Celsius is recommended. Consider a sleeping bag with a lower comfort rating if you're hiking in the colder months. A sleeping bag liner can add extra warmth.
Is there water readily available on the track?
Water is available from streams and rainwater tanks at huts along the wilderness world heritage Overland Track. However, due to possums and potential natural contaminants, it's advisable to treat all water, whether from tanks or streams. Carrying a water treatment method—such a filter or purifying tablets —is recommended to ensure your water is safe to drink throughout the hike.
Do you still need to carry a tent, or are there enough spaces in the hut to accommodate if you bring a sleeping bag & mat?
The new huts on the Overland Track generally accommodate the majority of hikers each day. Nonetheless, at the orientation, rangers will confirm that you have a tent before allowing you to start the hike—it's a mandatory item. This rule is in place to guarantee you have backup shelter should the huts be at capacity or in case of emergencies.
Do you see much wildlife on The Overland?
The Overland Track is renowned for its rich wildlife encounters. Hikers often spot a variety of Tasmanian species, including wallabies, wombats, and echidnas. There's also a chance to see the elusive Tasmanian devil. Birdwatchers can enjoy sightings of native birds. Remember to keep a respectful distance and adhere to park guidelines to protect the natural habitat of these animals.
Can you strap items to the outside of your pack?
It's not advisable to strap essential items like tents or sleeping bags to the outside of your pack on the Overland Track Tasmania. These items are crucial for survival in the unpredictable Tasmanian weather, and losing them could put your life at risk. Always pack critical gear securely inside your backpack to ensure they remain with you throughout your trek.
What kind of training do I need to do for The Overland Track?
Training for the Overland Track should include a mix of cardiovascular exercise, strength training, and hiking with a weighted pack to replicate trail conditions. Focus on leg strength and endurance, as well as core stability for carrying your backpack. Practice on varied terrain, including inclines, and gradually increase distance and weight. Include back-to-back long hikes to simulate consecutive trekking days.
Is there somewhere to camp at Cynthia Bay?
At Cynthia Bay, you have two camping options. There's a free walk-in campsite for hikers approximately 500 metres from the track's end, offering basic facilities. For more amenities like showers, toilets, and power, you can book a spot at the campground managed by the nearby lodge, adjacent to the car park
Can you fish in the rivers and lakes on The Overland?
Yes, fishing is allowed in certain areas on the Overland Track with a valid Inland Fisheries Service angling license. Introduced species like Brown and Rainbow Trout can be caught in lakes such as Dove Lake and Lake St Clair. However, rivers along the track are inhabited by protected native species like galaxiids and freshwater crayfish, where fishing is not permitted.
Recommended Guidebooks for hiking The Overland Track
Hiking the Overland Track is a Cicerone Press guidebook. Cicerone is known for guidebooks for hikers and has in-depth guides for a multitude of hikes worldwide. The format is easy to follow and accurate.
Overland Track Resources
- Tasmania Parks and Wildlife: Daily walk notes
- Overland Track booking
- Parks Pass purchase
- Australia Bureau of Meteorology
- TASMAP Overland Track Map
- Lake St Clair Ferry: +61 03 6289 1137